
The Blue Chalk Trick for Leveling Shower Floor Slopes
I spent three days grinding concrete on a job last month just so the floor would not click like a castanet. Most guys skip the leveling compound because they think the underlayment will hide the dip. It will not. It never does. I have been on my knees for twenty-five years with a moisture meter and a level. I have seen every shortcut in the book and I have seen the rot that follows. When it comes to a shower, the stakes are higher. You are not just building a floor. You are building a machine to move water. If that machine fails, your house rots from the inside out. My hands are stained with thin-set and my lungs have seen enough oak dust to fill a silo. I do not care about the color of your tile if your slope is a disaster. If you get the subfloor wrong, the rest is just expensive trash. This is about the physics of drainage and the structural integrity of the mortar bed.
The hidden geometry of the shower basin
A shower floor slope requires a precise incline of one-quarter inch per foot toward the drain to ensure water moves effectively without pooling. This geometry prevents standing water which leads to mold growth and grout degradation. Using blue chalk identifies high spots in the dry-pack mortar before the final tile set. Standing water is the enemy of every bathroom. You might think your tile is waterproof. It is not. Grout is porous. Water travels through it. It hits the waterproofing membrane and then it must flow to the weep holes in the drain assembly. If your slope is off by even an eighth of an inch, water sits. It stagnates. It creates a swamp under your feet. This is why the subfloor preparation is the most important part of the job. You cannot fix a bad slope with extra thin-set. Thin-set is an adhesive, not a filler. If you try to build up depth with it, the material will shrink as it cures, leaving you with a cracked mess and hollow sounding tiles.
“A floor is only as good as the subfloor beneath it; deflection is the enemy of every joint.” – Master Flooring Axiom
The blue chalk line of truth
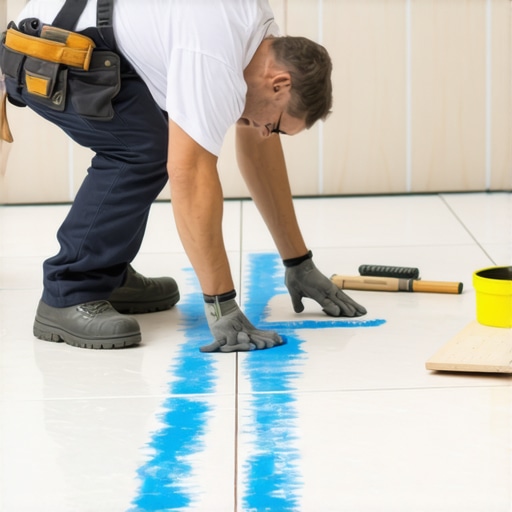
The blue chalk trick involves rubbing a straight edge coated in carpenter chalk across the hardened mortar bed to reveal irregularities in the slope. Any area where the chalk does not transfer represents a low spot while heavy blue marks indicate high points that require grinding. This is a simple trick from the old guard. After you have packed your mud bed and let it firm up, you take a straight level. You rub the bottom of that level with blue chalk. You slide it across the surface of your slope. The chalk does not lie. It shows you exactly where your trowel work was lazy. I have seen guys try to eyeball a shower pan. They end up with a puddle in the corner. You cannot eyeball gravity. The chalk gives you a visual map of the terrain. If you find a high spot, you take a rub stone and you grind it down. If you find a low spot, you have to decide if it is deep enough to require more mud or if you can compensate elsewhere. Precision is the only way to avoid a callback.
| Distance from Drain | Required Elevation Drop | Tolerance Level |
|---|---|---|
| 12 Inches | 0.25 Inches | +/- 0.0625 Inches |
| 24 Inches | 0.50 Inches | +/- 0.0625 Inches |
| 36 Inches | 0.75 Inches | +/- 0.1250 Inches |
| 48 Inches | 1.00 Inches | +/- 0.1250 Inches |
The chemical bond and the moisture barrier
The interaction between modified thin-set and the waterproofing membrane creates a chemical bond that must resist constant hydrostatic pressure. Choosing the correct mortar depends on the porosity of the tile and the type of membrane used in the shower assembly. Most people do not understand the molecular level of what is happening under their feet. When you mix thin-set, you are triggering a chemical reaction. If you use too much water, you weaken the crystalline structure of the cement. If you use too little, the bond will not penetrate the tile backer. You need the right slump. It should hold a ridge without sagging. I see homeowners trying to put hardwood floors or laminate right up against a shower curb. That is a death wish for the wood. The moisture levels in a bathroom fluctuate wildly. Even with a good exhaust fan, the humidity will cause hardwood floors to cup and laminate to swell at the seams. You need a hard transition. You need a threshold that can handle the spray.
The mechanical failure of the locking system
While most people want the thickest underlayment, too much cushion actually causes the locking mechanisms on LVP to snap under pressure. This is a common mistake in modern bathroom adjacent flooring. People buy high end luxury vinyl plank and then put a thick, squishy pad under it. They think it feels better on their feet. What happens is the floor flexes too much. The plastic tongue and groove joints are not designed for that much movement. They fatigue. They snap. Then you have gaps. In a bathroom, those gaps let water in. If you are running laminate or vinyl near a shower, you need a flat, rigid subfloor. You do not want a trampoline. You want a rock. I have ripped out brand new floors because the installer thought he was doing the customer a favor by adding extra padding. It is a structural failure disguised as a comfort feature. Stick to the manufacturer specifications for deflection and compression.
The checklist for a perfect shower pan
- Verify the subfloor is structurally sound and free of rot or deflection.
- Install a pre-slope under the pan liner to ensure water moves to the weep holes.
- Ensure the drain assembly is set at the correct height for the tile thickness.
- Mix dry-pack mortar to a peanut butter consistency for the primary bed.
- Use the blue chalk trick to verify a consistent one-quarter inch per foot slope.
- Apply a high-quality waterproofing membrane over the cured mortar bed.
- Perform a twenty-four hour flood test before laying any tile or grout.
The physics of the weep hole
Weep holes are small openings in the drain flange that allow moisture that has permeated the grout to escape into the plumbing system. If these holes are blocked by thin-set or mortar, water traps under the tile and creates a foul odor. This is where most rookies fail. They pack mortar right up against the drain and clog the very holes designed to save the floor. I always put a little bit of crushed stone or a plastic spacers around the weep holes. This creates a path for the water. If you block those holes, the water stays in the mud bed. It rots. It smells like a sewer. You can have the best looking grout lines in the world but if your weep holes are plugged, your shower is a ticking time bomb. The grout is your first line of defense, but it is not a waterproof seal. It is a filter. The real work happens at the drain level where the physics of pressure and gravity take over.
“Water follows the path of least resistance; if you do not provide a path, it will carve its own through your subfloor.” – Master Flooring Axiom
The myth of the waterproof grout
Grout is a cementitious product that naturally absorbs water unless it is modified with high-performance polymers or epoxy resins. Standard sanded grout is not a substitute for a proper waterproofing system beneath the tile surface. I hear it every week. A customer asks if they can just use a better grout to fix a leak. The answer is no. Grout is decorative and structural in terms of holding tile in place, but it is not a roof. Even epoxy grout, which is much more resistant to water, can develop hairline cracks over time due to house settling. If you rely on the grout to keep the water out of your subfloor, you have already lost the battle. You have to treat the subfloor as if the tile is not even there. The slope you create with the blue chalk trick is what actually saves the house. The tile is just the pretty face on a complex engineering project. If you are transition to hardwood floors outside the bathroom, ensure your curb is high enough to prevent any splashes from reaching the wood grain. Wood and showers are natural enemies. Respect the boundary.