
I spent three days grinding concrete on a job last month just so the floor wouldn’t click like a castanet. Most guys skip the leveling compound and think the underlayment will hide the dip. It won’t. That same lazy attitude is why people fail at pebble floors. They treat a complex geological surface like a flat piece of ceramic tile. My hands are stained with walnut stain and my boots smell like the WD-40 I use to clean my trowels, but I know how to make a floor last a century. Pebble floors in showers are a structural engineering challenge disguised as a spa feature. When you grout these stones, you are dealing with hundreds of irregular voids and varying heights. The haze left behind isn’t just a cosmetic smudge. It is a microscopic layer of Portland cement and polymers that will bond to the stone texture if you don’t act with surgical precision.
The chemical film you cannot see yet
Grout haze on pebbled floors consists of residual cementitious binders and latex additives that cling to the microscopic pores of natural stone after the initial wash. This film creates a dull appearance and attracts soap scum and mineral deposits if not removed within twenty-four hours of the initial installation. You have to understand the hydration process. When grout starts to set, the water evaporates and leaves behind a crystal structure of minerals. On a flat tile, a damp sponge can shear these crystals off easily. On a pebble, those crystals hide in the undulations and the ‘valleys’ where the stone meets the grout line. If you leave that film there, it becomes part of the stone. You can’t just mop it away later. You need to mechanical force and specific solvents to break that bond without etching the river rock itself.
The ghost in the expansion gap
Movement joints and expansion gaps are the most misunderstood parts of a pebble floor installation especially when transitioning to other materials like laminate or hardwood floors. Natural stone is rigid while the wooden subfloor and the house framing are constantly moving based on the ambient humidity and seasonal temperature changes. I once walked into a house where a walnut floor was cupping because the installer didn’t check the crawlspace humidity. The same thing happens in showers. If you don’t leave a proper gap at the perimeter of your pebble mosaic, the grout will crack and the haze will be the least of your problems. You have to ensure the pebbles are not locked against the wall. That expansion gap should be filled with 100 percent silicone sealant, not grout. Grout is brittle. Silicone is flexible. This is the difference between a floor that lasts and a floor that fails in two years.
“A floor is only as good as the subfloor beneath it; deflection is the enemy of every joint.” – Master Flooring Axiom
The precise mechanical action of the toothbrush
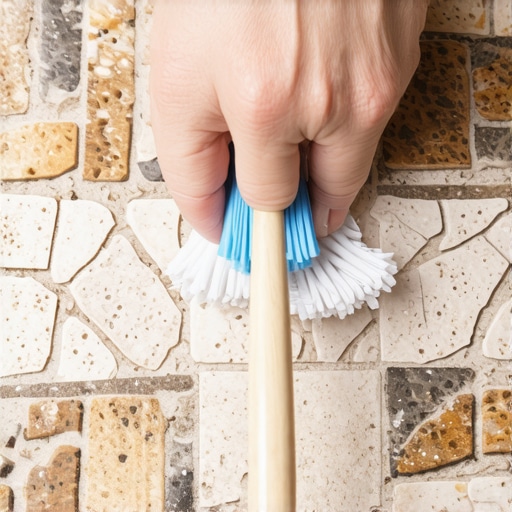
The toothbrush method for removing grout haze utilizes high-density nylon bristles to provide targeted pressure in the recessed areas of pebble mosaics that sponges cannot reach. This technique allows for the agitation of the cement film without saturated the grout joints with excessive water which can weaken the cure. You don’t just grab any brush. You need a firm bristle. A soft brush is for your teeth, but a firm brush is for the job site. You dip the brush in a mixture of white vinegar and distilled water, or a dedicated pH-neutral grout haze remover if you are dealing with sensitive stones like marble or limestone. You work in circular motions. The goal is to lift the haze off the stone and onto a microfiber cloth. It is slow. It is tedious. It will make your knees hurt even through your gel pads. But it is the only way to ensure the natural color of the river rock shines through the polymer film.
Why your subfloor is lying to you
Subfloor levelness is the hidden variable that dictates how grout settles and where haze will be most difficult to remove from pebbled shower floors. If the subfloor has a dip, the grout will pool in that area, creating a thicker layer of residue on the surrounding stones as you try to wipe the surface even. I have spent decades on my knees with a moisture meter. If your concrete slab is pushing out moisture, that vapor will travel up through the thin-set and the grout. This is called moisture vapor transmission. It can cause efflorescence, which looks like grout haze but is actually salt deposits coming from the ground up. Before you even think about the toothbrush method, you must verify that your subfloor is dry and flat to within 1/8 inch over 10 feet. If it isn’t, your grout lines will be uneven, and you will be scrubbing for a week.
Grout performance and removal difficulty
| Grout Type | Chemical Base | Removal Window | Difficulty Level |
|---|---|---|---|
| Sanded Grout | Portland Cement | 2-4 Hours | Moderate |
| Epoxy Grout | Resin and Hardener | 30 Minutes | Extreme |
| High Performance | Calcium Aluminate | 1 Hour | High |
| Premixed Grout | Acrylic/Urethane | 24 Hours | Low |
The danger of acidic cleaners on natural river rock
Acidic cleaners can dissolve the calcium carbonate found in many types of river stones leading to permanent etching and loss of color during the grout haze removal process. Using a toothbrush with a harsh acid is like taking sandpaper to a polished car finish because it destroys the surface tension. Most people think ‘more acid equals less haze.’ That is a lie. If you use a strong phosphoric or muriatic acid on a pebble floor, you will eat away the top layer of the stone. The stone becomes porous. Once it is porous, it will soak up every drop of dirty shower water and grow mold inside the rock itself. You must test your cleaning solution on a scrap piece of the pebble mosaic first. If the stone bubbles or fizzes, your cleaner is too strong. Stick to pH-neutral cleaners and the mechanical action of the toothbrush to do the heavy lifting.
The 1/8 inch that ruins everything
The thickness of the grout joint and the depth of the stone determine the surface area where haze can accumulate during the drying phase. A pebble floor with deep joints requires more precision because the toothbrush must reach the interface between the stone edge and the grout bed. Most builders use too much grout. They dump it on and spread it with a float like they are frosting a cake. That is wrong. You should work the grout into the joints and then use a damp sponge to remove the bulk of the material. The toothbrush is only for the fine details. If you have 1/8 inch of grout sitting on top of the stones, you didn’t do the job right. You need to reveal the top half of the pebble to get that natural look. If you bury the stones, you might as well have installed a flat tile.
- Inspect the pebble surface with a high-lumen flashlight to identify translucent haze.
- Mix a solution of one part white vinegar to four parts warm water for non-calcareous stones.
- Scrub the perimeter of each pebble using a firm nylon toothbrush in circular motions.
- Wipe the loosened residue immediately with a dry microfiber cloth to prevent re-deposition.
- Change your rinse water every 15 square feet to avoid spreading microscopic cement particles.
- Check the grout hardness with a fingernail to ensure you aren’t digging out the joints.
“The Tile Council of North America states that grout haze is a common occurrence that must be addressed within the first 24 hours to prevent permanent staining.” – TCNA Handbook
The molecular cling of cementitious film
At a molecular level the polymers in modern grout are designed to stick to non-porous surfaces which makes them incredibly difficult to remove from stones that have been smoothed by river water. The toothbrush provides the necessary friction to break these polymer chains and lift them from the stone. It is about the Mohs scale. Most river pebbles are quartz or basalt with a hardness of 6 or 7. The nylon bristles of a toothbrush have a hardness of about 2 or 3. This means you can scrub with all your weight and you won’t scratch the stone, but you will absolutely shred the grout haze which is much softer. This is the physics of cleaning. You use a tool that is harder than the dirt but softer than the surface. This is why you never use a wire brush. A wire brush will leave metal marks on the stones that look like gray streaks and you will never get them off.
Transitioning from wet zones to dry laminate
Transitions between a pebbled shower floor and adjacent laminate or hardwood floors require a waterproof curb and a transition strip that accounts for different heights. The grout haze removal process must be contained to the wet zone to prevent cleaning chemicals from damaging the wear layer of the laminate. Laminate is essentially a picture of wood glued to a fiberboard core. If you get your grout haze remover on the laminate, it will swell the edges and ruin the floor. I always tape off the transitions with high-quality painter tape and plastic sheeting. You have to be a professional. You can’t just splash water around like a kid in a bathtub. The toothbrush method is great for these edges because it gives you total control. You aren’t slopping a wet sponge near your expensive hardwood. You are working inch by inch, keeping the moisture where it belongs.
The final cure and sealer application
Applying a sealer to a pebble floor before the grout haze is completely removed will trap the film under a protective layer making it impossible to clean without stripping the entire floor. You must wait at least 72 hours for the grout to fully hydrate before applying any impregnating sealer. People are always in a rush. They want to use their new shower. If you seal over the haze, you are basically laminating a mistake. I tell my clients that the floor needs to breathe. Once the toothbrushing is done and the haze is gone, the stones will look vibrant when wet and dull when dry. The sealer will bring back that wet look permanently. But if you see a cloudy white patch, that is haze. Stop. Get the toothbrush back out. Clean it again. Only when the stone is pristine should you apply the sealer. A good impregnating sealer will soak into the pores of the stone and the grout, making the whole system waterproof and easy to clean for the next decade.