
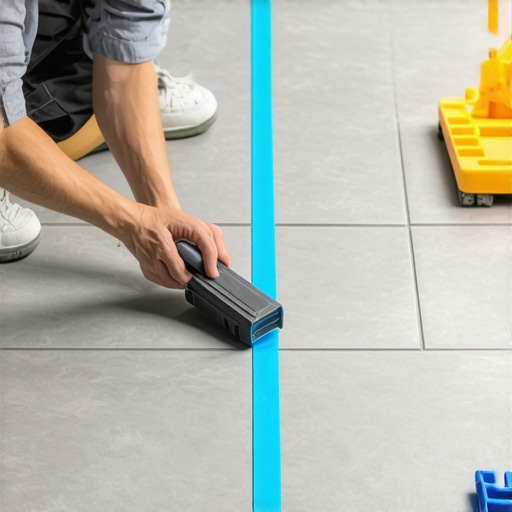
Most guys skip the leveling compound. They think the underlayment will hide the dip. It won’t. I spent three days grinding concrete on a job last month just so the floor wouldn’t click like a castanet. That is the reality of this business. You cannot hide a bad foundation with a expensive finish. If you do not start with a perfectly flat and square substrate, you are just dressing up a corpse. I have spent twenty five years on my knees with a moisture meter and a six foot level. I smell like oak dust and WD-40 most days. When a homeowner tells me they want their tile to look like a magazine photo, I tell them we need to talk about the subfloor first. If your subfloor is garbage, your grout lines will look like a mountain range within six months.
The lie of the naked eye
Your eyes are designed to find patterns but they are easily deceived by long distances and shifting light. You might think you can follow a wall to keep your tile straight. You are wrong. Walls in modern construction are rarely straight and they are almost never square to one another. If you start your first row of tile against a wall that bows out by just an eighth of an inch, that error will compound across the room. By the time you reach the far side of a large kitchen or a master bathroom, your rows will be crooked by two inches. This creates hideous sliver cuts at the edges. A chalk line is the only way to establish a definitive reference point that ignores the failures of the framing crew. We use the 3-4-5 rule to ensure the primary axis is perfectly perpendicular to the main entryway. This is not about aesthetics. This is about structural geometry and the physics of the installation.
“A floor is only as good as the subfloor beneath it; deflection is the enemy of every joint.” – Master Flooring Axiom
Why red chalk destroys your reputation
Chalk is not just colored powder; it is a chemical compound with varying levels of permanence. Most rookies grab the red chalk because it is easy to see on gray concrete. That is a massive mistake. Red chalk is permanent. It contains iron oxide which can bleed through thin-set and stain light colored grout or even porous stone like marble and travertine. If you are working in showers or high moisture areas, that red pigment will find a way to the surface. Always use blue or white chalk for interior tile work. Blue provides enough contrast against the dusty surface of a slab but it will not ghost through your finish. You also need to consider the thickness of the line. A fat, fuzzy chalk line is useless. You want a thin, crisp snap that identifies the exact center of the layout. I prefer a braided line over a twisted line because it holds less chalk and produces a sharper mark on the floor. It is the difference between a surgical scalpel and a crayon.
Geometry on the concrete canvas
The 3-4-5 rule is the foundation of every professional layout. You measure three feet from a corner along one wall and four feet along the adjacent wall. If the distance between those two points is exactly five feet, the corner is square. Most of the time it is not. You have to find the center point of the room and snap two lines that intersect at a perfect ninety degree angle. This creates a crosshair. You work outward from this center point toward the walls. This ensures that any cuts you have to make at the perimeter are equal in size on both sides. This is especially vital when installing large format tile. Modern tiles are getting bigger, which means they are less forgiving. A tiny dip in the subfloor or a slight curve in the line will cause lippage. Lippage is when the edge of one tile is higher than the next. It creates a trip hazard and looks like amateur hour. When you are dealing with showers, the pitch toward the drain adds another layer of complexity to these lines.
The physics of the subfloor bond
Before the first snap of the line, the chemistry of the slab must be addressed. Concrete is a sponge. It looks solid, but it is full of pores that hold water. If the moisture vapor emission rate is too high, your thin-set will not hydrate properly. It will create a weak bond that eventually fails. I have seen entire hardwood floors cup and buckle because the installer did not use a moisture barrier on a slab that felt dry to the touch. For tile, you need to check for deflection. If the floor bounces when you walk on it, the tile will crack. You need a rigid substrate. This usually means a double layer of plywood or a high quality cement backer board. Do not trust the builder grade subfloor. It is usually the cheapest OSB available and it swells when it gets wet. I have spent more time replacing rotted subfloors than I have actually laying tile. It is a thankless job, but it is the only way to ensure the floor lasts for fifty years instead of five.
| Material Type | Acclimation Time | Max Deflection | Moisture Limit |
|---|---|---|---|
| Solid Hardwood | 7 to 14 Days | L/360 | 4% MRE |
| Engineered Wood | 3 to 5 Days | L/360 | 4.5% MRE |
| Ceramic Tile | None | L/360 | Varies by adhesive |
| Natural Stone | None | L/720 | Low tolerance |
| Laminate | 48 Hours | L/240 | Moderate |
Comparing substrate requirements for various materials
Different materials demand different levels of precision. Hardwood floors are dynamic. They breathe and move with the seasons. You need expansion gaps at the perimeter to allow for this movement. If you lock a hardwood floor against a wall, it will buckle. Laminate and LVP are similar but they are even more sensitive to subfloor flatness. While most people want the thickest underlayment possible for comfort, too much cushion actually causes the locking mechanisms on LVP to snap under pressure. You want a firm, flat surface. Tile is the most demanding. It has zero flexibility. If the floor moves, the tile breaks. This is why the chalk line hack is so important. It allows you to visualize the entire layout before you mix a single bag of mortar. You can see where the difficult cuts will be. You can see if a row is going to hit a cabinet base at a weird angle. Preparation is ninety percent of the work. The actual laying of the tile is just the victory lap.
“Consistency in the mortar bed thickness is the silent partner of a perfectly straight chalk line.” – TCNA Handbook Reference
The checklist for a flawless layout
- Verify the subfloor is flat within 1/8 inch over 10 feet using a straightedge.
- Measure the moisture content of the wood or the vapor rate of the concrete.
- Find the center point of the room and snap the primary control line using blue chalk.
- Apply the 3-4-5 rule to snap the perpendicular secondary control line.
- Dry lay a row of tiles to check for sliver cuts at the edges.
- Back-butter large format tiles to ensure 95% mortar coverage.
- Maintain a consistent expansion gap around the entire perimeter for all flooring types.
The chemistry of the bond in wet environments
In showers, the grout is not the primary waterproofing. The grout is porous. Water goes through it. The real work is done by the membrane behind the tile. If you are snapping lines on a waterproof membrane, you have to be careful not to puncture it. Some guys use markers, but the ink can bleed through the grout. A chalk line is still the best tool, but you have to use a light touch. The thin-set used in these areas is usually highly modified with polymers. This increases the bond strength and allows for a bit of flexibility. When you are working with hardwood floors in a kitchen or near a bathroom, you have to be even more careful. One leak from a dishwasher can ruin ten thousand dollars of flooring. That is why I always advocate for a high quality moisture barrier regardless of what the homeowner thinks they need. They see the color of the wood. I see the potential for mold and rot underneath.
Managing the expansion gap ghost
The expansion gap is the most ignored part of the installation. I see it every day. Installers run the floor tight against the baseboard or the drywall. Then the summer humidity hits. The wood expands. It has nowhere to go. It pushes against the wall and starts to lift in the center of the room. This is the ghost in the expansion gap. You need at least a quarter inch for most floating floors and more for solid wood. You can hide this gap with baseboards or shoe molding, but the gap must exist. It is the same for tile in large areas. You need movement joints every twenty to twenty five feet. If you do not include them, the grout will crack and the tiles will eventually pop off the floor. It is basic thermodynamics. Materials expand and contract with temperature changes. If you do not account for it, the house will win and your floor will lose. Use your chalk lines to mark these movement joints early in the process so they look intentional rather than like an afterthought. Precision is not an accident. It is the result of following a proven system every single time.