
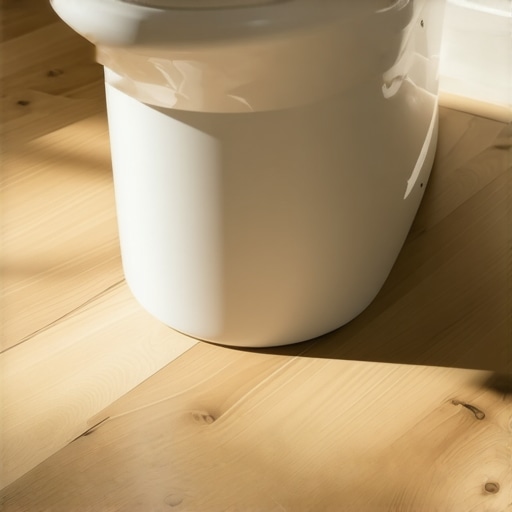
I spent three days grinding concrete on a job last month just so the floor wouldn’t click like a castanet. Most guys skip the leveling compound and think the underlayment will hide the dip. It won’t. I have spent 25 years on my knees with a moisture meter and a level. I have seen the way hardwood floors and laminate behave when they are ignored or installed by someone who thinks a tape measure is just a suggestion. I once walked into a house where a 15,000 dollar wide-plank walnut floor was cupping so bad it looked like a potato chip because the installer didn’t check the crawlspace humidity. Flooring is not decoration. It is a performance surface that must withstand the physics of heavy foot traffic and the chemistry of household moisture. When it comes to showers and bathrooms, the stakes are even higher. If you mess up the cut around a toilet, you are not just looking at an ugly gap. You are looking at a future site for mold and subfloor rot. I smell like oak dust and WD-40, and I am here to tell you that the 1/8 inch you think does not matter is the 1/8 inch that will ruin your entire week.
The template method for perfect radius cuts
To cut laminate around round toilet bases without gaps, use a cardboard template or a contour gauge to mirror the porcelain footprint onto your plank. Scribe the line accurately, use an oscillating multi-tool or jigsaw with a fine-tooth blade, and maintain a 1/4 inch expansion gap hidden by the porcelain or 100 percent silicone. The mechanical reality of a laminate floor is that it is a floating system. It moves. It expands. It contracts. If you jam the board tight against the toilet base, the floor will eventually buckle. The toilet is a static object bolted through the subfloor, while the laminate is a dynamic surface responding to atmospheric humidity. I always start by creating a paper or cardboard template. I lay the cardboard against the toilet base and use a compass to scribe the exact curve. I then transfer this curve to my laminate board. You have to account for the thickness of the porcelain. Most modern toilets have a flared base. If you cut the hole too small, the board will not sit flat. If you cut it too large, the gap will be visible even after you apply a bead of caulk. This is where the microscopic detail of the cut matters. I use a blade with at least 20 teeth per inch to prevent chipping the melamine wear layer. The melamine is the hard, protective surface that gives laminate its durability, but it is brittle. If you use a coarse blade, you will shatter the edge, and no amount of grout or caulk will hide that mess.
“A floor is only as good as the subfloor beneath it, deflection is the enemy of every joint.” – Master Flooring Axiom
Why your subfloor is lying to you
Subfloor levelness is the most important factor when installing laminate around plumbing fixtures because any vertical movement will snap the locking mechanisms near the flange. You must ensure the surface is flat within 3/16 of an inch over a 10 foot radius to prevent the floor from bouncing. Most homeowners think the foam underlayment is a magic carpet that hides hills and valleys. It is not. If you have a dip near the toilet, every time someone sits down, the floor will flex. That flex puts immense stress on the tongue and groove joints. Eventually, the joints will separate, and water from the showers or the toilet itself will find its way into the high-density fiberboard core. Laminate is essentially compressed sawdust and resin. When it gets wet, it expands like a sponge. I have seen floors grow two inches in width because of a slow leak at the wax ring. You need to check the subfloor with a straightedge. If you find a low spot, you fill it with a high-quality leveling compound. If you find a high spot, you grind it down. This is the part of the job that everyone hates because it is dusty and loud, but it is what separates a pro from a weekend warrior. The chemistry of the leveling compound matters too. You want a polymer-modified cement that bonds to the substrate without cracking under the weight of the toilet.
| Underlayment Type | Compression Strength | Moisture Resistance | Acoustic Rating (IIC) |
|---|---|---|---|
| Standard Foam | Low | Minimal | 50 |
| High-Density Rubber | High | Excellent | 70 |
| Cork Overlay | Medium | Moderate | 60 |
| Felt Pad | Medium | Low | 55 |
The mistake that ruins waterproof laminate
The biggest mistake installers make is assuming waterproof laminate does not need perimeter sealing around the toilet base. While the surface is waterproof, the cut edges are vulnerable to moisture and must be sealed with 100 percent RTV silicone to prevent the core from swelling. Manufacturers market these floors as being able to withstand standing water for 24 to 72 hours. That rating only applies to the factory-finished surface. Once you take a saw to that board to fit it around a toilet, you have exposed the raw HDF core. This core is thirsty. If a child splashes water or a pipe has a minor sweat issue, the water will travel under the floor and be sucked into the cut edge. I have replaced entire bathrooms because the installer trusted the word waterproof too much. You must leave that expansion gap, then you fill that gap with a backer rod and a heavy bead of silicone. Do not use acrylic caulk. Acrylic caulk shrinks and cracks. You need something that remains flexible and creates a chemical bond with both the porcelain and the laminate wear layer. This ensures that even as the floor moves, the seal remains intact. This is the difference between a floor that lasts 20 years and one that fails in two.
Tools that make the difference
Professional results require specific tools including a contour gauge for shape duplication, an oscillating multi-tool for undercut door jambs, and a fine-tooth jigsaw blade for the radius. A tapping block and pull bar are also necessary to ensure the locking mechanisms are fully engaged without damage. I see guys trying to make these cuts with a hand saw or a circular saw. It is painful to watch. A contour gauge is a series of plastic pins that you press against the toilet base. It takes the shape of the curve instantly. Then you just lay it on your board and trace. It is simple, but most people skip it. For the actual cut, I prefer an oscillating tool with a diamond or fine-metal blade. It gives you much more control than a jigsaw, which can vibrate and chip the finish. You also need to think about the toilet flange. The flange should be sitting on top of the new floor, not buried under it. If the flange is too low, you will need a flange extender. If you do not use one, the wax ring will not make a proper seal, and you will have a leak that you won’t notice until the subfloor is soft. I also keep a set of spacers nearby. You cannot eyeball an expansion gap. Use the plastic spacers to keep that 1/4 inch consistent all the way around the room.
“Wood and wood-based products are hygroscopic, meaning they will expand and contract with changes in moisture content.” – Master Flooring Axiom
Expansion gaps and invisible movement
Expansion gaps are the lungs of a laminate floor and must be maintained at 1/4 inch around every vertical obstruction including toilet bases and cabinets. Failure to provide this space results in peaking, where boards push against each other and lift off the subfloor. People think that because the bathroom is small, the floor won’t move much. They are wrong. Bathrooms are high-humidity environments. The air changes every time someone takes a hot shower. The laminate boards will absorb that humidity and grow. If there is no space for them to grow, the floor will find the weakest point and pop up. This is called peaking. I have seen floors rise three inches off the subfloor because they were pinned against a toilet and a bathtub. You have to give the floor room to breathe. When you are cutting around the toilet, the gap should be covered by the base of the toilet itself if possible, or by a neat bead of sealant. If the toilet base is too small to cover the gap, you may need to use a decorative trim, though I hate the way that looks. A better way is to template the cut so perfectly that the gap is exactly 1/8 to 1/4 inch, then fill it with color-matched silicone. This allows for movement while keeping the installation looking tight and professional.
- Acclimate the laminate in the bathroom for 48 to 72 hours before cutting.
- Remove the toilet completely rather than trying to cut around it while installed.
- Check the subfloor for moisture using a calcium chloride test.
- Install a 6 mil poly film vapor barrier if working over a concrete slab.
- Use a cardboard template to practice the radius cut before using a real board.
- Leave a 1/4 inch expansion gap at all walls and the toilet flange.
- Ensure the wax ring is new and of high quality with a plastic horn.
- Apply 100 percent silicone around the entire base of the toilet.
- Do not bolt the toilet down so hard that it crushes the laminate.
- Clean the laminate surface with a pH-neutral cleaner to remove adhesive residue.
The geometry of the porcelain base
Understanding the geometry of the toilet base is vital because most porcelain fixtures are not perfectly symmetrical or level. You must measure the distance from the wall to the flange and the flange to the edges of the base to center your boards. Porcelain is a fired material. It warps in the kiln. No two toilets are exactly the same shape. This is why you cannot just use a standard circle template. You have to treat every toilet like a custom job. I start by measuring the distance from the back wall to the center of the flange. Then I mark that on my layout. I make sure that my laminate seams do not land right in the middle of the toilet if I can help it. Having a seam right at the curve makes the cut more difficult and the joint weaker. I prefer to have a solid board where the most intricate cuts are located. This provides more structural integrity to the plank. When you are putting the toilet back down, you are placing several hundred pounds of porcelain and water on top of a floating floor. This can pin the floor in place. To mitigate this, some pros like to drill slightly larger holes for the closet bolts, allowing the floor a tiny bit of wiggle room under the washer.
Underlayment density and joint protection
High-density underlayment is required for bathroom laminate to provide the necessary support for the heavy weight of the toilet and to dampen sound. Soft or thick underlayment will allow too much vertical deflection, which leads to broken locking systems. While most people want the thickest underlayment, too much cushion actually causes the locking mechanisms on LVP and laminate to snap under pressure. You want an underlayment with a high compression strength. In a bathroom, you are dealing with concentrated loads. A person sitting on a toilet exerts a lot of PSI on a very small area. If the underlayment is too squishy, the laminate will dip under that weight, and the tongue of the board will snap off. I use a dense rubber or a high-compression cross-linked foam. These materials do not lose their shape over time. They also provide a better moisture barrier. In the world of hardwood floors, we worry about the wood rotting. In the world of laminate, we worry about the joints failing. The underlayment is the foundation. If you go cheap here, you are wasting your money on the flooring itself. Always look for an IIC rating of at least 50 to 60 to ensure that you are not creating a drum effect every time someone walks into the bathroom.
The final verification of the installation
The final steps are what determine if the job is a success or a failure. Once the boards are cut and the expansion gaps are verified, I dry-fit the toilet. I want to see how it sits on the floor. If it wobbles, I use plastic shims. Never use wood shims in a bathroom; they will rot. Once the toilet is level and the bolts are tightened, I apply the silicone. I do not just glob it on. I tape off the floor and the toilet base, apply the bead, smooth it with a finger, and then pull the tape. This gives you a factory-finished look that any architect would approve of. You want the seal to be water-tight but also aesthetically pleasing. Remember that the goal is to prevent water from reaching those raw edges of the laminate. If you have done your job right, the floor will be able to expand and contract under the toilet without any stress on the joints. You have successfully navigated the physics of a floating floor and the demands of a wet environment. It is a technical challenge that requires patience and the right tools. Do not rush the template. Do not skip the leveling. Do not forget the silicone. Follow these rules, and you will have a floor that stays flat and beautiful for decades.