
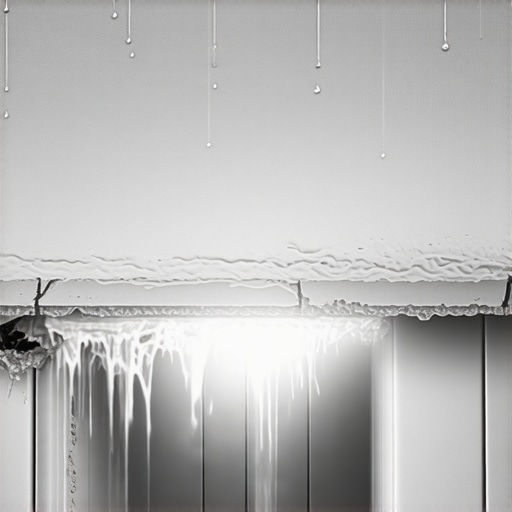
A wet spot on the ceiling below your bathroom is the final warning of a structural failure that started months or years ago. Water migration through a shower floor occurs because of hydrostatic pressure, capillary action in porous grout, or subfloor deflection that snaps the waterproofing bond. Most homeowners blame the plumber first, but as a floor installer who has torn out hundreds of rotted pans, I can tell you the plumber is rarely the primary culprit. The failure usually lives in the chemistry of the adhesive or the physics of the subfloor assembly. A shower is a pressurized environment where water molecules constantly search for a path of least resistance through microscopic voids in your grout and thin-set. When the system fails, gravity does the rest, pulling moisture into your joists and eventually through your drywall.
The hidden path of water through your subfloor
Subfloor deflection and moisture vapor drive are the primary reasons a shower leak manifests in the room below. Most guys skip the leveling compound. They think the underlayment will hide the dip. It won’t. I spent three days grinding concrete on a job last month just so the floor wouldn’t click like a castanet. That same philosophy applies to showers. If your subfloor has even a sixteenth of an inch of bounce, your grout will crack. Once that grout cracks, you no longer have a shower floor; you have a sieve. I once walked into a house where a custom tile job was failing because the installer used a standard 3/4 inch plywood subfloor over joists spaced 24 inches on center without adding a second layer of exterior grade plywood. The floor was acting like a trampoline, and no amount of expensive tile could stop the movement from tearing the waterproofing membrane apart. You cannot build a rigid surface on a flexible foundation. It is a fundamental law of engineering that many contractors ignore to save time. When the floor flexes, the bond between the tile and the substrate breaks. This creates a cavity where water collects. This standing water eventually finds the fastener holes in the backer board and travels down the nail shank into the wood. From there, it saturates the ceiling joists and makes its appearance in your kitchen or living room below as a brown, circular stain.
[image]
The chemistry of grout and the myth of waterproof tile
Grout is a cementitious product that is naturally porous and serves as a filter rather than a barrier. Many people believe that because tile is hard and glazed, it is waterproof. This is a dangerous misconception. Grout is essentially a mixture of sand and portland cement. On a molecular level, it is full of tiny tunnels. When you shower, the water does not just sit on top of the tile. It is absorbed into the grout lines. If you used a cheap, non-modified grout, the water moves even faster. This is why the industry moved toward high-performance epoxy grouts and polymer-modified sands. These additives fill the microscopic voids with plastic resins, making it much harder for water to penetrate. However, even the best grout is not a substitute for a dedicated waterproofing membrane. Water will eventually get past the grout, especially at the change of plane where the wall meets the floor. If that joint was filled with grout instead of a 100 percent silicone caulk, it will crack as the house settles. That crack becomes a highway for water to bypass the entire tile assembly. Once water gets behind the tile, it sits on the waterproofing layer. If that layer was installed with the wrong pitch or if the installer used a ‘waterproof’ paint-on product that was applied too thin, the water will find a pinhole. It takes surprisingly little water to cause a massive ceiling stain. A constant drip through a pinhole can saturate a square foot of drywall in less than 48 hours.
“A floor is only as good as the subfloor beneath it; deflection is the enemy of every joint.” – Master Flooring Axiom
The physics of the 1/8 inch gap that ruins everything
Expansion and contraction at the perimeter of the shower floor are responsible for over sixty percent of long-term leaks. Buildings are dynamic structures. They breathe, move, and settle. If your tile is installed tight against the wall without a proper expansion gap, the pressure will cause the tile to tent or the grout to pulverize. This movement is often invisible to the naked eye until the leak begins. We measure these tolerances in tiny fractions. A movement of 1/32 of an inch is enough to break the chemical bond of a standard thin-set mortar. This is why we use modified mortars with high latex content. The latex allows for a microscopic amount of stretch. Without it, the assembly is brittle. Think of it like glass versus plexiglass. You want your shower floor to have a tiny amount of internal flexibility while remaining externally rigid. When we talk about technical specifications, we look at the TCNA handbook. It dictates that for any tile installation over 15 feet in length, or in areas exposed to moisture, expansion joints are mandatory. In a small shower, that means the perimeter must be a flexible sealant, not a hard mortar. If I see grout in the corners of a shower, I know that shower has a shelf life. It is only a matter of time before the structural movement of the house creates a fracture that invites water into the wall cavity.
| Material Type | Permeability Rating | Flexibility Index | Drying Time |
|---|---|---|---|
| Standard Grout | High | Low | 24 Hours |
| Epoxy Grout | Very Low | High | 72 Hours |
| Liquid Membrane | Low | Medium | 12 Hours |
| Sheet Membrane | Zero | High | Instant |
Vapor drive and the unseen rot
Vapor drive occurs when hot shower water turns into steam and pushes through materials that liquid water cannot penetrate. This is a higher level of physics that most DIY installers fail to consider. When you take a hot shower, the air pressure in the stall increases. This pressure pushes water vapor through the tile and into the wall or floor assembly. If you have a plastic vapor barrier behind your backer board but you also used a paint-on waterproofing on the front, you have created a ‘moisture sandwich.’ The moisture gets trapped between two waterproof layers and has nowhere to go. It cannot evaporate. This leads to the growth of ‘black gold,’ which is what we call the mold that eats your 2×4 studs from the inside out. I have seen showers where the tile looked perfect, but when I leaned against the wall, the whole thing moved two inches because the wood behind it had the consistency of wet cake. This is why the industry has shifted toward bonded membrane systems like Schluter-Kerdi. These systems manage the vapor at the surface, preventing it from ever entering the wall cavity. It is about controlling the environment on a molecular scale. You want to keep the moisture as close to the drain as possible. Any inch that water travels away from the drain is an inch where something can go wrong. We also have to consider the Janka hardness of surrounding materials. If you have hardwood floors outside your shower, any leak under the tile will eventually wick into the oak. I’ve seen $15,000 wide-plank walnut floors cup like potato chips because a shower pan two rooms away was slowly weeping into the subfloor. Wood is a sponge. It will pull moisture across an entire floor plan if given the chance.
“Standardization of the substrate is the only path to a permanent installation; never trust the house to stay still.” – TCNA Technical Bulletin
The checklist for a leak-proof shower floor
- Check subfloor deflection to ensure it meets L/360 requirements for ceramic or L/720 for natural stone.
- Verify the slope to the drain is exactly 1/4 inch per foot of run.
- Use a flood test to verify the integrity of the waterproofing before a single tile is laid.
- Apply 100 percent silicone caulk to all changes of plane and corners.
- Ensure the thin-set coverage is at least 95 percent for wet areas to eliminate air pockets.
The bottom line is that a shower leak is a systemic failure. It is rarely just one thing. It is a combination of a subfloor that is too thin, a waterproofing layer that was rushed, and a grout choice that was based on color rather than chemistry. If you are seeing water on your ceiling, do not just patch the drywall and re-caulk the shower. You need to investigate the structural integrity of the pan. Use a moisture meter to check the surrounding walls. If the moisture levels are above 16 percent in the wood, you have a problem that a tube of caulk cannot fix. You have to respect the physics of water. It is patient. It is persistent. And it will find every mistake you made during the installation. Investing in a high-quality sheet membrane and a proper mortar bed might cost an extra few hundred dollars today, but it will save you the thousands of dollars it costs to replace a kitchen ceiling and remediate mold. Do not be the person who values the look of the tile over the science of the subfloor. A beautiful floor that leaks is just an expensive mistake.