
The geometric mechanics of perceived space
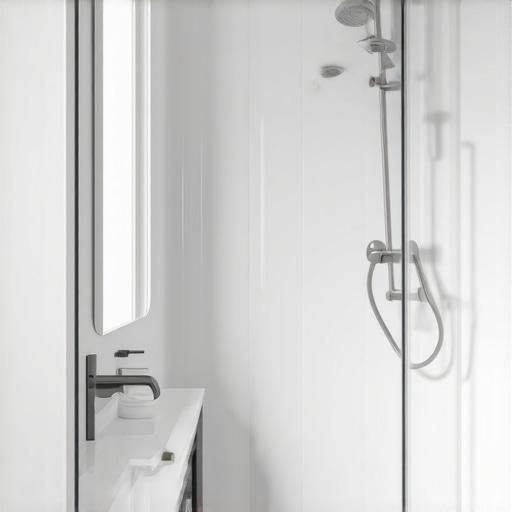
To make a small bathroom look larger with tile, installers must prioritize reducing visual interruptions by using large format porcelain tiles with minimal grout joints and matching grout colors. This strategy creates an unbroken surface that prevents the eye from cataloging individual units, which expands the perceived square footage through mathematical continuity. Most homeowners make the mistake of choosing small tiles for small rooms, but this creates a grid of grout lines that acts as a cage for the eye. I spent three days grinding concrete on a job last month just so the floor wouldn’t click like a castanet, and that prep work is what allows for the massive 24 by 48 inch tiles that actually open up a room. If the subfloor is off by even an eighth of an inch, those big tiles will experience lippage, and the illusion of space is destroyed by shadows in the joints. You want the floor to look like a single slab of stone, not a patchwork quilt of ceramic bits. This requires a level of precision that most builders ignore. They think the underlayment will hide the dip. It won’t. You have to start with a surface that is dead flat to the standards of the Tile Council of North America. I have seen enough failed showers to know that the chemistry of your mortar and the physics of your subfloor are more important than the color of the glaze.
Why your subfloor is lying to you
A bathroom floor must be structurally rigid to support large tiles without cracking the grout or the tile body itself. This requires a deflection rating of L/360 for ceramic and L/720 for natural stone to ensure the substrate does not bend under the weight of the user. I once walked into a job where the homeowner wanted marble in a tiny powder room. The joists were bouncy and the subfloor was half inch plywood. If I had laid that tile, it would have been a pile of rubble in six months. We had to sister the joists and add a layer of exterior grade structural plywood before we even touched a trowel. People look at the surface, but I look at the fasteners and the span of the lumber. The secret to a big-looking room is a floor that stays perfectly flat. When the floor is flat, you can use rectified edges on your tile. Rectified tiles are cut after firing to be exactly the same size. This allows for grout joints as thin as one sixteenth of an inch. When you match the grout color to the tile color, the lines disappear. This is the ultimate trick for small showers. It makes the walls look like they go on forever.
“A floor is only as good as the subfloor beneath it, deflection is the enemy of every joint.” – Master Flooring Axiom
The technical comparison of flooring substrates
| Material Type | Expansion Coefficient | Moisture Resistance | Typical Grout Joint |
|---|---|---|---|
| Porcelain Tile | Low | High | 1/16 to 1/8 inch |
| Ceramic Tile | Moderate | Medium | 3/16 to 1/4 inch |
| Hardwood Floors | High | Low | None (Expansion Gaps) |
| Laminate Flooring | Extreme | Very Low | None (Click Lock) |
Hardwood floors and laminate are often discussed for bathrooms, but they are generally poor choices for making a small space feel open and durable. Hardwood reacts to the humidity of a shower by expanding and contracting. This movement requires large gaps at the baseboards which can make a room feel cramped and poorly finished. Laminate is even worse in high moisture environments because the fiberboard core acts like a sponge. Once those edges swell, the floor is ruined. Tile is the only material that allows for the tight tolerances needed to trick the brain into seeing more space than actually exists. The chemistry of the bond is where the magic happens. Using a high polymer modified thin set ensures that the tile remains fused to the substrate even when the house settles. This prevents the microscopic shifting that leads to hairline cracks in your grout. When grout cracks, it creates a dark line that catches the eye and shrinks the room.
The physics of light and glaze
Light colored tiles with a polished or satin finish reflect more lumens than dark matte surfaces, which increases the brightness and perceived volume of a small bathroom. The light bounces off the floor and walls, eliminating the dark corners that make a room feel claustrophobic and tight. However, you have to be careful with the slip resistance. A high gloss floor in a wet shower is a recipe for a hospital visit. I always look for a Dynamic Coefficient of Friction rating of at least 0.42 for bathroom floors. You can get a polished look on the walls to expand the space and use a matching matte finish on the floor for safety. The goal is color continuity. If the floor and the walls are the same color, the brain cannot easily find the corner where the floor ends and the wall begins. This is why curbless showers are so effective. By removing the curb, you extend the floor plane all the way to the back wall. It adds three square feet of visual floor space that would otherwise be chopped off by a plastic or tiled curb. This is a structural engineering challenge because you have to recess the floor joists or build up the rest of the bathroom to create the necessary slope for the drain without creating a trip hazard at the door.
Checklist for a successful bathroom expansion
- Verify subfloor flatness within 1/8 inch over 10 feet
- Select rectified porcelain tiles at least 12×24 inches
- Apply a waterproof uncoupling membrane like Schluter-Ditra
- Use a matching high performance epoxy grout
- Ensure a minimum 95 percent mortar coverage for wet areas
- Eliminate the shower curb for a continuous floor plane
The chemistry of modern setting materials is a far cry from the mud beds of forty years ago. We now have epoxy grouts that are completely non porous. They do not stain and they do not change color when wet. This is vital for maintaining the look of a large, open space. If your grout gets dirty or darkens in the high traffic areas, the grid returns and the room shrinks. I tell my clients that the grout is not just a filler, it is a structural component of the design.
“Waterproof is a professional standard, not a product label; the assembly must be engineered to manage moisture.” – Master Flooring Axiom
The ghost in the expansion gap
Every floor needs to breathe, even a tile floor in a small bathroom. We leave a quarter inch gap at the perimeter where the tile meets the wall. This is often covered by baseboard or the wall tile itself. If you grout that perimeter joint solid, the floor will tent. I have seen $20,000 bathrooms where the tile popped off the floor because the installer didn’t leave room for the house to move. It sounds like a gunshot when it happens. When the floor tents, it breaks the plane and ruins the visual expansion we worked so hard to create. You must use a color matched 100 percent silicone sealant in the corners and at the floor to wall transition. Silicone is flexible and handles the movement while keeping the look of a solid joint. This level of detail is the difference between a floor that looks like a cheap DIY project and one that looks like it was carved out of a single block of stone. I am a stickler for these details because I know that a floor is a performance surface. It has to handle the weight of the vanity, the vibration of the plumbing, and the constant cycle of heat and humidity. If you ignore the physics of the installation, the aesthetics will not last. The secret to making a small bathroom look bigger is not a secret at all. It is just good engineering and a refusal to take shortcuts with the subfloor. {“@context”:”https://schema.org”,”@type”:”Article”,”headline”:”The Secret to Making a Small Bathroom Look Bigger with Tile”,”author”:{“@type”:”Person”,”name”:”Master Floor Installer”},”datePublished”:”2023-10-27″,”description”:”Expert guide on using tile sizes, grout techniques, and subfloor preparation to expand the visual space of a small bathroom.”,”publisher”:{“@type”:”Organization”,”name”:”Flooring Architecture Engine”}}