
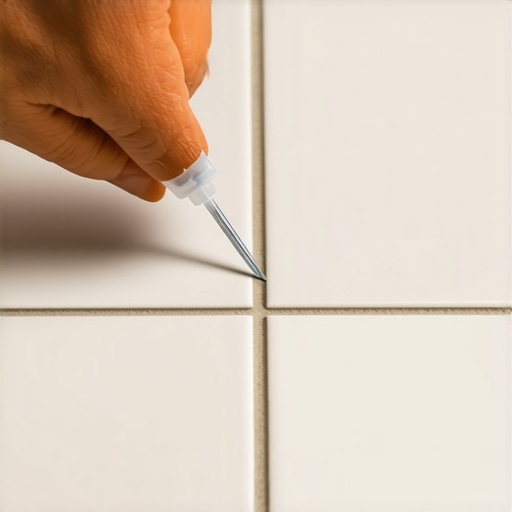
The sound of a hollow tile is the sound of a failure waiting to happen. You walk across your kitchen or bathroom and hear that distinct, high pitched click or a deep thud. It is the sound of an air pocket. Most homeowners think they have two options which are living with the noise or ripping the entire floor up. They are wrong. As a master installer who has spent thirty years kneeling on concrete with sawdust under my nails, I have seen every shortcut in the book. Most guys skip the leveling compound. They think the underlayment will hide the dip. It won’t. I spent three days grinding concrete on a job last month just so the floor wouldn’t click like a castanet. That job taught me that a floor is a structural system, not a decorative layer. If you have a hollow tile, you have a bond failure. The thin-set has either detached from the tile or from the subfloor. This usually happens because of improper trowel technique or a lack of back-buttering on large format porcelain. Fixing it without a sledgehammer requires precision, patience, and the right chemistry.
The physics of the failed mechanical bond
A hollow sounding tile indicates delamination where the cementitious thin-set mortar has separated from either the tile bisque or the subfloor substrate. This creates a resonant air gap that amplifies the sound of footsteps and introduces a structural weak point prone to stress cracking or grout failure. When a tile is installed, the mortar should achieve at least eighty percent coverage in dry areas and ninety five percent in wet areas. When that coverage is lacking, air pockets form. Over time, the movement of the house or the weight of foot traffic causes the mechanical bond to snap. The tile then sits loose on top of a bed of dried cement. It might not move visibly, but the air underneath acts like a drum. The chemistry of Portland cement requires a specific hydration process to lock into the microscopic pores of the tile. If the tile was too dusty or the mortar was mixed too dry, that crystalline structure never forms. You are left with a floating piece of ceramic that is one heavy dropped pot away from shattering.
“A floor is only as good as the subfloor beneath it; deflection is the enemy of every joint.” – Master Flooring Axiom
The ghost in the expansion gap
An expansion gap is the perimeter space left between the flooring material and the vertical walls to allow for thermal expansion and moisture fluctuation. If this gap is missing, the floor will bind and tent, causing tiles to lift and sound hollow. I have seen beautiful installations ruined because some rookie shoved the tile tight against the baseboard. Houses breathe. They expand in the summer and contract in the winter. If that tile has nowhere to go, the pressure builds up until the weakest point gives way. Usually, that is the bond between the tile and the slab. You might hear the hollow sound only in the afternoon when the sun hits the floor and the ceramic expands. This is a sign of a structural pinch point. You can fix this by cleaning out the perimeter joints, but often, the damage to the bond is already done. You need a way to re-establish that bond without breaking the surface of your expensive stone or porcelain.
The chemistry of the injection resin
The repair process involves using a low viscosity liquid adhesive, typically an acrylic resin or epoxy polymer, designed to capillary flow into the void beneath the tile. These adhesives are engineered to have high tensile strength and flexibility to handle the micro-movements of the floor. You cannot just use any glue. You need something with a viscosity close to water so it can travel through the narrow channels of the failed mortar. When you inject these resins, they seek out the lowest point and fill the air pockets. Once they cure, they create a solid bridge between the subfloor and the tile. This is a permanent fix because the resin is actually stronger than the original thin-set. It has a higher modulus of elasticity, meaning it can bend slightly without snapping. This is vital in modern homes where subfloor deflection is a constant reality. If you use a brittle adhesive, the hollow sound will return within a year as the house settles.
| Material Property | Epoxy Resin | Acrylic Injection Adhesive | Polyurethane Adhesive |
|---|---|---|---|
| Viscosity | Medium to High | Very Low | Medium |
| Cure Time | 24 Hours | 12 to 24 Hours | 4 to 6 Hours |
| Flexibility | Low | High | Very High |
| Bond Strength | 9,000 PSI | 3,500 PSI | 2,500 PSI |
Tools for a surgical restoration
A surgical tile repair requires a variable speed drill, carbide tipped masonry bits, a high pressure injection syringe, and matching grout to seal the access points. You are not just drilling holes; you are creating a map for the adhesive to follow. I prefer using a 1/16 inch bit because it is small enough to be hidden in the grout line but large enough to allow the resin to pass through. You need a vacuum with a HEPA filter to suck the dust out of the holes as you drill. If you leave the dust in the void, the adhesive will just bond to the dust, not the tile. This is where most DIY attempts fail. They don’t clean the site. You also need heavy weights, like five gallon buckets of water or sandbags, to place on the tile after injection. This ensures the tile is pressed firmly into the new adhesive bed as it cures. Without that pressure, you might actually glue the tile in a slightly raised position, creating a trip hazard.
“Correct mortar coverage is essential; voids larger than two square inches can lead to catastrophic tile failure under point loads.” – TCNA Handbook Standards
The 1/8 inch that ruins everything
A levelness tolerance of 1/8 inch over 10 feet is the industry standard for large format tile, and exceeding this limit creates lippage and hollow spots. When the subfloor has a dip, the trowel cannot reach the bottom of the tile. This leaves a bridge of air. If you are fixing a tile in a doorway or a transition area, the problem is likely a subfloor transition. Hardwood floors and laminate often meet tile at these points, and if the subfloors aren’t perfectly flush, the tile installer likely used extra thick mortar to ramp up the height. That extra thick mortar is prone to shrinking as it cures, which pulls it away from the tile. This is why you hear that hollow click near the transitions. The injection method works perfectly here because it fills that specific shrinkage gap. You must be careful not to over-inject, or you will find the resin bubbling up through the expansion joint at the doorway. It is a messy job if you don’t respect the flow of the liquid.
Step by step guide to tile stabilization
The stabilization process begins with acoustic mapping to find the boundaries of the void, followed by drilling access holes at the corners of the affected tile. You must work slowly to avoid cracking the surrounding grout or the tile itself. Follow this checklist for a successful repair.
- Tap the tile with a plastic mallet to locate the exact edges of the hollow sound.
- Mark the injection points on the grout lines with a pencil, never on the tile face.
- Drill at a 45 degree angle into the grout joint to reach the space under the tile.
- Vacuum each hole thoroughly to remove all debris and loose mortar.
- Slowly inject the adhesive until it starts to resist or flows out of an adjacent hole.
- Wipe away excess adhesive immediately with a damp cloth before it skins over.
- Place heavy weights on the tile and leave them for at least 24 hours.
- Refill the drill holes with matching grout once the adhesive is fully cured.
Why your subfloor is lying to you
The subfloor material, whether plywood, OSB, or concrete, has a moisture vapor transmission rate that can weaken adhesives over time. If your concrete slab is sweating, no amount of injection will fix a hollow tile forever. The moisture will eventually push the resin off the surface. Before you spend money on repair kits, check for signs of dampness in the grout. If the grout looks darker in the hollow area, you have a moisture problem. In these cases, the hollow sound is just a symptom of a failing vapor barrier. As an architect of floors, I look at the whole assembly. Sometimes the best fix is to address the drainage outside the house or the humidity in the crawlspace. But if the subfloor is dry and the issue is just a poor bond, the injection method is a lifesaver. It saves you from the dust, the noise, and the massive cost of a full replacement. It turns a three day demolition job into a two hour surgical fix. Just remember that the resin needs time to breathe and cure. Don’t let the kids or the dog run across that tile for at least a full day. You want that bond to be as solid as the stone itself. If you follow the physics and respect the chemistry, that hollow sound will be gone for good.