
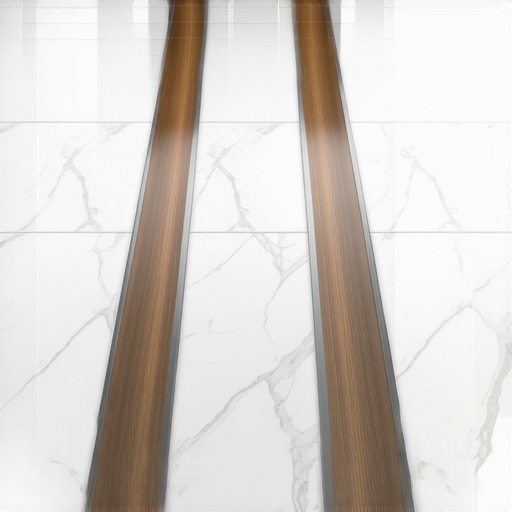
Most guys skip the leveling compound. They think the underlayment will hide the dip. It won’t. I spent three days grinding concrete on a job last month just so the floor wouldn’t click like a castanet. That job was a nightmare in a high-rise downtown where the slab was as wavy as the ocean. I had to use a diamond cup wheel and a HEPA vacuum just to get the substrate within the required three-sixteenths of an inch over a ten-foot radius. If I hadn’t done that, the transition between the kitchen slate and the white oak in the hallway would have looked like a mountain range within six months. This is the reality of professional flooring. It is not about the wood or the tile you see on the surface. It is about the physics of the subfloor and the chemical bond of the adhesive. When you are looking at the best way to transition between tile and hardwood floors, you are looking at a battle between a rigid, immovable object and a hygroscopic material that breathes with the seasons. If you do not respect that difference, your floor will fail. It is that simple.
The structural myth of the level floor
Subfloor preparation is the single most important factor in a successful transition because height differentials are the primary cause of joint failure. You cannot expect a transition strip to bridge a gap if one side of the floor is bouncing every time someone walks on it. You must check the deflection. For tile, the TCNA requires a maximum deflection of L over 360, which means the floor should not bend more than one inch over 360 inches of span. If your joists are too bouncy, your grout will crack and your hardwood floors will squeak. I always double-up the plywood or add blocking underneath before I even think about laying a single plank. You need a solid foundation before you worry about the aesthetics of the transition.
The science of the expansion gap
Hardwood floors require a minimum of a half-inch expansion gap at all vertical surfaces to prevent buckling during high-humidity cycles. Wood is a living material. Even after it is cut and finished, the cellular structure of the oak or maple reacts to the moisture in the air. When the humidity rises, the cells swell. If the wood is butted tight against a rigid tile floor, it has nowhere to go but up. This creates cupping or crowning. You must leave room for the wood to move. This is why a T-molding or a specialized transition strip is often the safest choice for most residential installs. It covers the necessary gap while allowing the wood to slide underneath as it expands and contracts.
“A floor is only as good as the subfloor beneath it; deflection is the enemy of every joint.” – Master Flooring Axiom
The geometry of the T-mold versus the flush mount
Flush transitions offer the cleanest aesthetic but require perfect height alignment between the tile and the hardwood substrate. To achieve a flush look, you have to plan the floor from the subfloor up. You calculate the thickness of the tile, the thin-set bed, and any uncoupling membranes like Schluter-Ditra. Then you compare that to the thickness of the hardwood and its underlayment. If they do not match perfectly, you are either grinding the subfloor down or shimmying the other side up with plywood underlayment. It is a game of millimeters. If you are off by even an eighth of an inch, it becomes a trip hazard. That is why many pros stick with T-moldings. They are more forgiving. They sit on top of both surfaces and hide the raw edges of both materials. They are not as sleek, but they work every time.
Chemistry of the bond at the threshold
Modified thin-set mortars provide the lateral strength needed to hold tile in place while resisting the vibrations from adjacent hardwood movement. When you are installing the tile portion of the transition, you cannot just use any bag of mud from the big box store. You need a high-latex, polymer-modified mortar that creates a chemical bond. This is vital when the tile meets a transition strip or a metal Schulter profile. The grout in that final joint should also be carefully considered. In many cases, I prefer a color-matched 100 percent silicone sealant instead of standard cementitious grout at the transition line. Silicone is flexible. It can handle the micro-movements of the house without cracking like grout would. This keeps the line clean and prevents moisture from seeping under the hardwood.
| Transition Method | Ease of Install | Movement Capacity | Durability Rating |
|---|---|---|---|
| T-Molding | High | Excellent | Medium |
| Flush Reducer | Low | Moderate | High |
| Schluter Profile | Medium | Low | Excellent |
| Threshold Stone | Medium | None | High |
Why your subfloor is lying to you
Moisture testing is the only way to ensure the subfloor is dry enough to accept a permanent transition. I see guys all the time who walk onto a job site, feel the concrete with their hand, and say it is dry. That is a lie. You need a calcium chloride test or a relative humidity probe drilled into the slab. If the slab is pushing out more than three pounds of moisture per thousand square feet, your hardwood is going to fail at the transition. The moisture will migrate from the concrete, through the thin-set of the tile, and into the end-grain of your wood planks. This causes the wood to swell specifically at the transition point, creating a lip that will catch your toe every time you walk by. Always use a moisture barrier, especially in humid regions like the Southeast where the ground stays damp year-round.
The geometry of the metal transition strip
Metal profiles like those from Schluter provide a crisp edge for tile while protecting the fragile end-grain of hardwood floors. These strips are installed during the tile process. They have a perforated leg that gets embedded in the thin-set. The visible part is a thin line of aluminum, brass, or stainless steel. This is the preferred method for modern architects because it eliminates the bulky look of wood transitions. However, it requires the installer to be a master with the wet saw. The tile cuts must be perfect because the metal strip shows everything. There is no hiding a jagged cut under a metal profile. You also have to make sure the height of the metal matches the height of the wood exactly. If the wood is higher, the metal edge becomes a blade that can damage the finish of the wood over time.
How moisture migration ruins your transition
In areas like showers or bathrooms, the transition must act as a dam to prevent water from reaching the hardwood substrate. If you are transitioning from a tiled bathroom to a hardwood hallway, the waterproofing is the priority. The grout alone will not stop water. You need a solid marble or granite threshold that is slightly pitched back toward the tile. This creates a physical barrier. I have seen too many hardwood floors rotted out because the installer used a simple wood T-mold at a bathroom door. Steam from the shower and drips from the bath mat soak into the wood transition, and then travel into the subfloor. Within a year, the first three rows of hardwood are black with mold. Always use a non-porous material for transitions in wet areas.
“Wood moves. Tile doesn’t. Your transition is the mediator of that conflict.” – Master Flooring Axiom
The checklist for a permanent transition
- Measure subfloor moisture levels with a calibrated meter before installation.
- Check the flatness of the substrate using a ten-foot straightedge.
- Calculate the total stack-up height including thin-set and underlayment.
- Select a transition material that matches the traffic level of the room.
- Leave a minimum half-inch expansion gap for the hardwood.
- Use silicone instead of grout for the final joint to allow for movement.
- Seal the end-grain of the hardwood where it meets the transition.
The 1/8 inch that ruins everything
Precision cutting and the use of a high-quality oscillating multi-tool are the keys to a tight fit at the door casing. When the transition happens at a doorway, you have to undercut the jambs. If you don’t, you end up with ugly gaps that you have to fill with caulk. A professional uses a scrap piece of wood and a scrap piece of tile as a guide. You lay them down, put your saw on top, and cut the casing. This allows the transition and the flooring to slide underneath for a clean, integrated look. This is the difference between a DIY job and a master installation. It is the small details that define the longevity of the floor. If you rush the transition, you are essentially planning for a future repair. Take the time to get the heights right. Take the time to grind the concrete. Your knees and your reputation will thank you later.