
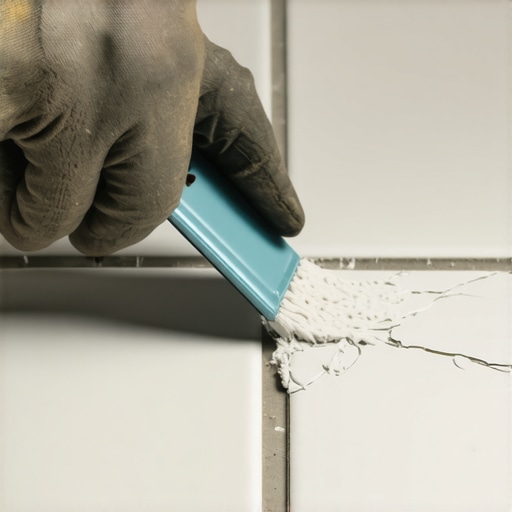
Most guys skip the leveling compound. They think the underlayment will hide the dip. It won’t. I spent three days grinding concrete on a job last month just so the floor wouldn’t click like a castanet. When you see a crack in your grout, you are looking at a structural failure, not a cosmetic blemish. My hands are stained with years of thin-set and my knees have the permanent ache of a man who knows that a subfloor never lies. If that grout line is splitting, something underneath is moving. Flooring is a performance surface. It is a system of layers working in a high-pressure environment of weight and moisture. If you want to fix it in five minutes, you can smear some paste in there, but it will fail again by next Tuesday. To do it right, you have to understand the physics of deflection and the chemistry of the bond.
The physics of a failing grout joint
Fixing a cracked tile grout line requires a diamond-tipped grout saw, high-performance polymer-modified grout, and a clean substrate to ensure the new material achieves a mechanical bond. You must remove the old, crumbling material to a depth of at least 1/8 inch to provide enough surface area for the new grout to grab. If you just skim the top, the repair will pop out like a dry scab. Most people ignore the L/360 deflection standard which dictates that a floor must not bend more than 1/360th of its span. When a floor is too bouncy, the tile stays rigid while the subfloor dips, and the grout is the first thing to snap. This is the same reason hardwood floors start to squeak or laminate planks begin to separate at the butt joints. Movement is the enemy of every installation. I have seen million-dollar homes where the showers leaked through the curb because the installer used standard grout where he should have used a 100 percent silicone sealant at the change of plane.
“A floor is only as good as the subfloor beneath it; deflection is the enemy of every joint.” – Master Flooring Axiom
The 1/8 inch that ruins everything
Subfloor preparation is the only way to prevent cracked grout and loose tiles in high-traffic areas. If your subfloor has a dip greater than 1/8 inch over a ten-foot span, your tile is at risk. We use self-leveling underlayment to create a dead-flat plane because even the most expensive hardwood floors or laminate will fail if the foundation is wavy. When you are performing a five-minute repair, you are essentially performing surgery. You need to evacuate the dust using a vacuum with a HEPA filter. Dust is a bond-breaker. If there is a layer of pulverized cement in that crack, your new grout will just sit on top like a loose tooth. I always keep a bottle of grout additive or a bonding agent in my truck. These polymers increase the tensile strength of the repair. Standard Portland cement grout is brittle. It has great compressive strength but zero flexibility. In a modern home that breathes and shifts with the seasons, you need that extra polymer boost to keep the lines intact.
| Grout Type | Compressressive Strength | Best Use Case |
|---|---|---|
| Sanded Grout | 3,000 PSI | Joints wider than 1/8 inch |
| Unsanded Grout | 2,500 PSI | Wall tile and narrow joints |
| Epoxy Grout | 8,000 PSI | Showers and high-moisture areas |
The surgical strike for a five-minute repair
Grout removal tools come in various forms, but for a quick repair, a manual carbide-grit blade is your best friend. Follow these steps to ensure the fix lasts longer than a week. First, scrape out the loose bits. You aren’t just cleaning; you are creating a canyon for the new material. Second, wipe the area with a damp sponge to remove the microscopic film of dust. Third, mix your grout to a peanut butter consistency. If it is too runny, it will shrink and crack as the water evaporates. This is basic chemistry. Water takes up space. When it leaves, the solids pull together. Too much water equals too much shrinkage. This is a common mistake in showers where homeowners try to fix things themselves. They over-water the mix and wonder why it looks like a dried-up lake bed the next morning.
- Select a grout color that matches the existing cured grout.
- Remove old grout to a minimum depth of 1/8 inch.
- Vacuum the joint thoroughly to remove all bond-breaking debris.
- Mix the grout using a margin trowel to avoid introducing air bubbles.
- Pack the joint tightly with a rubber grout float at a 45-degree angle.
- Wait ten minutes before wiping with a barely damp sponge.
Why your subfloor is lying to you
Concrete slabs often look flat, but they carry a moisture vapor transmission rate that can blow the grout right out of the joints. Even if you are installing hardwood floors, you have to check the calcium chloride levels. I have walked onto jobs where the laminate was cupping because the installer didn’t use a 6-mil poly vapor barrier. In tile work, that moisture can travel through the slab and break the chemical bond of the thin-set. If you see white powder appearing on your grout lines, that is efflorescence. It is a sign that water is moving through the system and bringing minerals to the surface. A five-minute fix won’t solve a moisture problem. You might need to seal the grout once it cures, but wait at least 48 hours. If you seal it too early, you trap the moisture inside, which leads to a cloudy finish and eventual mold growth in showers.
“The National Wood Flooring Association (NWFA) states that most flooring failures are caused by improper acclimation or subfloor moisture levels that exceed the manufacturer’s specifications.” – NWFA Technical Guidelines
The final word on grout maintenance
Flooring is an engineering challenge. Whether you are dealing with hardwood floors, laminate, or showers, the rules of physics apply. Don’t be the person who thinks a little bit of caulk can fix a structural problem. Use the right tools, understand the chemistry of your adhesives, and never trust a subfloor that hasn’t been checked with a straightedge. My years in the trade have taught me that the shortcuts you take today will be the headaches you deal with tomorrow. Keep your joints clean, your moisture levels low, and your expectations grounded in reality. That is how you build a floor that lasts a lifetime.