
Most guys skip the leveling compound. They think the underlayment will hide the dip. It won’t. I spent three days grinding concrete on a job last month just so the floor wouldn’t click like a castanet. My back still hurts from that slab. That is the reality of the trade. If you do not respect the physics of the subfloor, the surface will fail every single time. Whether you are dealing with hardwood floors, laminate, or the intricate tile work in showers, the foundation dictates the lifespan. Most homeowners look at a tile floor and see the color of the stone or the pattern of the layout. I see the bond. I see the chemical lattice of the portland cement. I see the moisture content in the slab that will eventually try to push its way through the grout lines and create efflorescence. If you want a floor that lasts thirty years instead of three, you have to stop thinking about aesthetics and start thinking about structural engineering. This brings us to the most misunderstood substance in the flooring world. Grout is not just filler. It is a structural bridge between rigid units. And the secret to a successful installation starts in the bucket.
The physical science of grout viscosity
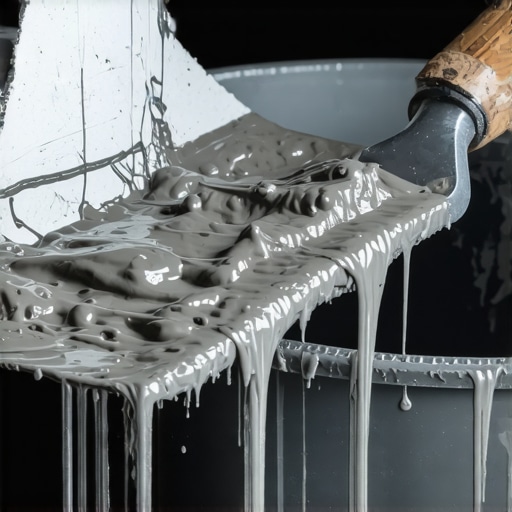
The perfect peanut butter consistency for grout is a specific state of viscosity where the mixture holds its shape on a margin trowel without slumping but remains pliable enough to be pressed deep into the joint. This balance ensures the polymer additives and cement particles fully hydrate for maximum structural bond strength. Achieving this state requires a precise water to powder ratio. If the mix is too thin, the water will evaporate and leave behind a brittle, porous honeycomb structure that will crack under the slightest deflection. If it is too thick, it will not penetrate the full depth of the tile joint. This creates air pockets. Those pockets are where mold lives and where structural failure begins. When we talk about showers, this becomes even more vital. A shower floor is a wet environment subject to constant thermal expansion. If your grout is weak because you added too much water during the mixing phase, you are inviting water to bypass your topical membrane and rot your subfloor. I have seen 2 by 10 joists turned into mush because someone wanted their grout to be easy to spread. Do not be that installer. Accuracy is the only thing that matters when the mixer starts spinning.
“A floor is only as good as the subfloor beneath it; deflection is the enemy of every joint.” – Master Flooring Axiom
The chemical reality of hydration and slaking
Mixing grout is a chemical reaction. It is not like making pancake batter. When you introduce water to the dry grout powder, you are initiating a process called hydration. This is where the calcium silicates and aluminates in the cement start to grow crystals. These crystals are what lock the sand and pigments together. Most amateurs make the mistake of mixing the grout and immediately applying it to the floor. This is a recipe for disaster. You must let the grout slake. Slaking is a ten minute period where the mixture sits untouched in the bucket. During this time, the water molecules are penetrating the dry clumps of polymer and chemicals. If you skip this, the grout will feel gritty and will set up too fast in the bucket. After the slaking period, you must remix it by hand. Never use a high speed drill for this second mix. High speeds introduce air bubbles. Air bubbles lead to pinholes in your finished grout lines. Pinholes are the first sign of a failing installation. I always tell my guys that the bucket is where the job is won or lost. If the mix in the bucket is wrong, the floor will never be right.
| Grout Type | Ideal Joint Width | Primary Use Case | Cure Time |
|---|---|---|---|
| Sanded Grout | 1/8 inch to 1/2 inch | Floors and large wall tiles | 24 to 72 hours |
| Unsanded Grout | Less than 1/8 inch | Polished stone and glass | 24 to 48 hours |
| Epoxy Grout | Variable | High moisture and heavy traffic | 24 hours |
| Pre-mixed Grout | 1/16 inch to 1/2 inch | Small repairs or DIY projects | Varies by brand |
The 1/8 inch that ruins everything
Precision in the joint width is often ignored by those rushing the job. People think a small gap is just for looks. It is not. Expansion gaps are the lungs of a floor. Hardwood floors require a full 3/4 inch gap at the perimeter because wood is a living material. It breathes. It expands in the summer and shrinks in the winter. Laminate is the same way. Even tile, which seems rock solid, moves. If you pack grout too tightly against a vertical surface without an expansion joint, the tile will tent. I have walked into rooms where the tile literally popped off the floor like a small explosion because there was no room for movement. The grout must be allowed to exist as its own entity within the grid. This is why we use 100 percent silicone caulk in the corners of showers instead of grout. Grout is rigid. Silicone is flexible. If you put rigid grout in a change of plane, it will crack within months. I see this mistake in million dollar homes every single week. It is a sign of an installer who does not understand the physics of a building. Buildings move. Foundations settle. Your flooring system must be designed to accommodate that movement or it will destroy itself.
The checklist for a fail-proof grout installation
- Verify the subfloor meets L/360 deflection standards for ceramic or L/720 for natural stone.
- Vacuum every single joint to remove debris, spacers, and thinset chunks before mixing.
- Use cool, clean potable water only to avoid contaminating the chemical balance.
- Measure water using a graduated cylinder rather than eyeballing the pour.
- Allow the mixture to slake for a minimum of ten minutes to ensure polymer activation.
- Test the consistency by standing a margin trowel upright in the bucket; it should stay vertical.
- Apply grout at a 45 degree angle to the joints to ensure maximum pack density.
- Wipe with a damp, not dripping, sponge to prevent washing out the pigment.
The ghost in the expansion gap
One of the biggest lies in the industry is that underlayment can fix a bad subfloor. It cannot. I have heard sales reps tell customers that a thick foam underlayment will make their laminate feel like solid wood. That is a lie. While most people want the thickest underlayment, too much cushion actually causes the locking mechanisms on LVP to snap under pressure. Think about it. If the floor has too much bounce, every step puts vertical stress on the plastic tongue and groove. Eventually, those joints fatigue and break. Then you have a floating floor that is actually just a collection of loose planks. The same logic applies to grout. If the subfloor has too much flex, the grout will turn to powder. You can mix the perfect peanut butter consistency, but if the plywood beneath the tile is bowing, that grout is gone. You have to ensure the joist spacing is correct. You have to ensure the subfloor thickness meets the TCNA requirements. Only then does the mix in the bucket actually matter. In this business, you are either a mechanic or a handyman. A mechanic understands why the machine works. A handyman just hopes it stays together until the check clears.
“Grout is the structural mortar of the tile assembly; its integrity depends entirely on the ratio of water to cementitious material during the initial hydration phase.” – TCNA Technical Manual
Why your grout keeps cracking into dust
When grout fails, it usually manifests as fine cracks or a chalky residue. This is almost always caused by too much water. Most people use a soaking wet sponge to clean the tile. That water seeps into the fresh grout and dilutes the cement paste. You are essentially washing away the glue that holds the sand together. You should be using a sponge that is so dry you can barely squeeze a drop of water out of it. The goal is to clean the surface of the tile, not to add more moisture to the joint. Another factor is the temperature. If you are working in a house that is 90 degrees with no air conditioning, the water in your grout will evaporate before it can hydrate the cement. This is called a flash dry. It results in a weak, crumbly joint. I always tell homeowners to keep the HVAC running at a steady 72 degrees for forty eight hours before and after an installation. Stability is the friend of a good floor. Fluctuations are the enemy. If you treat your floor like a laboratory experiment, you will get laboratory results. If you treat it like a weekend hobby, you will be replacing it in five years. The choice is yours, but the physics do not lie.
{“@context”:”https://schema.org”,”@type”:”HowTo”,”name”:”How to Mix Grout to the Perfect Consistency”,”step”:[{“@type”:”HowToStep”,”text”:”Measure clean water into a clean bucket based on the manufacturer’s specific ratio.”},{“@type”:”HowToStep”,”text”:”Slowly add grout powder while stirring at a low RPM to avoid air entrainment.”},{“@type”:”HowToStep”,”text”:”Mix until the texture resembles thick, creamy peanut butter with no dry lumps.”},{“@type”:”HowToStep”,”text”:”Allow the mixture to slake for 10 minutes to activate chemical polymers.”},{“@type”:”HowToStep”,”text”:”Remix the grout by hand for 1 minute before application to the tile joints.”}]}