
The physics of the melamine wear layer
Fixing laminate scratches with a repair crayon involves filling the breach in the protective aluminum oxide coating with a color matched wax or resin. This process requires cleaning the area, warming the wax, and buffing the residue to ensure the repair bond survives the movement of the floor. Most homeowners fail because they ignore the microscopic depth of the damage. A floor is not a static object. It is a shifting, breathing mechanical system that responds to every footstep and every change in room humidity. I once walked into a house where a $15,000 wide-plank walnut floor was cupping so bad it looked like a potato chip because the installer didn’t check the crawlspace humidity, and I see the same neglect with laminate. People think laminate is plastic. It is not. It is a high-density fiberboard core wrapped in a photographic layer and topped with a resin-infused shield. When you scratch it, you aren’t just making a mark, you are creating a gateway for moisture to enter the fiberboard. I have spent twenty-five years on my knees with a moisture meter and a level, and I can tell you that a scratch is the beginning of the end if you do not seal it correctly.
The ghost in the expansion gap
Your subfloor is the foundation of every repair because it determines how much the planks flex when you walk on them. If the floor has too much deflection, a wax repair will simply pop out of the scratch within forty-eight hours because the wax cannot handle the structural shear forces. I spent three days grinding concrete on a job last month just so the floor wouldn’t click like a castanet, and that same level of obsession is required for a simple scratch. You have to understand that laminate is a floating floor. It is never nailed down. It moves as a single unit. If you locked it under a heavy kitchen island, you killed the floor’s ability to breathe, and now every scratch will expand and contract more aggressively.
“A floor is only as good as the subfloor beneath it; deflection is the enemy of every joint.” – Master Flooring Axiom
This axiom applies to the repair crayon as well. The wax must be pushed into the scratch with enough force to create a mechanical bond with the exposed fiberboard core, but without distorting the surrounding wear layer.
The wax chemistry of the repair crayon
A professional repair crayon is not a toy; it is a blend of hard paraffin, carnauba wax, and synthetic pigments designed to mimic the refractive index of wood grain. You need to select a shade that is slightly darker than the floor because light hitting the wax will make it appear lighter than it is in the stick. The chemistry of these crayons is fascinating. High-quality kits use a harder wax that has a higher melting point, ensuring that the repair does not turn into a sticky mess during the heat of summer. Cheap crayons from big-box discount retailers are basically soft school supplies that will attract dirt and turn black over time. You want a tool that resists the pressure of a mop and the friction of a shoe. When you apply the wax, you are essentially performing a localized lamination. You are replacing the missing melamine with a substance that can shed water and resist impact.
Tools and materials for a professional finish
The successful repair of a laminate floor requires specific preparation tools and a controlled environment to ensure the adhesive bond of the wax stick. You cannot just rub a crayon on a dirty floor and expect it to hold. You need to de-grease the area first. I always use a 50/50 mix of denatured alcohol and water to strip away any floor wax or silicone-based cleaners that have built up over the years. If there is a single molecule of oil in that scratch, the repair will fail. Here is what you need in your bucket before you start.
- High density wax repair crayons in three matching shades.
- A plastic scraper or an old credit card for leveling.
- Denatured alcohol for surface preparation.
- A lint free microfiber cloth.
- A hair dryer to soften the hard wax sticks.
- A fine tip permanent marker for adding grain detail.
The 1/8 inch that ruins everything
Precision in the application of the repair material is the difference between a hidden fix and a glaring eyesore that draws the eye every time you enter the room. Most people overfill the scratch and leave a hump. That hump will catch the edge of a vacuum cleaner and rip the entire repair out. You have to level the wax perfectly with the surface of the floor. While most people want the thickest underlayment, too much cushion actually causes the locking mechanisms on LVP or laminate to snap under pressure, and it causes the same instability for your scratch repairs. You need a solid, firm base.
| Scratch Type | Depth in Microns | Repair Strategy |
|---|---|---|
| Surface Scuff | Less than 5 | Buffing with microfiber and polish |
| Minor Scratch | 5 to 20 | Standard repair crayon application |
| Deep Gouge | More than 20 | Hard wax melt with heat iron |
| Full Breach | Core Exposed | Two stage filler and pigment pens |
A step by step guide to the crayon method
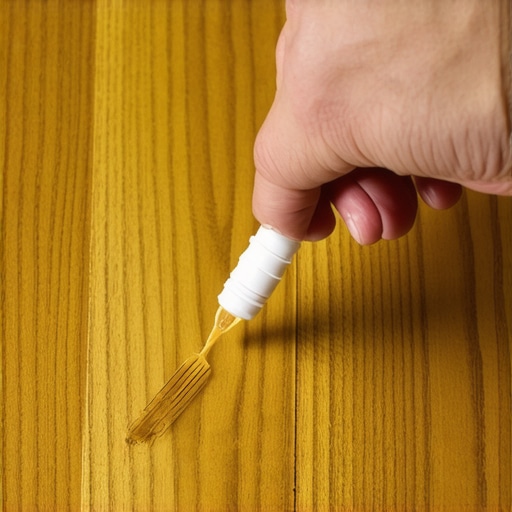
Following a systematic approach ensures that the repair crayon integrates with the existing flooring texture and maintains its integrity over years of foot traffic. First, clean the scratch with the alcohol solution to remove any trapped dust. Use the hair dryer to gently warm the floor and the crayon. This lowers the viscosity of the wax, allowing it to flow into the microscopic crevices of the fiberboard core. Rub the crayon across the scratch, never along it. Rubbing across the grain ensures the wax is packed tightly into the void. Once the scratch is overfilled, take your plastic scraper and gently shave away the excess. Do not use metal. A metal blade will leave silver marks on your floor that you will never get out. After leveling, use the microfiber cloth to buff the area in a circular motion. This generates heat through friction, which fuses the edges of the wax to the melamine.
“Surface integrity is maintained through mechanical bonding and chemical compatibility between the repair media and the host substrate.” – NWFA Technical Standards
If the floor is a multi-tonal wood grain like oak or hickory, use the fine-tip marker to draw small lines through the wax to mimic the natural wood pores. This breaks up the flat look of the wax and tricks the eye.
Climate logic and regional considerations
The environment of your home dictates how long a laminate repair will last, as humidity levels cause the fiberboard core to expand and contract. If you live in the swampy humidity of Houston, your laminate floor is constantly under pressure. The planks are swelling against the walls. In this environment, a soft wax will be squeezed out of the scratch like toothpaste. You need the hardest wax available. Conversely, in the dry heat of Phoenix, the floor will shrink until the baseboards show a gap. This shrinkage can pull the scratch open, causing the repair to crack. In dry climates, you must ensure the repair remains flexible. This is why I always check the ambient humidity before I even open my tool bag. If the house is at 60 percent humidity, that floor is at its maximum size. If I repair it then, the repair will likely hold when it shrinks. But if I repair a bone-dry floor in the winter, that wax is going to be under immense pressure when the summer humidity hits.
The final inspection
A floor is a performance surface and the success of a repair is measured by its ability to withstand the daily rigors of a household. Do not let anyone walk on the repair for at least four hours. The wax needs time to reach its final hardness. If you have pets, keep them away. Dog claws are the natural enemy of laminate and will gouge out a fresh repair in seconds. If the scratch was deep enough to expose the brown core, you have successfully saved that plank from moisture damage. If you had left it open, every time you mopped, the water would have seeped in, causing the edges of the plank to swell and peak. Once the edges peak, the floor is ruined and no crayon in the world can fix it. You have to be proactive. Smelling the floor wax and the sawdust is part of the job, but the real skill is in the chemistry and the physics of the install. Keep your floor dry, keep your subfloor level, and keep your repair kit ready. That is how you make a laminate floor last thirty years instead of five.