
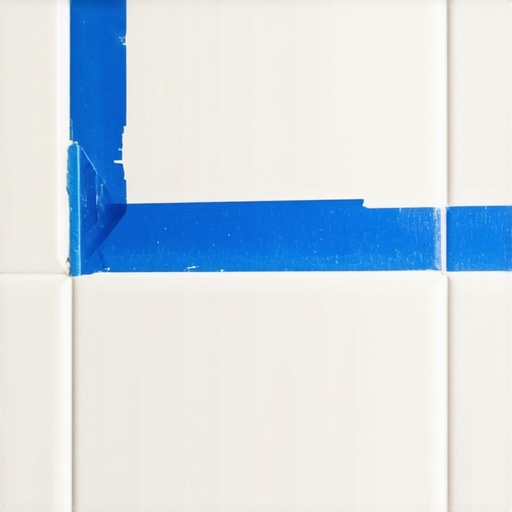
I spent three days grinding concrete on a job last month just so the floor wouldn’t click like a castanet. Most guys skip the leveling compound. They think the underlayment will hide the dip. It won’t. I have seen countless installations fail because someone thought they could cheat the physics of a flat plane. Whether you are dealing with showers or hardwood floors, the prep work determines the legacy of the build. Grouting is the final act of a long play, and if you mess it up in the corners, the whole aesthetic collapses into a smear of cement and regret. The blue tape trick is the professional answer to the messy reality of 90 degree internal joints. It is a method born from the necessity of precision. Most installers try to freehand their corners, leading to jagged lines and grout haze that takes hours to scrub off. By using a sacrificial barrier, you control the placement of the material at a molecular level.
The geometry of a perfect corner
The blue tape trick for grouting corners involves masking both sides of an internal 90 degree joint to prevent excess material from staining tile surfaces. This method creates a crisp, professional grout line while protecting the surrounding area from the abrasive nature of sand based grout mixtures. It is a simple concept but requires an understanding of how grout behaves during the hydration process. When you push grout into a corner, the pressure forces the paste into every microscopic pore of the tile. If that tile is a natural stone or a textured porcelain, the grout becomes a permanent part of the surface. By applying tape exactly one sixteenth of an inch from the corner, you create a dam. This dam holds the grout in place while it begins its chemical transition from a paste to a solid. It prevents the pigment from bleeding into the neighboring tiles, which is especially important when using high contrast colors like charcoal grout against white subway tile.
Why your subfloor is lying to you
Subfloor flatness is the single most important factor in flooring longevity, yet it is frequently ignored. A subfloor that deviates more than 3/16 of an inch over 10 feet will cause mechanical failure in locking systems, grout cracking in tile, and structural fatigue in solid wood planks. You can use all the blue tape in the world, but if the floor underneath is moving, the grout in your corners will crack within six months. I have walked onto jobs where the homeowner complained about a squeak in their laminate, only to find the installer laid it over a subfloor that looked like the rolling hills of Kentucky. You have to get the moisture meter out. You have to check the relative humidity of the slab. If you are laying hardwood floors, the wood needs to acclimate until its moisture content is within two percent of the subfloor. If you rush this, the wood will expand and contract with a force that can shear off flooring cleats or buckle an entire room. Concrete slabs are particularly deceptive. They might look dry on the surface, but they can hold gallons of water that will eventually turn your adhesive into a gummy mess. [IMAGE_PLACEHOLDER]
The chemistry of adhesion in wet environments
Grout in showers requires a specific chemical composition to resist water penetration and mold growth. Standard portland cement grout is porous and will eventually absorb water, leading to the deterioration of the thin set bond and potential structural rot in the wall studs. This is why the blue tape trick is so effective for epoxy or high performance grouts. These materials are incredibly sticky and difficult to clean once they begin to set. Epoxy grout does not use water for hydration; it uses a chemical reaction between a resin and a hardener. If you get epoxy grout on the face of your tile and don’t clean it immediately, you will need a jackhammer to get it off. The tape acts as a shield. You apply the epoxy, tool the joint with a rounded stick or your finger, and then pull the tape while the mixture is still tacky. This leaves a bead so perfect it looks like it was manufactured in a factory. It is the difference between a DIY hack job and a master installation.
“A floor is only as good as the subfloor beneath it; deflection is the enemy of every joint.” – Master Flooring Axiom
The precise sequence of the blue tape method
Achieving a flawless grout line in a corner requires a disciplined approach to masking and tooling. The process begins with a completely clean and dry joint, free of any thin set squeeze out or debris that could interfere with the bond of the new grout. Follow this checklist to ensure the corner stays clean and the lines stay sharp.
- Clean the corner joint thoroughly with a utility knife to remove dried thin set.
- Vacuum the joint to ensure no dust particles are trapped behind the tape.
- Apply high quality painters tape to both sides of the corner, leaving a 1/16 inch gap.
- Press the edges of the tape down firmly with a putty knife to prevent bleed under.
- Pack the grout into the joint using a small margin trowel or a gloved finger.
- Tool the joint immediately to create a consistent concave shape.
- Carefully peel the tape away from the corner while the grout is still wet.
- Wipe the edges with a barely damp sponge to smooth any tiny ridges.
Comparing materials for durability and stability
Different flooring materials react differently to environmental stressors like heat and humidity. Understanding the Janka hardness scale and the expansion coefficient of your chosen material is essential for a successful long term installation. While laminate is often marketed as a durable alternative to wood, it lacks the structural integrity of solid timber. Laminate is essentially a photograph of wood glued to a core of compressed sawdust. When it gets wet, it swells like a sponge and never returns to its original shape. Solid hardwood floors, while more expensive, can be sanded and refinished multiple times over a century. However, hardwood is a living product. It breathes. It moves. In a high humidity environment, you must account for this movement by leaving a significant expansion gap at the perimeter, hidden by your baseboards.
| Material Type | Janka Rating | Moisture Tolerance | Installation Type |
|---|---|---|---|
| White Oak | 1360 | Moderate | Nail Down |
| Red Oak | 1290 | Low | Nail Down |
| Engineered Oak | 1360 | High | Glue or Float |
| Laminate | N/A | Very Low | Click Lock |
| Porcelain Tile | N/A | Immune | Thin-set |
The ghost in the expansion gap
Expansion gaps are the invisible lungs of a flooring system, allowing the material to expand and contract without causing structural failure. Forgetting to leave a 1/2 inch gap at the wall is the fastest way to ruin a professional hardwood or laminate installation. I have seen floors that buckled so high they lifted the furniture off the ground. This happens because the installer didn’t understand the physics of wood cells. Each plank of wood is made of tiny tubes that hold water. When the humidity in the room goes up, those tubes fill up and the plank gets wider. If there is no room for that width to go, the floor has no choice but to go up. In showers, the expansion gap is less about the tile and more about the movement of the house itself. Every house settles. Every house breathes. If you grout your corners solid without using a flexible color matched caulk or the blue tape trick for a clean transition, the grout will crack as the walls move independently of the floor.
Hardwood struggles in the modern home
Modern HVAC systems and radiant floor heating have changed the way we must approach hardwood installations. The extreme dry heat of a radiant system can shrink wood planks to the point where the tongues pull out of the grooves, creating unsightly gaps. If you are putting wood over radiant heat, you need to use quarter sawn lumber. Plain sawn lumber, which is what most big box stores sell, expands and contracts across its width. Quarter sawn lumber is cut at an angle that causes it to expand and contract in its thickness, which is much more stable for a floor. Also, consider the species. Hickory is beautiful but it is notoriously unstable. It moves like a snake. White oak is the gold standard for a reason. It has closed pores called tyloses that make it naturally resistant to rot and moisture. This is why white oak was used for ship building and whiskey barrels. It is a structural powerhouse.
“Wood is a hygroscopic material, it constantly gains or loses moisture to reach equilibrium with its environment.” – NWFA Technical Manual
The 1/8 inch that ruins everything
Precision in flooring is measured in fractions of an inch, and a mistake of just 1/8 of an inch can lead to a cascade of failures. This is especially true when transitioning between different types of flooring or when layout out a tile pattern. If your first row of tile is off by a hair, by the time you reach the other side of the room, you will be looking at a massive wedge. The blue tape trick is a tool for precision, but it cannot fix a bad layout. You have to snap your lines. You have to square the room. Most houses are not square. They are rhombuses at best. You have to find the center point and work outward, ensuring that your cuts at the walls are symmetrical. In the world of flooring, the eye is drawn to the corners and the edges. If the grout lines in the corners are messy, the whole job looks cheap. If the transitions between the hardwood and the tile are uneven, it is a trip hazard and an eyesore.
The myth of the maintenance free floor
There is no such thing as a maintenance free floor, only floors that require different types of care. Even the most expensive porcelain tile requires regular cleaning and occasional regrouting of the high traffic areas. People buy waterproof laminate thinking they can leave a puddle of water on it for a week. They can’t. The surface might be waterproof, but the joints are not. Water will seep into the seams and rot the core from the inside out. Hardwood needs to be cleaned with specific pH neutral cleaners. Using vinegar or steam mops will destroy the finish and dull the wood over time. For tile, the grout is the weakest link. It is the part that stains and the part that cracks. By using the blue tape trick during the initial installation, you create a denser, smoother grout line that is much easier to keep clean. A smooth surface doesn’t hold onto dirt the way a rough, poorly tooled joint does. Invest the time in the corners now, or you will spend your weekends scrubbing them with a toothbrush later. “