
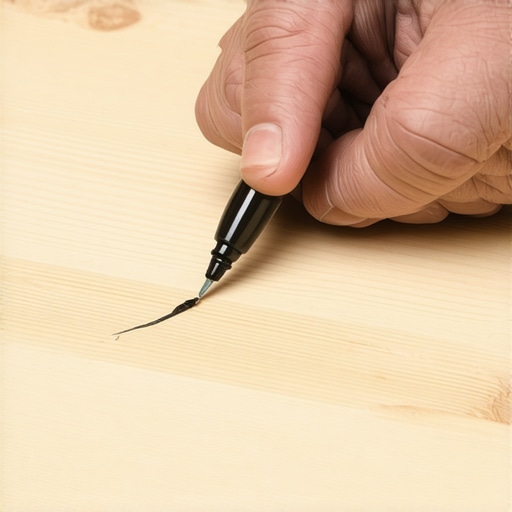
I once spent three days grinding concrete on a job last month just so the floor wouldn’t click like a castanet because the previous guy thought a thick underlayment would hide a half inch dip. It did not. That same level of shortcuts is what leads people to buy those cheap wax sticks for their laminate floors. I smell like sawdust and WD-40 most days, and I have seen a thousand floors ruined by people who treat their flooring like a piece of furniture instead of a high performance structural surface. When you scratch a laminate floor, you are not just making a mark; you are breaching a sophisticated layers of chemistry designed to withstand thousands of pounds of pressure. Laminate is a sandwich of melamine resin, photographic paper, and high density fiberboard. If you try to fix that with a soft wax crayon, you are just inviting a sticky mess that will turn black with dirt in six months.
The myth of the magic wax stick
Fixing laminate scratches without wax requires using specialized repair markers or acrylic based fillers that bond permanently to the melamine wear layer. These solutions provide a hard finish that mimics the original factory coating and prevents moisture from reaching the vulnerable HDF core. Most homeowners reach for wax because it is cheap and easy. In my twenty five years on my knees, I have learned that easy is usually a lie. Wax sits on top of the surface. It does not bond. It catches hair, dust, and microscopic debris. If you have laminate in a high traffic area, that wax will be gone or filthy within a few weeks. You need a solution that addresses the physics of the scratch itself.
Anatomy of a melamine surface
A laminate plank consists of a wear layer made of aluminum oxide and melamine resin which provides the primary defense against abrasion and impact. Beneath this sits the decorative layer and the structural core which provides the floor its stability and moisture resistance characteristics. To understand why wax fails, you have to look at the molecular level. The wear layer of your laminate is often rated on the AC scale, or Abrasion Class. Most residential floors are AC3. This layer is effectively a sheet of hard plastic and crushed minerals. When a chair leg or a pebble under a boot drags across it, it creates a microscopic canyon. If the scratch is white, you have only damaged the wear layer. If it is brown or black, you have hit the core. Putting wax in a wear layer scratch is like putting a band-aid on a piece of glass. It just won’t hold.
“A floor is only as good as the subfloor beneath it; deflection is the enemy of every joint.” – Master Flooring Axiom
The physics of light and surface depth
Scratches are visible primarily because of how light refracts off the jagged edges of the damaged melamine. By smoothing these edges and filling the void with a transparent or color matched acrylic, you eliminate the shadow that makes the scratch stand out to the human eye. Professional installers use floor markers that are basically high quality stains. They soak into the fibers if the scratch is deep, or they lay a thin film of resin if it is shallow. You want something that dries hard. Think of it as a localized refinishing of the plank. Unlike hardwood floors which can be sanded, laminate is a one shot deal. You cannot sand out a scratch. If you try, you will disappear the wood grain pattern faster than you can blink. I have seen guys try to sand laminate and they end up with a smooth, grey patch of fiberboard that looks like a hole in the floor.
Why sanding is a one way ticket to disaster
Sanding laminate floors is impossible because the decorative layer is merely a printed image of wood or stone that is only a few microns thick. Any abrasive action will remove this image and expose the dark brown high density fiberboard underneath which cannot be repaired. People often confuse laminate with hardwood floors. In a hardwood floor, the color goes all the way through. In laminate, the color is just a picture. If you scratch through that picture, you are done. This is why we focus on ‘filling’ and ‘masking’ rather than ‘leveling’ through abrasion. If you have deep gouges that go through the image, you need a hard filler that dries to a stone-like consistency. These fillers are often two part epoxies or specialized acrylics that you level off with a plastic scraper while they are still wet.
| Material Type | Scratch Resistance | Repair Difficulty | Moisture Sensitivity |
|---|---|---|---|
| Laminate | High (AC3-AC5) | Moderate | Extreme at seams |
| Hardwood Floors | Low to Moderate | Easy (Sandable) | Moderate |
| Tile and Grout | Very High | Hard (Replacement) | Low |
| Vinyl (LVP) | High | Easy (Marker) | None |
The precision marker technique
Using a flooring repair marker involves cleaning the scratch with isopropyl alcohol to remove oils and then applying the pigment in thin layers until the color matches the surrounding wood grain. This method creates a chemical bond that will not wash away during regular mopping or cleaning. When I walk onto a job site, I carry a kit with thirty different marker shades. You never use just one. Real wood has variation. You use a lighter base and then tap in darker dots to mimic the grain. This is a surgical process. You are not painting a wall; you are restoring a texture. If you have been working near showers or areas where water is present, you must ensure the scratch is sealed perfectly. If water gets into a scratch, the HDF core will swell like a sponge. Once that core swells, the floor is junk. There is no fixing a ‘bubbled’ laminate plank.
Putting the density back in the core
For deep gouges that penetrate the core, a non-wax floor filler or color matched acrylic putty must be used to restore the structural integrity and prevent moisture ingress. These fillers shrink slightly as they dry so a second application is often required to achieve a flush finish. Most guys skip the leveling compound on a subfloor and they skip the primer on a scratch repair too. You need to clean the gouge. I use a small needle to pick out any loose debris. If there is dust in the hole, the filler will just pop out in a week. After the filler is dry, you can use a fine-tip graining marker to draw the wood lines back over the patch. It takes patience, but it is the only way to make it invisible without replacing the whole board.
Climate and the invisible expansion gap
Laminate floors are highly reactive to changes in humidity which causes the planks to expand and contract throughout the year. Repairs must be flexible enough to handle this movement or they will crack and fall out during the dry winter months. In regions with high humidity, like the coastal south, laminate expands significantly. If you don’t have a 3/8 inch expansion gap at your walls, the floor will buckle. This movement affects repairs too. That is why wax is so bad; it is too soft and gets squeezed out as the boards move. Acrylics have a bit of ‘give’ but stay anchored to the edges of the scratch. I always tell my clients to keep their humidity between 35 and 55 percent. Anything outside that and your floor starts doing things it was never meant to do.
“A floor is a performance surface; treat it with the respect its engineering demands or it will fail you when you least expect it.” – Flooring Science Quarterly
The 1/8 inch that ruins everything
The difference between a successful repair and a failed one is often less than an eighth of an inch of surface deviation. If a repair sits higher than the surrounding plank, it will be sheared off by foot traffic or vacuum cleaners within days. You have to be precise. After you apply your filler, take a credit card or a plastic putty knife and swipe it across. Do not use metal. Metal will create new scratches. You want that filler to be perfectly flush. If you leave a hump, every shoe that walks over it will kick it until the bond breaks. This is the same reason we hate bulky T-molding in minimalist designs; anything that sticks up is a trip hazard and a point of failure. Keep it flat, keep it clean, and keep it sealed.
- Clean the scratch with 99% isopropyl alcohol to remove all surface contaminants.
- Select a repair marker that is one shade lighter than the darkest grain in the plank.
- Apply the marker in short, feathering strokes to blend with the existing pattern.
- Use a microfiber cloth to immediately buff the edges of the repair.
- Apply a drop of clear coat or floor-grade acrylic sealer to protect the pigment.
- Allow the repair to cure for 24 hours before any wet mopping occurs.
The ghost in the expansion gap
If a laminate floor is pinned under heavy cabinetry or lacks proper expansion gaps, the resulting stress can cause micro-fractures in the wear layer that appear as long scratches. Addressing the root cause of floor tension is necessary before attempting cosmetic repairs. Sometimes a scratch isn’t a scratch. It is a stress fracture. If your floor is buckling because you didn’t leave room at the edges, the melamine will eventually crack. I see this a lot in bathrooms where people try to run laminate right up to the showers or use grout to fill the gap. That is a recipe for disaster. Laminate needs to breathe. If the floor is under tension, no repair will hold. You have to fix the expansion problem first, then worry about the marks. Otherwise, you are just painting a sinking ship. The mechanics of the floor always come before the aesthetics.