
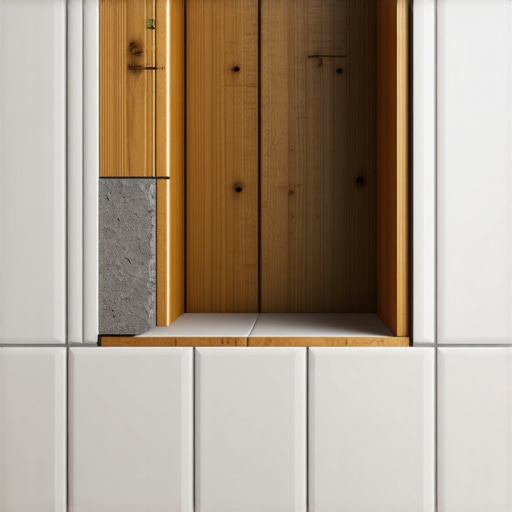
I spent three days grinding concrete on a job last month just so the floor wouldn’t click like a castanet, but that was nothing compared to the disaster I found behind a custom marble shower niche the week after. The homeowner spent six figures on a primary suite renovation. Within eighteen months, the hardwood floors in the hallway began to cup and turn a dark, bruised grey. They thought it was a plumbing leak. It wasn’t. It was the shower niche. I tore out the tile and found the wall studs had turned into mush because the installer trusted grout and a prayer instead of physics. This is the reality of modern tile work. Most guys are decorators, not mechanics. They care about how the pattern aligns, but they ignore how water moves at a molecular level. If you have a niche in your shower, there is a high probability it is currently wicking moisture into your framing. This is not a matter of if, but when. We are going to look at the structural engineering failures that lead to these leaks and why your subfloor is the ultimate victim of a poorly built shower.
The structural failure of the standard niche
The standard shower niche fails because installers treat it as a hole in the wall rather than a primary drainage intersection. Gravity forces water down the vertical tile face, where it hits the flat horizontal sill of the niche. If that sill is not sloped at a precise pitch of at least one eighth of an inch, the water sits. It does not just sit on the tile. It works its way through the microscopic pores of the grout through a process known as capillary action. This moisture finds the path of least resistance, which is usually the unsealed joint where the niche box meets the wall substrate. Once the water passes the tile layer, it hits the framing. If you are lucky, it stays in the wall for a few months before showing up. If you are unlucky, it travels down the studs and pools on your subfloor, rotting the very foundation of your bathroom. I have seen laminate floors three rooms away buckle because a shower niche was wicking water into the bottom plate of a wall. The physics of water tension mean that a tiny gap is more dangerous than a large one, as it draws water in like a vacuum.
Why grout is not a waterproof membrane
Grout is a cementitious product that is porous by design and provides zero protection against liquid water penetration over time. Many homeowners and even some low-bid contractors believe that a thick layer of grout is enough to keep a shower dry. This is a dangerous lie. Cement based grout is essentially a hard sponge. At a microscopic level, it contains thousands of interconnected voids. When you take a shower, those voids fill with water. When the shower is off, the water is supposed to evaporate. However, in a niche, the water often stays trapped behind the tile. If the installer did not use a topical waterproofing membrane like Kerdi or a liquid applied guard like Hydro Ban, that moisture goes directly into the cement board. From there, it enters the wall cavity. This creates a hidden ecosystem of mold and rot that you cannot see until the structural integrity of the wall is compromised. Hardwood floors are particularly sensitive to this invisible moisture migration. Even a slight increase in the ambient humidity of the subfloor caused by a slow niche leak will cause solid oak to expand, leading to the dreaded cupping effect that ruins an expensive installation.
“A floor is only as good as the subfloor beneath it; deflection is the enemy of every joint.” – Master Flooring Axiom
The physics of the horizontal sill
The horizontal sill of a shower niche must act as a miniature roof with a dedicated drainage slope to prevent hydrostatic pressure. When water collects on a flat surface, surface tension holds it in place. In a shower, this standing water creates a constant pressure against the grout lines at the base of the niche. If the sill is perfectly level, the water has nowhere to go. It will eventually find a microscopic crack in the grout or the silicone caulk. Professional installers know that the sill must be pitched toward the drain. We are talking about a subtle but mandatory angle. Without this, the water saturates the thin set mortar behind the tile. This is where the chemistry gets messy. Standard thin set is not waterproof. It is water resistant, but it can become saturated. Once saturated, it acts as a bridge for moisture to cross from the wet side of the wall to the dry side. I have seen cases where the moisture travels through the studs and causes laminate flooring in the adjacent bedroom to peak at the joints. The laminate core, usually made of high density fiberboard, sucks up that moisture like a straw and expands until the floor looks like a mountain range.
| Waterproofing Method | Perm Rating | Installation Speed | Risk of Failure |
|---|---|---|---|
| Liquid Membrane | Low | Medium | High (if too thin) |
| Sheet Membrane | Very Low | Fast | Low (if overlapped) |
| Foam Niche Box | Zero | Instant | Lowest |
| Cement Board Only | High | Slow | Guaranteed |
The chemical reality of modified thin set
Modified thin set uses polymers to create a mechanical bond, but these polymers can break down if they are constantly submerged in trapped water. We use fortified mortars because they stick to everything. They are amazing for bond strength. However, they are not designed to be underwater 24/7. When a niche leaks, the space behind the tile stays damp. This leads to a process called re-emulsification in some lower quality modified mortars. The bond softens. The tile starts to sound hollow when you tap it. This is the sound of failure. If you hear a click or a hollow thud in your shower niche, the water has already won. The moisture is now sitting against your wall studs. If your house has a wooden subfloor, that water is following the pull of gravity down to the floor joists. I have pulled up hardwood floors that were installed over 3/4 inch plywood where the plywood had the consistency of wet cardboard because of a niche leak. This is why we insist on foam waterproofing systems that create a continuous, hydrophobic barrier. You want the water to stay on the surface where it can be sent down the drain, not tucked away in the wall where it can start a colony of black mold.
Hardwood floors and the adjacent splash zone
Hardwood floors installed near a walk-in shower are the first indicators of a failing waterproofing system behind the tile. Wood is a hygroscopic material. It lives and breathes. It reacts to every change in moisture content in its environment. When a shower niche leaks, it often travels down the wall and spreads across the subfloor. You might not see a puddle on your bathroom tile, but your hardwood in the hallway will tell the story. The edges of the boards will lift. This is because the bottom of the board is wetter than the top. The wood cells swell and the board is forced to curve. Most people blame the flooring installer. They think the wood wasn’t acclimated properly. In reality, the wood is doing exactly what it is supposed to do when it meets water. It is reacting to a plumbing failure. If you are installing hardwood floors near a bathroom, you must ensure the shower is a sealed tank. I always tell clients that a cheap shower niche is the most expensive thing they can put in their house. It is a ticking time bomb for their flooring investment.
“Every installation must account for the vapor drive and the thermal expansion of the substrate to avoid catastrophic shear failure.” – TCNA Technical Bulletin
Protecting the home from the invisible leak
Protecting your home requires moving away from traditional site-built niches and toward integrated, pre-fabricated waterproof inserts. The old way of building a niche involved cutting 2x4s, nailing in some scraps, and slapping some cement board over it. This method has too many points of failure. Every nail hole is a potential leak. Every corner is a weak spot. Modern pros use pre-fabricated foam niches. These are made of high density extruded polystyrene and come pre-sealed. When you thin-set these into the wall and band the edges with waterproof tape, you create a single, monolithic surface. Water cannot get behind it because there is no “behind.” It is one solid piece of foam. This is how you protect your subfloor. This is how you ensure your hardwood floors don’t turn into a wavy mess. You have to think like an engineer. You have to assume the water will get past the grout and have a plan for where it goes when it does. If your plan is “hope,” you are going to be calling me in two years to tear out your bathroom and your hallway floors.
- Use pre-manufactured foam niche inserts to eliminate corner seams.
- Apply a topical waterproofing membrane over the entire shower footprint.
- Ensure a minimum 1/8 inch pitch on the niche sill toward the drain.
- Avoid using small mosaic tiles in the niche that require excessive grout lines.
- Test the shower with a flood test before the final tile installation.
- Seal all grout with a high quality penetrating sealer every six months.
The 1/8 inch that ruins everything is the difference between a dry house and a rot pit. Don’t let a contractor tell you that waterproofing is optional or that grout is waterproof. It isn’t. Your hardwood floors, your laminate, and your subfloor are all counting on that niche being a sealed vault. If it isn’t, you aren’t just losing a shower, you are losing the structural integrity of your home. Focus on the chemistry of the mortars and the physics of the slope. That is the only way to build a shower that lasts for thirty years instead of three. It will buckle if you don’t. It will rot. Do it right the first time.