
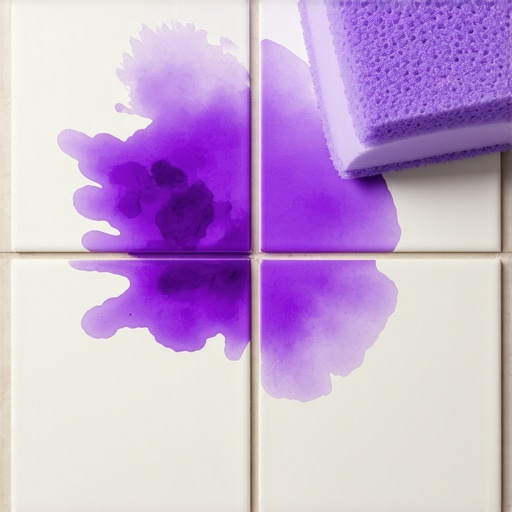
Most guys skip the leveling compound. They think the underlayment will hide the dip. It won’t. I spent three days grinding concrete on a job last month with 30-grit diamond pads just so the floor wouldn’t click like a castanet. That is the level of obsession you need if you want a floor that actually lasts. If you treat your bathroom floor like a decorative rug, you are going to end up with a permanent mess. I have spent 25 years on my knees with a moisture meter and a level, and I can tell you that a floor is a performance surface, not a piece of furniture. When you drop hair dye on a porous tile, you aren’t just dealing with a surface spill. You are dealing with a chemical intrusion into the structural integrity of your finish. This article will break down why those stains happen and how the physics of stone allows them to take hold.
The chemical assault on your grout line
Removing hair dye from porous tile requires oxidizing agents or alkaline poultices because the capillary action of the stone pulls pigment particles deep into the calcium carbonate structure of the grout or the microscopic pores of natural stone like travertine and slate. If you do not neutralize the dye quickly, the ammonia and peroxide in the dye will create a permanent bond with the minerals in your subfloor system. Most people think their tile is a solid shield. It is actually more like a hard sponge. If you have unsealed stone, you have thousands of tiny straws reaching down toward your subfloor, just waiting to suck up whatever liquid you drop. This is why site-finished floors and properly sealed installations are the only way to go. If you are living with builder-grade materials, you are already behind the curve.
The molecular tragedy of unsealed stone
When we talk about porous tile, we are usually talking about natural materials like marble, travertine, or limestone. These materials are formed over millions of years by geological pressure, but they remain chemically active. At a molecular level, travertine is riddled with voids. When hair dye hits the surface, the liquid carrier for the pigment finds these voids. The dye molecules are often smaller than the pore size of the stone, allowing them to migrate millimeters below the surface where no scrub brush can reach. This is the same reason why unacclimated hardwood or poorly prepped subfloors fail. You are ignoring the physics of the material. If you didn’t seal that stone with a high-quality impregnating sealer, you have left the door wide open for a permanent stain. I have seen $20,000 bathrooms ruined because someone wanted to save fifty bucks on a bottle of sealer. It makes me sick to my stomach.
“A floor is only as good as the subfloor beneath it; deflection is the enemy of every joint.” – Master Flooring Axiom
How subfloor deflection invites permanent stains
You might wonder what your subfloor has to do with a hair dye stain. It comes down to structural engineering. If your subfloor has too much deflection, meaning it bounces when you walk on it, your grout lines will develop micro-fissures. These cracks are often invisible to the naked eye. However, they are wide enough to act as a highway for liquids. When you spill dye in the shower, it doesn’t just sit on top. It gets pulled into those micro-cracks by gravitational force and capillary action. Once the dye reaches the thin-set mortar beneath the tile, it can actually spread laterally. I have torn up floors where the stain on the surface was only an inch wide, but the mortar bed underneath was stained for six inches in every direction. This is why a stiff subfloor, meeting the L over 360 standard for ceramic tile or L over 720 for natural stone, is the foundation of a clean home. No amount of scrubbing will fix a floor that is moving and cracking from below.
The chemistry of a permanent mistake
Hair dye is a complex mixture of p-phenylenediamine, ammonia, and hydrogen peroxide. The ammonia opens the cuticle of the hair, but on a tile floor, it acts as a solvent that helps the pigment penetrate the surface tension of the water. If you are dealing with cementitious grout, you are dealing with a highly alkaline material. The dye reacts with the calcium hydroxide in the grout. This creates a chemical bond that is incredibly difficult to break without destroying the grout itself. You cannot just use a generic bathroom cleaner. You need something that will reach into the pore, break the chemical bond, and lift the pigment back to the surface. This is where the concept of a poultice comes in. You are essentially creating a reverse vacuum to pull the dye out of the stone.
| Material | Porosity Rating | Acclimation Time | Stain Resistance |
|---|---|---|---|
| Travertine | High | 48 Hours | Low |
| Slate | Medium | 72 Hours | Medium |
| Porcelain | Low | 24 Hours | High |
| Limestone | Extreme | 48 Hours | Very Low |
The professional protocol for pigment extraction
If you have a stain, you need to act with a plan. Don’t just start dumping bleach on it. Bleach can actually degrade the polymers in modern modified grouts and weaken the bond to the tile. First, you need to identify the material. If it is natural stone, stay away from acids. Acid will etch the stone and create a permanent dull spot that looks worse than the stain. For most porous surfaces, a mixture of hydrogen peroxide and baking soda is the safest bet. You want to create a thick paste, the consistency of peanut butter. Apply it to the stain and cover it with plastic wrap. Tape the edges down. This stops the peroxide from evaporating and forces it to work its way down into the pores of the stone. Leave it for twenty-four hours. As the paste dries, it draws the liquid, and the dissolved dye, back up into the baking soda. It is a slow process. It requires patience. If you’re looking for a quick fix, go talk to a salesman at a big-box store. Real floor work takes time.
The tools you need for success
- 3% or 6% Hydrogen Peroxide for oxidation
- Baking soda to create a drawing poultice
- Nitrile gloves to protect your hands from chemical burns
- Plastic wrap to maintain moisture levels during the reaction
- A soft-bristled nylon brush for surface agitation
- pH neutral stone cleaner for the final rinse
The regional impact of bathroom humidity
In the humid coastal environments of the Southeast, like Charleston or Savannah, the moisture levels in your home play a huge role in how tile behaves. High ambient humidity means that your grout stays damp longer. Damp grout is even more susceptible to staining because the pores are already full of moisture that can transport the dye deeply and quickly. I always tell people in these regions that they need to be even more vigilant with their sealants. You should be testing your sealer every six months. Drop a bit of water on the grout. If it beads up, you are safe. If it soaks in and darkens the grout, you are wide open for a hair dye disaster. The vapor pressure in a humid bathroom can also cause ghosting, where a stain seems to disappear when the floor is dry but reappears as soon as the floor gets damp. This is because the dye is sitting just below the surface and becomes visible again when the stone’s refractive index changes with moisture.
Why your sealant failed the coffee test
Most homeowners think that because their floor was sealed once, it is protected forever. That is a lie. Sealers are sacrificial coatings. They break down under the friction of foot traffic and the harsh chemicals in cleaning products. If you are using a generic