
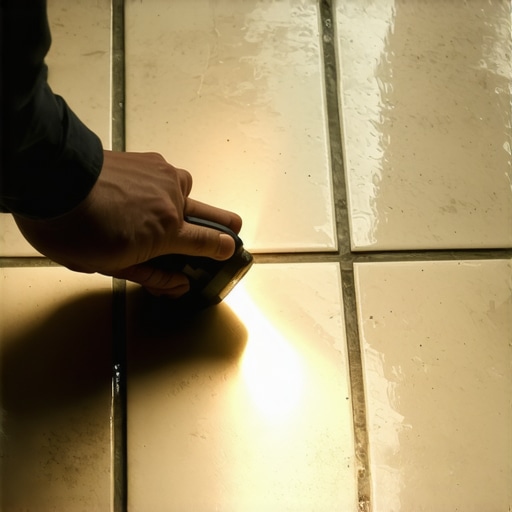
Most guys skip the leveling compound. They think the underlayment will hide the dip. It won’t. I spent three days grinding concrete on a job last month just so the floor wouldn’t click like a castanet. I once walked into a house where a custom shower floor had water pooling in the corners because the installer didn’t understand the physics of a pre-slope. That is why the flashlight trick is the only way to keep an installer honest. You can look at a floor all day under overhead lights and it will look fine. The moment you drop a high-lumen light to the floor level, every mistake becomes a mountain. This is about more than just looks. It is about the structural integrity of the bond and the longevity of your grout. If a tile is sitting higher than its neighbor, it is a trip hazard and a weak point where the edge will eventually chip under foot traffic.
The shadow that reveals the truth
Lippage detection requires a high-lumen LED flashlight placed parallel to the tile surface to cast shadows over uneven joints. This optical inspection identifies vertical displacement exceeding ANSI A137.1 standards, which typically allow only 1/32 of an inch for rectified porcelain tile and thin-set mortar applications. If you see a shadow stretching across the grout line, you have a problem. The length of that shadow tells you exactly how much the tile has warped or how poorly the thin-set was combed out. We are talking about microscopic tolerances that dictate whether a floor lasts thirty years or three months. When light hits an obstruction at a low angle, it creates a high-contrast zone. This is the same principle used by forensic investigators to find footprints, but here, we are looking for the footprint of a lazy installer.
Why your subfloor is lying to you
Subfloor flatness is different from being level, as a concrete slab or plywood deck must be flat within 1/8 inch over 10 feet for large format tile. Failure to achieve this planarity results in lippage because the rigid tile cannot conform to undulations in the structural substrate. I have seen slabs that looked like the rolling hills of Kentucky. You cannot fix that with a bigger notch trowel. You have to get out the grinder or the self-leveling underlayment. If the subfloor has a dip, the tile will bridge that gap. When you step on it, the air pocket underneath compresses, the grout cracks, and eventually, the tile snaps. This is why grinding the high spots is a non-negotiable step in the process. You want a surface so flat you could play air hockey on it before the first bag of mortar is even opened.
“A floor is only as good as the subfloor beneath it; deflection is the enemy of every joint.” – Master Flooring Axiom
The physics of thin-set shrinkage
Thin-set mortar undergoes a chemical hydration process where water molecules react with Portland cement, causing a slight volumetric contraction during the curing cycle. If the trowel ridges are not properly collapsed, this shrinkage pulls the tile downward unevenly, creating height variances at the grout joints. This is why we use medium-bed mortars for large tiles. Standard thin-set has too much water. As that water evaporates and the crystals form, the mortar pulls. If you have a 12 by 24 inch porcelain tile, that pull can be significant. The flashlight trick after 24 hours of curing will often reveal lippage that wasn’t there when the tile was first set. This is the ghost in the machine. It is the result of chemistry working against your aesthetics.
Grout lines and the illusion of level
Grout joints serve as expansion buffers and aesthetic boundaries, but they also act as visual camouflage for minor installation errors. A wider grout joint can sometimes hide lippage, whereas narrow joints on rectified tile amplify every millimeter of offset. In showers, this is critical. If the tile is lipped in a shower, the water will catch on the edge. It won’t drain. You will get mold growth in those tiny stagnant pools. People think grout is waterproof. It is not. Grout is a filter. If the tile underneath is not set flat, you are just inviting moisture to sit against the thin-set and weaken the bond. This is why the flashlight test is even more important in wet areas where shadows indicate future drainage failures.
| Material Type | Max Lippage Tolerance | Acclimation Time | Subfloor Requirement |
|---|---|---|---|
| Rectified Porcelain | 1/32 inch | None | 1/8″ in 10′ |
| Natural Stone | 1/32 inch | 24 Hours | 1/8″ in 10′ |
| Laminate Flooring | N/A (Gap check) | 48 Hours | 3/16″ in 10′ |
| Solid Hardwood | N/A (Sanding req) | 7-14 Days | 1/4″ in 10′ |
The 1/32 inch that ruins everything
Vertical displacement exceeding the thickness of a credit card constitutes a failure of installation according to the TCNA Handbook guidelines. This threshold ensures that sliding objects and pedestrian traffic do not catch on tile edges, preventing mechanical damage to the glaze layer. I have seen beautiful marble floors ruined because one corner was proud by a fraction of an inch. Over time, the vacuum cleaner hits it. The furniture hits it. The edge chips. Then you are looking at a repair that involves a diamond blade and a lot of dust. It is much easier to check it with a flashlight while the mortar is still wet enough to move the tile. Once it is set, you are committed to the mistake. Precision is the difference between a craftsman and a guy who just puts sticks in the mud.
Hardwood floors and the moisture battle
Hardwood installation requires ambient humidity control and subfloor moisture testing to prevent cupping or crowning of the oak planks. Unlike tile, wood fibers are hygroscopic, meaning they expand and contract based on the relative humidity of the indoor environment. If you are in a place like New Orleans, you better be using engineered wood with a stable core. If you are in the desert, you need to worry about the wood shrinking so fast the tongues snap off the grooves. The flashlight trick works here too. Shine it across a newly sanded floor and you will see every sanding mark and every hump in the subfloor. It is about the light hitting the grain at the right angle to show the truth of the surface.
“The surface of the subfloor shall not stiffen or deflect more than L/360 of the span under live load.” – TCNA Standard for Ceramic Tile
The final word on floor integrity
Floor performance is a structural engineering outcome that depends on substrate preparation, adhesive selection, and mechanical leveling. Using the flashlight trick is the final quality control step that ensures your flooring investment remains functional and safe for its intended lifespan. Don’t let an installer tell you it will “even out with grout.” It won’t. Grout follows the contour of the tile. If the tile is crooked, the grout will be crooked. Take the five minutes to drop a light to the floor. If you see shadows, make them fix it. Your feet will thank you ten years from now. This is the difference between a floor that just sits there and a floor that performs.
- Place the flashlight directly on the floor at a 5-degree angle.
- Move the beam slowly across the grout lines.
- Mark any shadow longer than 1/8 inch with blue painter’s tape.
- Check corners where four tiles meet as this is the most common lippage point.
- Verify that the tile spacers were not pushed too deep into the thin-set.