
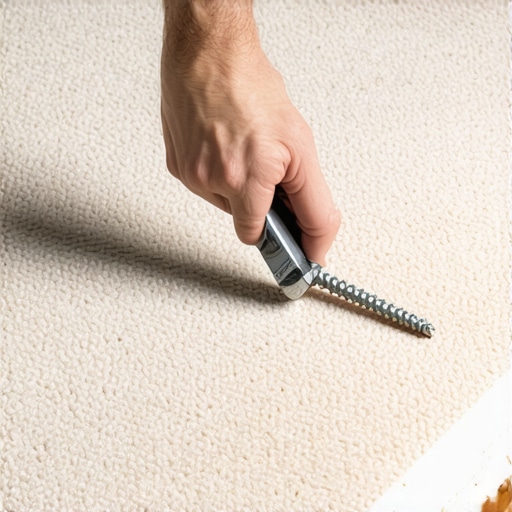
The phantom groan beneath the pile
Fixing a loose stair tread without removing the carpet requires specialized breakaway fasteners and a deep understanding of wood-to-wood friction. You can stop the squeak by driving screws through the carpet and padding into the stringer, then snapping off the heads so they remain invisible. This process targets the mechanical failure of the original nails which have likely pulled away from the lumber due to seasonal expansion and contraction cycles. Most people think they need to rip up the whole staircase, but they are wrong. If you know where the stringer is located and you have the right metallurgy in your screws, you can restore structural integrity in twenty minutes.
Why your subfloor is lying to you
Most guys skip the leveling compound. They think the underlayment will hide the dip. It won’t. I spent three days grinding concrete on a job last month just so the floor wouldn’t click like a castanet. That same level of neglect happens under your carpeted stairs. I once walked into a house where the treads were so loose they felt like they were floating on a layer of grease. The builder had used cheap box nails instead of ring-shank fasteners or construction adhesive. Over five years, the wood dried out, the nails shrank away from the wood fibers, and now every step sounds like a haunted house. This is a structural engineering failure masquerading as a minor annoyance. When wood fibers lose their grip on a smooth nail shank, the resulting gap allows the tread to rub against the riser or the stringer. That friction is the source of the noise. If you ignore it, you are not just living with a noise. You are living with a mechanical system that is slowly grinding itself into sawdust.
“A floor is only as good as the subfloor beneath it; deflection is the enemy of every joint.” – Master Flooring Axiom
The structural anatomy of a squeak
To fix a stair, you have to understand that you are dealing with a three-point connection. The tread is the horizontal board you step on. The riser is the vertical board. The stringers are the heavy diagonal beams that support everything from underneath. Usually, there is a stringer on each side and one right down the middle. A squeak happens when the tread moves independently of the stringer. When you have carpet, you cannot see the nails. This makes the job a game of tactile feedback. You have to use a stud finder or a hammer to tap and find the solid thud of the stringer. Once you find it, you are aiming for the center of that 2×12 beam. If you miss, you are just spinning metal into air. The carpet acts as a muffler, which is why the sound is a dull groan rather than the sharp crack you hear on hardwood floors. If you were dealing with solid hardwood floors, you would have to worry about the Janka hardness and pre-drilling, but with carpeted stairs, the primary obstacle is the dense weave of the fiber which can get caught in a standard drill bit and create a nasty run in the fabric.
The 1/8 inch that ruins everything
Precision is not a suggestion. It is a requirement. If your tread has even an eighth of an inch of vertical play, it will eventually shear off a standard wood screw. The chemistry of the fastener matters. You need a screw with a high shear strength but a brittle enough head that it can be snapped off once it is seated. This is where the Squeeeeek No More system or similar trim-head screws come into play. These fasteners have a scored section in the shank. You drive them through a plastic tripod guide that holds the carpet fibers open. When the screw hits the stop, you use the tripod to snap the head off below the surface of the wood. The thread remains locked in the stringer, pulling the tread down tight, while the top of the screw disappears into the carpet padding. This is not like installing laminate where you have room for an expansion gap. On a staircase, every connection must be rigid. There is no room for movement. Movement is the enemy of longevity.
Hidden fasteners and the chemistry of the grip
When you drive a screw into a 25-year-old kiln-dried Douglas Fir stringer, you are engaging in a high-friction thermal event. The friction of the threads entering the wood generates heat, which can slightly soften any residual resins in the wood. As it cools, it creates a secondary bond. This is why a screw holds where a nail fails. A nail is a wedge. A screw is a mechanical anchor. If you try to use something like grout to fill the gap, you will fail. Grout is for tile and showers. It has zero tensile strength and will crumble the first time someone walks up the stairs. You need the mechanical pull of steel. I have seen homeowners try to squirt wood glue under the carpet. All that does is ruin the padding and create a sticky mess that smells like a chemistry lab. It does nothing for the structural deflection of the tread.
| Fastener Type | Holding Power | Visibility under Carpet | Shear Resistance |
|---|---|---|---|
| Common Box Nail | Low | Visible if popped | Minimal |
| Standard Wood Screw | High | High (Heads bulge) | Moderate |
| Breakaway Trim Screw | High | Invisible | High |
| Construction Adhesive | Extreme | Invisible | N/A (Bonding only) |
Regional humidity and the swelling tread
If you live in a place like Houston or New Orleans, your wood is constantly drinking moisture from the air. This causes the cells in the lumber to expand. When the air dries out, the wood shrinks. This constant movement is what pulls nails out of their holes. In a dry climate like Phoenix, the wood can become so brittle that it cracks when you try to drive a fastener. You have to be aware of the moisture content of your home. If your staircase is near a bathroom or a kitchen where humidity is high, the wood is more prone to movement than a staircase in a climate-controlled basement. I always tell people to check their crawlspace. If you have standing water or high humidity down there, your stairs will never stay quiet. The wood is just a sponge, and a sponge is a terrible structural material when it is wet. This is the same reason we don’t put hardwood floors in showers. The material is simply not designed for that level of environmental stress.
“Wood is a hygroscopic material; it will always seek an equilibrium with its environment, regardless of the installer’s intent.” – NWFA Technical Manual
A checklist for the silent staircase
- Locate the stringers by tapping or using a high-density stud finder through the carpet.
- Mark the locations with masking tape so you do not lose your spot.
- Use a specialized carpet screw kit with a depth-control tripod.
- Drive the screw until it bottoms out against the plastic guide.
- Snap the head of the screw off using the gripper tool or the side of the tripod.
- Verify the silence by putting your full weight on the tread and shifting side to side.
- Vacuum the area to pull the carpet fibers back over the tiny entry hole.
The metallurgy of the permanent fix
We need to talk about the grain of the wood. When you drive a fastener into the end grain of a riser, it has almost no holding power. You must hit the side grain of the stringer. The threads of the screw act like a series of tiny shelves that the wood fibers rest on. If those fibers are rotted or soft, the screw will strip. This is why I always carry a bottle of thin-set epoxy. If I hit a soft spot, I inject a tiny amount of epoxy into the hole before driving the screw. It reinforces the wood cells and creates a permanent anchor. This is the difference between a handyman and a floor architect. One just wants the noise to stop for a week. The other wants it to stop for a generation. You are not just fixing a floor. You are restoring the mechanical integrity of a vertical transit system. Every step taken on a loose tread contributes to the eventual failure of the entire assembly. By locking it down now, you are preventing the stringer from splitting, which is a much more expensive repair that would involve tearing out the drywall and the carpet. Do it right the first time and you will never have to think about it again.