
The mechanical bond behind every successful tile installation
Most guys skip the leveling compound. They think the underlayment will hide the dip. It won’t. I spent three days grinding concrete on a job last month just so the floor wouldn’t click like a castanet. That job was for a high-end client who had picked out these massive 24 by 48 inch porcelain slabs. The subfloor was a disaster of high spots and valley-like depressions. If I had just slapped mortar down, those tiles would have cracked within six months. I had to use a diamond cup wheel on a seven-inch grinder, hooked up to a HEPA vacuum, to get that slab within the required 1/8 inch over 10 feet. My hands were vibrating for two days after, but that floor is now dead flat. Most installers today just want to get in and get out, but with large format tiles, you cannot cheat the physics of the subfloor. If the foundation is not perfect, the finish will be a failure. This is not about aesthetics. This is about structural integrity and the chemical bond between the substrate and the ceramic. When you are dealing with tiles that have at least one side longer than 15 inches, the margin for error disappears completely.
The subfloor secret that prevents tile failure
Subfloor preparation for large format tile requires a maximum variation of 1/8 inch over 10 feet to ensure proper mortar contact. This standard is significantly stricter than for smaller tiles. Achieving this often involves grinding high spots or using self-leveling underlayment to create a truly planar surface for the installation.
When you walk onto a job site, the first thing you should do is pull out a 10-foot straightedge. If you see light under that level, you have a problem. Large format tiles are rigid. They do not bend. If there is a dip in the concrete, the tile will bridge that gap. This creates a hollow spot. When someone steps on that spot, the pressure is concentrated on the edges of the tile. This leads to lippage, where one tile sits higher than the next, or worse, the tile simply snaps. This is why grinding concrete or pouring a high-quality self-leveling compound is non-negotiable. I have seen too many homeowners try to save a few hundred dollars on prep work only to lose thousands in ruined materials. Unlike hardwood floors which can sometimes tolerate minor subfloor imperfections through their thickness and tongue-and-groove locking, tile is brittle. It demands a flat plane. Even laminate flooring, which is a floating system, will eventually fail if the subfloor is not within tolerance, as the locking mechanisms will fatigue and break under the constant movement of a bouncing floor.
“A floor is only as good as the subfloor beneath it; deflection is the enemy of every joint.” – Master Flooring Axiom
Physics of the notched trowel and mortar coverage
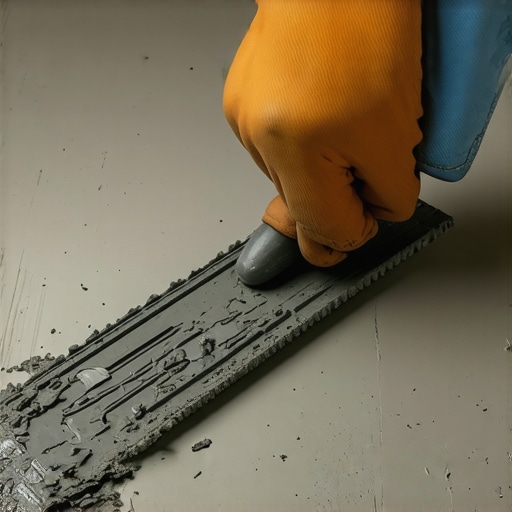
The notched trowel acts as a metering tool to apply a specific volume of mortar. For large format tiles, a 1/2 inch by 1/2 inch square notch or a specialized Euro-notch is essential to achieve 95 percent coverage. This ensures there are no air pockets where moisture or pressure can cause damage.
The ridges created by the trowel serve a dual purpose. They allow air to escape when the tile is pressed into the bed, and they provide a reservoir of mortar that collapses to form a continuous layer. If you use a trowel that is too small, you will not have enough material to fill the voids. This is especially dangerous in showers where water can penetrate grout lines. If there are voids behind the tile in a wet environment, water will collect there. This leads to mold, efflorescence, and the eventual degradation of the mortar bond. You must comb the mortar in straight lines. Never use swirl patterns. Swirls trap air. When you press a tile into swirled mortar, those air pockets have nowhere to go. They stay trapped, reducing your bond strength by up to 50 percent. When I set a large slab, I always pull it back up once or twice to check the back. If I do not see 95 percent coverage with no visible ridges, I know I need a larger notch or more consistent pressure.
| Tile Size | Trowel Notch Size | Minimum Coverage Requirement |
|---|---|---|
| 12×12 inch | 1/4 x 3/8 Square | 80% Dry / 95% Wet |
| 24×24 inch | 1/2 x 1/2 Square | 95% Minimum |
| 12×48 plank | 1/2 x 1/2 U-Notch | 95% Minimum |
| Slab units | Euro-Notch | 100% Preferred |
Choosing the right trowel for large format ceramic and porcelain
Selecting a trowel for large format tile depends on the tile size and the flatness of the substrate. Larger notches provide more height to compensate for minor irregularities. Stainless steel trowels are preferred for their durability and resistance to the corrosive nature of highly modified thin-set mortars.
I prefer a U-notch trowel for most large format work. The rounded ridges collapse more easily than square ridges, which helps in achieving that elusive 95 percent coverage without having to beat the tile into submission. You also have to consider the back of the tile. Many modern porcelain tiles have deep ribs or textures on the back. This is why back-buttering is essential. Back-buttering involves applying a thin, flat layer of mortar to the back of the tile using the flat side of the trowel. This fills those ribs and ensures that the mortar on the floor is bonding to mortar on the tile, rather than trying to wet out a dry, dusty ceramic surface. It is a messy step. It takes more time. It makes your back ache. But it is the difference between a floor that lasts 50 years and one that pops up in three. If you are working in a region with high evaporation rates, like the Southwest, you have to be even faster. The thin-set can skin over in minutes, ruining your bond before you even set the piece.
Chemistry of polymer modified thin set mortar
Modern thin-sets use liquid latex or powdered polymers to increase bond strength and flexibility. For large format tiles, you must use a medium bed mortar designed to support the weight of the tile without sagging. These mortars have a specific crystalline structure that resists shrinkage during the curing process.
The chemistry inside a bag of high-performance mortar is incredible. You have portland cement, graded sands, and cellulose-based water retention agents. Then you add the polymers. These long-chain molecules wrap around the cement crystals as they grow, creating a matrix that is both incredibly strong and slightly flexible. This flexibility is vital. Buildings move. Foundations settle. Temperature changes cause materials to expand and contract. If your mortar is too brittle, it will shear off the subfloor or the tile. This is why I never use cheap, unmodified thin-set for anything larger than a subway tile. Large format tiles exert a lot of leverage on the bond line. When the building moves, that large tile wants to stay put. The mortar has to be the shock absorber. If you are installing over radiant heat, the thermal stress is even higher. You need a mortar that can handle the constant cycling without losing its grip on the substrate.
“Standard thin-set mortars are not designed to bridge the gaps found in large format installations; use only mortars meeting ANSI A118.15 standards for high-performance bonds.” – TCNA Installation Handbook
The 1/8 inch that ruins everything in a shower installation
In shower environments, the management of the 1/8 inch expansion gap at the perimeter and in the corners is the primary defense against grout cracking. This gap must be filled with a 100 percent silicone sealant rather than cementitious grout to allow for structural movement.
I have lost count of how many showers I have had to rip out because someone grouted the corners. Grout is not waterproof. It is a hard, mineral-based filler. When the walls of a house move, even slightly, that hard grout in the corner will crack. Water then gets behind the tile and begins to rot the studs. When using large format tiles in a shower, this problem is magnified. The weight of the tile creates more pressure on the joints. You must leave that 1/8 inch gap at every change of plane. It looks like a small detail, but it is the most common point of failure. I always use a color-matched silicone. It stays flexible. It handles the expansion. It keeps the water where it belongs. People think they can skip this because they used a waterproof backer board, but if the tile starts falling off the wall because the bond was broken by movement, the waterproofing does not matter much anymore.
Comparing tile rigidity to laminate and hardwood floors
The structural behavior of tile differs fundamentally from laminate and hardwood floors because it is a bonded system rather than a floating or mechanically fastened one. Tile relies on a chemical connection to the subfloor, making it more sensitive to substrate deflection and vibration.
If you install hardwood floors, you are usually nailing into a plywood subfloor. The wood can move, expand, and contract with the seasons. Laminate is even more forgiving because the entire floor can shift as one unit. Tile has no such luxury. It is glued to the earth. If the plywood under your tile flexes when you walk on it, the tile will crack. This is why we use the L/360 standard. The floor should not deflect more than the length of the span divided by 360. For natural stone, it is L/720. If I am going over a wood joist system, I almost always add a layer of 1/2 inch exterior grade plywood or a high-quality uncoupling membrane. These membranes are a lifesaver for large format tile. They allow the subfloor to move horizontally without transferring that stress to the tile. It is like a slip-sheet for your floor. It is expensive, but it is cheaper than replacing a cracked porcelain floor.
Pre-installation checklist for large format tile
- Verify subfloor flatness is within 1/8 inch over 10 feet using a certified straightedge.
- Check moisture content of the concrete slab using a calcium chloride test or an electronic meter.
- Confirm that the thin-set mortar is rated for Large and Heavy Tile (LHT) applications.
- Ensure all expansion joints are planned at 20-foot to 25-foot intervals in large rooms.
- Clean the back of all tiles to remove residual factory dust that prevents bonding.
- Select a lippage control system to maintain a level surface across all joints.
The ghost in the expansion gap and how to manage it
Expansion joints are the intentional breaks in a tile field that prevent the floor from tenting or buckling. For large format tiles, these joints must be placed more frequently because the lack of numerous grout lines means there are fewer places for stress to dissipate.
Expansion is a real force of nature. In a large room, the entire mass of the tile and mortar will grow when the sun hits it. If that tile is pushed tight against the walls, it has nowhere to go but up. I once saw a floor in a sunroom that had literally jumped off the slab. It looked like a small mountain range running through the center of the room. The installer had forgotten to leave an expansion gap at the perimeter. They had tucked the tile tight under the baseboards and filled the gap with grout. When the summer heat hit, the floor expanded, hit the walls, and buckled. For large format tile, you should have an expansion joint every 20 to 25 feet in both directions. In areas with lots of sunlight, that should be reduced to every 15 feet. You can use specialized profiles that look like a metal strip with a rubber center. They are subtle, but they save the floor. Never trust the grout to handle the movement. It will fail every time. You need a system that understands the physics of the building. Install the tile, leave the gaps, and use the right materials. That is the only way to ensure the floor you lay today is the floor your client enjoys for the rest of their lives.