
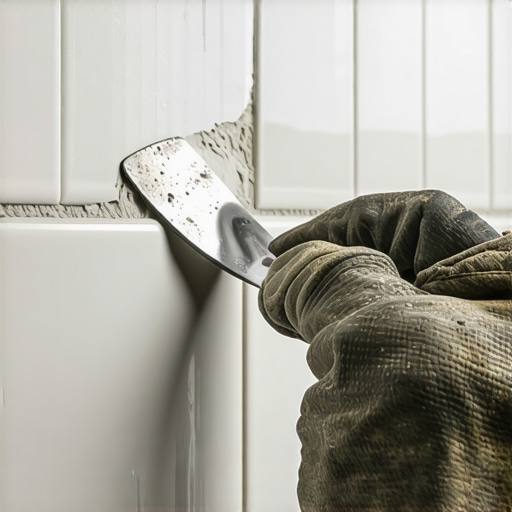
Most guys skip the leveling compound. They think the underlayment will hide the dip. It won’t. I spent three days grinding concrete on a job last month just so the floor wouldn’t click like a castanet. That job taught me that if you do not respect the structural reality of the slab, the finish floor will fail. This same philosophy applies to the smallest details in a bathroom, particularly where the tile meets the vanity or the shower curb. Most installers rely on a standard rubber grout float, but in a tight three-quarter inch gap, that float is as useless as a hammer in a glass shop. You need a tool that offers precision and a specific type of leverage. This is where the six inch stainless steel drywall knife becomes the most important tool in your bag for finishing professional showers and tile installations.
Why your subfloor is lying to you
Subfloor flatness and structural deflection are the primary causes of grout failure in bathrooms. To achieve a TCNA-compliant installation, you must ensure the surface has no more than one eighth inch of variation over ten feet. If the plywood subfloor or concrete slab is uneven, the tile will move under load, causing the polymer-modified grout to crack and eventually turn to dust. I have seen countless homeowners complain about crumbling grout in corners, and nine times out of ten, it is because the installer ignored the dip in the floor. They thought the thin-set would act as a leveler. It does not. Thin-set is an adhesive, not a structural filler. When you are working in those tight corners, the lack of a flat plane makes it impossible to pack the joint correctly with a standard float.
The physics of tight spaces in wet environments
Bathroom corners and shower transitions require a higher density of grout packing because these areas are subject to the highest levels of moisture infiltration and capillary action. If the grout is loosely placed, water will find its way into the porous structure of the cementitious material. By using a stainless steel drywall knife, you can apply concentrated perpendicular pressure that a flexible rubber float cannot provide. This ensures the aggregate within the grout is compressed tightly against the tile edge, creating a mechanical bond that resists water penetration.
“A floor is only as good as the subfloor beneath it; deflection is the enemy of every joint.” – Master Flooring Axiom
Technical comparison of joint fillers
| Material Type | Typical Use Case | Flexibility Rating | Cure Time |
|---|---|---|---|
| Sanded Grout | Joints wider than 1/8 inch | Low | 24-48 Hours |
| Unsanded Grout | Polished stone or narrow joints | Low | 24 Hours |
| Epoxy Grout | High moisture and chemical resistance | Medium | 24 Hours |
| High-Performance Caulk | Expansion joints and corners | High | Variable |
The ghost in the expansion gap
Movement joints and expansion gaps are the only things keeping your hardwood floors or laminate from buckling when the humidity hits eighty percent. In a bathroom, you often see tile meeting a different material. If you grout that transition solid, it will crack. The National Wood Flooring Association specifies that wood needs room to breathe. When we talk about the drywall knife trick, it is strictly for those hard-to-reach internal tile corners where a change of plane doesn’t necessarily require a silicone bead, though TCNA standards often suggest 100 percent silicone for all vertical changes of plane.
A technical guide to the drywall knife method
Grout application in tight quarters requires a tool that can navigate the zero-clearance zones found between cabinets and walls. A six-inch drywall knife provides the flexibility and stiffness needed to force the grout deep into the thin-set cavity without scratching the porcelain glaze. You must use a clean, burr-free blade. Any nick in the metal will leave a streak in your grout line.
- Clean the joint thoroughly with a shop vac to remove all thin-set chunks.
- Mix the grout to a peanut butter consistency, ensuring no dry pockets of pigment remain.
- Load the edge of the drywall knife with roughly two tablespoons of material.
- Press the knife at a 45-degree angle into the corner, dragging it upwards with steady pressure.
- Use the corner of the knife to strike the joint, creating a uniform depth.
- Wipe the excess with a microfiber cloth rather than a dripping wet sponge to avoid washing out the pigment.
The chemistry of modern grout bonds
Hydration and chemical crystallization are the processes that turn a wet paste into a stone-like grout joint. When you use a metal tool like a drywall knife, you are effectively burnishing the surface of the grout as you apply it. This surface compression reduces the porosity of the finished joint. In showers, this is the difference between a floor that lasts twenty years and one that develops mold in six months. The polymer additives in modern grouts are designed to cross-link during the drying phase. If you introduce too much water during the cleanup phase, you dilute these polymers, leaving the grout brittle.
The 1/8 inch that ruins everything
Precision measurements are the hallmark of a master installer. If your tile layout leaves a sliver of tile that is less than one eighth of an inch wide in a corner, your grout will not hold. The surface area for the bond is too small. I always plan my layout from the center of the room to ensure that all perimeter cuts are at least half a tile wide. This gives the grout enough structural mass to resist the lateral forces of the house settling. When you are stuck with a tight corner because of a bad layout, the drywall knife is the only way to pack enough material into that tiny void to give it a fighting chance.
“Proper substrate preparation is the silent partner of every beautiful finish.” – TCNA Installation Handbook
Moisture dynamics and thermal expansion
Hydrostatic pressure and vapor transmission are invisible forces that destroy laminate and hardwood floors near bathroom doors. If your bathroom tile isn’t sealed perfectly at the edges, water will migrate under the transition strip and swell the HDF core of your laminate in the hallway. Using the drywall knife trick ensures that your perimeter grout is packed tight, acting as a secondary moisture barrier. While it is not a substitute for a waterproofing membrane like Kerdi or Wedi, a dense grout joint is your first line of defense.
The hardwood myth in modern bathrooms
Solid oak and bathroom humidity are natural enemies. I have seen wide-plank walnut floors cup until they looked like potato chips because the homeowner insisted on wood in a full bath with no exhaust fan. If you must have the wood look, use a porcelain wood-look tile and grout it with the drywall knife technique to get those minimalist joints that mimic real timber. The Janka hardness scale doesn’t matter if the wood is rotting from the bottom up. Tile is the only logical choice for high-moisture zones, and the quality of that tile is defined by the quality of the grout lines.
Structural integrity of the bond
Adhesive shear strength and grout compression work together to create a monolithic surface. When you use the drywall knife, you are avoiding the suction often created by rubber floats which can actually pull grout back out of a narrow joint as you lift the tool away. The metal blade releases the material more cleanly. This is especially vital when using epoxy grouts, which are incredibly sticky and difficult to manage in tight geometric configurations.
The final strike of the joint
Tooling the joint is the final step in the process. After the grout has sat for about ten to fifteen minutes, take the drywall knife and run it lightly over the joint one last time. This is called striking. It levels the grout with the bevel of the tile. It removes any high spots that would otherwise catch dirt and grime. In a shower, a perfectly struck joint allows water to bead and roll toward the drain instead of pooling in micro-depressions. It will last. It will stay clean. It will prove you knew what you were doing.