
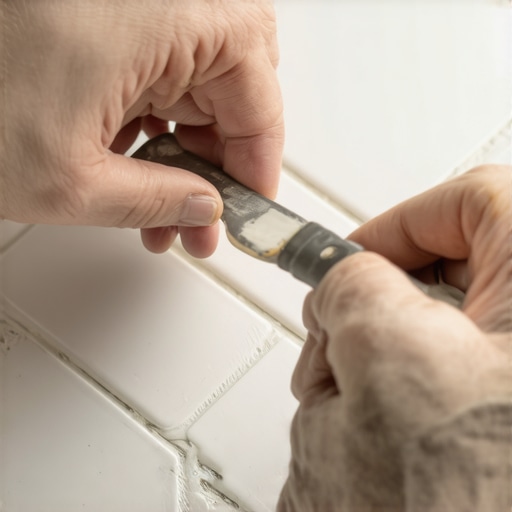
Repairing a chipped porcelain tile requires more than just a smear of hardware store putty. It demands an understanding of the molecular density of the material and the physics of the bond between the repair compound and the vitrified surface. I spent three days grinding concrete on a job last month just so the floor would not click like a castanet, and that same level of obsessive prep is what separates a visible patch from a permanent restoration. Most guys skip the leveling compound and think the underlayment will hide the dip. It will not. In the world of high-end flooring, a chip is a symptom of either an impact or a subfloor deflection issue that needs to be addressed before the aesthetic fix. When a heavy pot falls in a kitchen or a tool drops in a bathroom, the energy has nowhere to go because porcelain is incredibly brittle. This brittleness is a trade-off for its density. Unlike ceramic tile, which is porous and softer, porcelain is fired at extreme temperatures until it reaches a nearly waterproof state. This means your repair material must have an equivalent bond strength to stay put under foot traffic.
The physics of porcelain and why chips occur
Porcelain tile chips occur when concentrated kinetic energy exceeds the material’s internal bond strength, often exacerbated by subfloor voids. To fix this without removal, you must use a repair medium that mimics the refractive index and hardness of the original fired clay. If the tile was installed over a subfloor with too much flex, the repair will eventually pop out. This is why checking for deflection is the first step in any repair process. If you can feel the floor move when you step near the chip, no amount of epoxy will save you. You are dealing with a structural failure of the assembly. I have seen fifteen thousand dollar walnut floors cup like potato chips because of moisture, but porcelain fails through cracks and chips. The TCNA standards are very clear about the amount of support required under large format tiles. If that support is missing, the tile acts like a bridge. When you drop something on that bridge, it snaps. Before you reach for the resin, tap the surrounding tiles with a plastic mallet. A hollow sound means you have a bigger problem than a cosmetic chip.
“A floor is only as good as the subfloor beneath it; deflection is the enemy of every joint.” – Master Flooring Axiom
The chemistry of epoxy resins in tile restoration
Professional tile repair relies on two-part epoxy resins or UV-cured acrylics that create a mechanical and chemical bond with the porcelain edges. These materials are chosen for their shrinkage rates and their ability to accept pigments. Most DIY kits use a single-part air-dry filler, which is a mistake. As the water or solvent evaporates from a single-part filler, the material shrinks, leaving a concave divot that collects dirt and eventually peels. A two-part epoxy undergoes a chemical reaction that creates a stable, non-shrinking mass. You need to look for a resin with a high shore D hardness rating once cured. This ensures that the patch can withstand the pressure of high heels or furniture legs without indenting. When mixing your resin, the ratio must be exact. Too much hardener and the patch becomes brittle and yellows over time. Too little and it remains tacky, attracting every bit of dust and pet hair in the house. I always tell my apprentices that the mix is the most important part of the job. You want a consistency like thick honey before you add your pigments.
The anatomy of a professional repair kit
A proper kit includes several components that go beyond the filler itself. You need a degreaser, a variety of pigments, the resin, and multiple grits of sandpaper.
| Material Type | Best Use Case | Cure Time | Durability |
|---|---|---|---|
| UV-Cured Acrylic | Small chips, high gloss | Seconds | Medium |
| Two-Part Epoxy | Deep gouges, high traffic | 24 Hours | High |
| Polyester Resin | Vertical surfaces, walls | 20 Minutes | Medium-High |
| Cyanoacrylate | Fine hairline cracks | Instant | Low |
This table shows that for a floor, the two-part epoxy is the king of durability. While the cure time is longer, the result is a patch that will likely outlast the rest of the house. You also need to consider the finish of your tile. A matte tile requires a different sanding technique than a polished porcelain. For polished surfaces, you will need to go up to a three thousand grit diamond pad to match the factory sheen.
The step by step decontamination process
Decontamination is the removal of all oils, waxes, and grout residues from the chip site to ensure maximum adhesion. Use denatured alcohol or a high-strength acetone. Do not use mineral spirits, as they leave an oily film that will kill your bond. You need to scrub the interior of the chip with a stiff nylon brush. If the chip is old, it likely has floor wax or mopping chemicals embedded in the pores. If you do not get those out, your repair will peel off within a month. I once worked a job where a previous contractor tried to fix a chip without cleaning it. The epoxy just sat on top of the grime like a scab. I had to pop it off with a putty knife and start from scratch. After cleaning, use a hair dryer to ensure there is zero moisture trapped in the tile. Even a microscopic amount of water will cause the epoxy to cloud and fail. This is the zooming into the chemistry that most people ignore. The surface tension of the alcohol helps pull contaminants out of the microscopic fissures in the ceramic body. Once the site is bone dry, you are ready for the primer or the first layer of resin.
Color matching and the art of camouflage
Color matching involves layering primary pigments into a clear base resin to mimic the variegated patterns found in modern porcelain. Most porcelain today is inkjet printed to look like stone or wood. It is not a solid color. If you just use a flat white or beige, it will look like a piece of gum stuck to the floor. You need to start with a base color that matches the lightest part of the tile. Then, you use a fine brush or a toothpick to swirl in darker veins or flecks. This is where the artistic side of the trade comes in. You are essentially painting a miniature landscape inside a quarter-inch hole. Watch the way the light hits the tile. Porcelain has a specific depth to its glaze. To replicate this, some pros use a translucent top layer over their colored base. This creates a 3D effect that tricks the eye into seeing a solid surface. If you are working on a marble-look porcelain, you will need at least three shades of gray and a hint of ochre to get it right. It takes patience and a steady hand. If you mess up the color, wipe it out with acetone before it cures and start over.
“Consistency in subfloor preparation prevents the mechanical stress that leads to porcelain fracture.” – TCNA Technical Bulletin
Leveling and the final finish
Leveling the repair involves overfilling the chip slightly and then sanding it perfectly flush with the surrounding tile surface. You cannot just trowel it flat and walk away. Because of surface tension, the resin will naturally pull away from the edges as it sets. Overfill it so there is a slight mound. Once it is fully cured, use a leveling block. Do not use your fingers to hold the sandpaper, as your soft finger pads will sand the patch into a bowl shape. A hard block ensures you are only taking down the high spots. Start with four hundred grit wet-dry paper and work your way up. If the tile is textured, you might need to use a dremel tool with a fine engraving bit to recreate the grain or the pits of the stone. This is tedious work, but it is what makes the repair invisible. After sanding, use a polishing compound to bring back the luster. If the tile is matte, you might need to knock back the gloss of the epoxy with a bit of steel wool. The goal is to match the light reflection of the surrounding area perfectly.
Why your subfloor is lying to you
Many homeowners think their floors are solid until they start seeing chips near the grout lines or in the center of high-traffic paths. This is often due to a lack of thin-set coverage, known in the trade as ‘bridging.’ If the installer did not use a notched trowel correctly or failed to back-butter the tiles, there are air pockets underneath. When you walk over these pockets, the tile flexes just a few microns. Over time, this fatigue causes the porcelain to fail. A chip is often the first warning sign. While you can fix the chip, you should also check for loose grout or a hollow sound. If the whole floor is moving, the chip repair is just a cosmetic bandage on a structural wound. In my years of experience, I have found that cheap underlayments that promise too much cushion are often the culprit. While most people want the thickest underlayment for comfort, too much cushion actually causes the locking mechanisms on LVP to snap and causes tile grout to crumble. Tile needs a rigid, dead-flat surface. If your subfloor is plywood, it needs to be at least an inch and a quarter thick total to meet the L/360 deflection standard for tile. If it is concrete, it needs to be ground flat to within an eighth of an inch over ten feet.
Maintenance and long term care of repaired tile
Once the repair is complete, you must treat it with respect. While the epoxy is hard, it is not as hard as the original porcelain. Avoid using harsh acidic cleaners like vinegar or bleach on the patch, as these can break down the resin over time. Stick to pH-neutral cleaners.
- Wait at least 48 hours before deep cleaning the area.
- Avoid dragging heavy furniture across the repaired site.
- Use felt pads on all chair legs to prevent point-load pressure.
- Check the repair annually for any signs of lifting or yellowing.
- Keep the grout lines clean to prevent moisture from seeping under the tile edges.
Following these steps will ensure that your repair stays intact for years. If you notice the patch starts to look dull, you can usually buff it back to life with a tiny amount of automotive polishing compound. The key is to catch any issues early before the bond is fully compromised.