
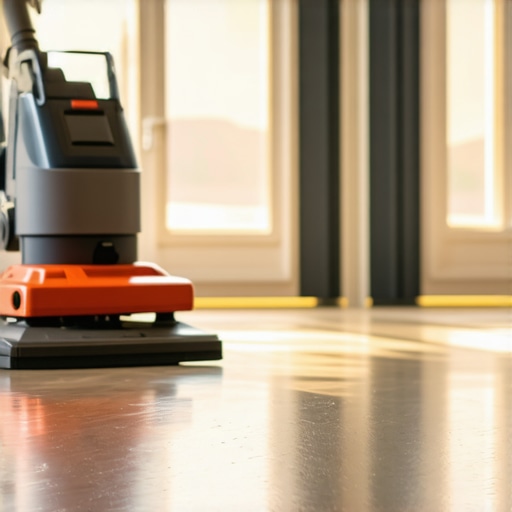
Dustless Sanding Secrets from a Hardwood Veteran
I once walked into a house where a $15,000 wide-plank walnut floor was cupping so bad it looked like a potato chip because the installer didn’t check the crawlspace humidity. It was a wreck. But even worse than the cupping was the layer of fine gray silt covering every surface in the home. The previous crew had promised a dustless finish and failed. I have spent twenty-five years on my knees with a moisture meter and a level, and I can tell you that a floor is a performance surface. It is not a decoration. When you sand hardwood, you are engaging in a violent mechanical removal of wood fiber. If you do not control the physics of those particles, they will haunt your HVAC system for a decade. My hands smell like WD-40 and red oak. I do not care about the latest trends in gray stain. I care about the structural integrity of the wear layer and the micron count of the airborne particulates. Sanding is an engineering challenge, not a weekend hobby. If you get it wrong, you are not just making a mess, you are ruining the air quality of your sanctuary.
The myth of the dustless guarantee
Dustless sanding is achieved through high-powered portable containment systems that connect directly to the sanding equipment, creating a vacuum seal at the point of contact. This prevents over 99 percent of wood dust from entering the air by utilizing HEPA filtration and long-distance hoses that vent outside or into sealed tanks. Many contractors claim to be dust-free but simply strap a bag to their 220-volt drum sander. That is a lie. A bag is a filter that leaks. True dust containment requires a suction motor that can pull at least 200 cubic feet per minute (CFM) of air. When the abrasive paper hits the wood at 1,800 RPM, the friction creates heat and dust. If that dust is not instantly captured, it becomes an aerosol. It floats. It finds its way into your closets, your vents, and your lungs. Unlike the static environment of showers where grout is applied in a wet state, wood sanding is a dry, high-velocity operation. It demands a level of vacuum pressure that most residential equipment cannot provide.
“A floor is only as good as the subfloor beneath it; deflection is the enemy of every joint.” – Master Flooring Axiom
The physics of wood dust and micron levels
Wood dust particles are categorized by their size in microns, where particles smaller than 10 microns are respirable and can penetrate deep into the lungs. Professional sanding equipment utilizes HEPA filters rated to capture 99.97 percent of particles as small as 0.3 microns, ensuring the air remains safe. When you sand a hardwood floors surface, you are creating a spectrum of debris. The heavy stuff falls. The light stuff stays airborne for hours. If you are used to the laminate world where you just click planks together, the sheer volume of waste generated by a site-finished wood floor will shock you. A standard 500-square-foot room can produce several pounds of wood flour. This flour is highly flammable and extremely invasive. If the vacuum pressure drops even for a second, the dust escapes the shroud of the machine. This is why I use a triple-motor vacuum system. It creates a negative pressure zone under the sanding drum. The air is sucked into the machine faster than the dust can escape the centrifugal force of the rotating sandpaper.
Why your subfloor is lying to you
A subfloor must be flat within 3/16 of an inch over a 10-foot radius to ensure the sanding drum makes consistent contact with the surface. Any dips or crowns in the plywood or concrete will result in uneven sanding marks, also known as chatter or waves, which become visible after the finish is applied. I spent three days grinding concrete on a job last month just so the floor wouldn’t click like a castanet. If the subfloor is not level, the sander will skip. When the sander skips, it creates dust that the vacuum shroud cannot catch because the seal is broken. Most guys think the underlayment will hide the dip. It won’t. While most people want the thickest underlayment, too much cushion actually causes the locking mechanisms on modern floors to snap under pressure. For solid wood, the subfloor is the foundation. If that foundation is uneven, your sanding will be a disaster. You will end up over-sanding the high spots, eating through the wear layer, and leaving the low spots with old finish. It is a mechanical failure that no amount of fancy stain can hide.
The grit sequence and abrasive chemistry
The standard grit sequence for hardwood refinishing follows a progression of 36, 60, 80, and 100 grit to incrementally smooth the wood fibers. Skipping a grit level prevents the removal of scratches from the previous stage, leading to a botched finish that highlights every mechanical error. Each grit serves a specific structural purpose. The 36-grit is the bulldozer. It levels the boards and removes the old polyurethane. The 60-grit removes the deep scratches from the 36. The 80 and 100 grit prepare the wood cells to accept the sealer. If you go from 36 straight to 80, you are leaving canyons in the wood. This is where the chemistry comes in. Wood is a bundle of straws. When you sand, you are cutting those straws. If you dull the straws instead of cutting them cleanly, they will not soak up the finish evenly. I prefer ceramic abrasives. They stay sharp longer and generate less heat. Heat is the enemy. Heat melts the old finish, turning it into a gummy residue that clogs the vacuum ports. When the ports clog, the dust returns to your living room. It is a vicious cycle of poor equipment and poor technique.
| Equipment Type | CFM Rating | Micron Filtration | Best Use Case |
|---|---|---|---|
| Standard Shop Vac | 90 | 10.0 | Small repairs only |
| Professional Buffer | 130 | 1.0 | Final polishing |
| Triple-Motor Vacuum | 290 | 0.3 | Whole house sanding |
| Truck-Mount Unit | 450 | 0.1 | Industrial containment |
The ghost in the expansion gap
Expansion gaps are essential perimeter spaces of at least 1/2 inch that allow hardwood floors to expand and contract with seasonal humidity changes. Without these gaps, the floor will buckle or crown, putting immense pressure on the fasteners and the subfloor. I have seen floors rip the baseboards off the wall because there was no room to move. When sanding, these gaps become dust traps. If you do not vacuum the perimeter gaps with a specialized crevice tool, the first time your HVAC turns on, it will blow all that trapped dust onto your wet finish. It is the ghost that ruins a perfect job. You think you are clean, but the dust is hiding. I use a high-velocity blower to clear the gaps before the final coat. It is about controlling the environment. You have to think like a clean-room technician. In showers, we worry about water leaks. In wood flooring, we worry about air leaks. A single speck of dust in the finish will feel like a mountain under a sock. It is about the tactile reality of the surface.
“Wood is a hygroscopic material, meaning it gains or loses moisture to remain in equilibrium with its environment.” – NWFA Technical Manual
The 1/8 inch that ruins everything
Precision in flooring is measured in increments of 1/8 inch, particularly regarding the height of transitions and the depth of the sanding cut. Removing more than 1/8 inch of the wear layer during a single refinishing project significantly shortens the lifespan of the floor. People get aggressive. They want to remove every dent and ding. But you have to respect the wear layer. If you sand too deep, you hit the tongues and grooves. Then the floor is garbage. You have to balance the aesthetics with the structural lifespan. This is why I use a multi-disc orbital sander for the final passes. It is more forgiving than a drum sander. It levels the wood without gouging. It also has a better dust shroud. The physics of an orbital motion allows the vacuum to grab the dust from multiple angles. It is a superior way to finish. If you are looking for that glass-smooth look, you cannot rush the process. You have to listen to the machine. The sound of the sander tells you when the paper is spent or when you are hitting a loose nail.
- Remove all furniture and soft goods from the work zone.
- Seal all HVAC supply and return registers with 4-mil plastic.
- Verify that the moisture content of the wood is within 2 percent of the subfloor.
- Inspect the drum sander for any flat spots on the rubber wheel.
- Use a dedicated 20-amp circuit for the vacuum system to prevent power drops.
- Wear a P100 respirator even if the system is rated as dustless.
The airtight seal strategy
Sealing the work area involves using plastic barriers and tape to isolate the room, but the most effective method is creating negative air pressure within the space. By venting a high-volume fan out a window, you ensure that any escaped dust is pulled outside rather than into the rest of the home. I don’t trust plastic alone. Static electricity makes dust stick to the plastic, and the moment you peel it down, the dust falls. You need airflow. You need to understand how air moves through a house. If the kitchen is open to the living room, you have to build a temporary wall. Use zip-poles. Use heavy-duty tape. But most importantly, keep that vacuum running. A professional dust containment system is not just a vacuum. It is a localized cyclonic separator. It spins the air to drop the heavy particles into a bag before the fine dust ever hits the filter. This keeps the suction at maximum. If the suction drops, you might as well be sanding with a handheld block and a prayer. It is about the relentless pursuit of containment. My goal is for the homeowner to walk in and not even know I was there, except for the beautiful, level, perfectly smooth oak under their feet. No dust. No excuses. Just engineering.