
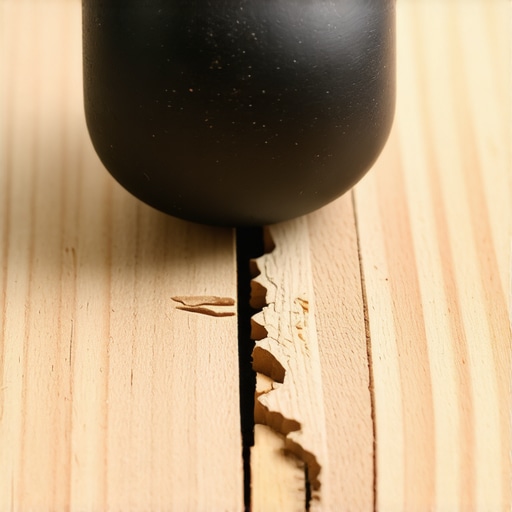
A floor is not a decoration; it is a structural performance surface that must withstand thousands of pounds of kinetic energy over its lifespan. Most homeowners and amateur installers walk into a room with a box of click-lock planks and a rubber mallet thinking they are just assembling a giant puzzle. They are wrong. They are engaging in a high-stakes engineering project where the tolerances are measured in microns. My hands are stained with the residue of a thousand installations and my ears still ring with the sound of snapping HDF tongues. I have spent twenty-five years on my knees corrected the sins of those who think a hammer is the solution to a milling problem. Most guys skip the leveling compound. They think the underlayment will hide the dip. It won’t. I spent three days grinding concrete on a job last month just so the floor wouldn’t click like a castanet because the substrate had a three-quarter inch trough that no foam pad could ever bridge. If you do not respect the physics of the subfloor, the floor will eventually break you. This article will break down the molecular reality of laminate failure and why your choice of tool is the difference between a lifetime warranty and a pile of expensive trash.
The structural physics of a click lock
Laminate locking mechanisms rely on the structural integrity of high density fiberboard tongues to maintain a tension-based seal. When these microscopic fibers are compressed or sheared by an improper mallet strike, the joint loses its ability to resist vertical deflection. This results in the dreaded floor gap.
“A floor is only as good as the subfloor beneath it; deflection is the enemy of every joint.” – Master Flooring Axiom
The core of a laminate plank is composed of compressed wood fibers bound together by phenolic resins. Unlike solid hardwood floors that have natural grain flexibility, high-density fiberboard or HDF is brittle. It is designed to resist compression from above, not lateral impact from a heavy rubber head. When you swing a standard black rubber mallet against a tapping block, the energy transfer is often uneven. A black rubber mallet has a high rebound coefficient. This means a portion of the energy bounces back into your wrist while the rest creates a shockwave that travels through the tapping block and into the delicate 2mm tongue of the plank. If the plank is even slightly misaligned, that shockwave does not slide the plank into place. Instead, it creates a fracture line at the base of the tongue. You might not see it immediately. The floor might look tight for a week. But as the seasons change and the house breathes, that fracture expands. Eventually, the tongue shears off completely, leaving the joint to float freely and eventually fail.
Why your subfloor is lying to you
Subfloor flatness is the single most ignored specification in the flooring industry despite being the leading cause of locking system failure. Most manufacturers require a floor to be flat within one-eighth of an inch over a ten-foot radius to prevent excessive joint stress. When a subfloor has a dip or a high spot, the laminate plank acts like a bridge. Every time you step on that bridge, the locking mechanism undergoes a cycle of vertical deflection. Imagine taking a paperclip and bending it back and forth. Eventually, it snaps. The same thing happens to the HDF tongue in your laminate. This is why I obsess over the concrete slab. If I see a hump, I am out there with a diamond cup wheel and a vacuum system. I do not care if it takes an extra day. I have seen fifteen thousand dollar wide-plank walnut floors cup like potato chips because the installer ignored the crawlspace humidity, but laminate is even less forgiving of substrate issues. Hardwood floors can sometimes be sanded and refinished to hide a mistake; laminate is a one-shot deal. If the substrate is trash, the floor is trash.
The microscopic impact of a five pound swing
The kinetic energy produced by a standard mallet strike can exceed the shear strength of the melamine wear layer and the HDF core. Using a dead-blow hammer filled with steel shot is the only professional way to ensure the energy stays in the plank rather than bouncing. When you hit a tapping block, the goal is move the entire mass of the plank forward as a single unit. If the mallet is too soft, the impact duration is too long, which allows the energy to dissipate into the top edge of the plank rather than the locking tongue. This leads to mushrooming where the decorative layer peels back. It is a hideous mistake that cannot be repaired with wood filler or grout. Speaking of grout, people often ask if they can use it to fix gaps in laminate. The answer is a hard no. Grout is for showers and tile installations where the substrate is rigid. Laminate is a floating system. It moves. It expands and contracts with the relative humidity of the room. If you put grout in a laminate joint, the floor will crush that grout into powder the first time the temperature drops. Or worse, the grout will act as a wedge and force the joints to buckle.
Chemical composition of modern laminate cores
Modern laminate flooring uses urea-formaldehyde or methyl diphenyl diisocyanate resins to bond wood fibers into a dense substrate. These resins provide the hardness required for an AC4 or AC5 durability rating but they also make the material less elastic than natural timber. Because the material is so dense, it does not absorb impact energy. It transfers it. This is why the precision of the mallet strike is so vital. If the strike is off-center, the force is concentrated on a tiny area of the profiling. In my twenty-five years, I have seen tongues that looked like they were chewed by a dog because the installer was too aggressive with a rubber mallet. You are not driving a stake into the ground; you are coaxing two precision-milled parts to engage. If you have to hit it hard, something is wrong. Usually, there is debris in the groove or the subfloor is not level. Stop hitting it and find the problem.
| Material Property | Laminate (HDF) | Engineered Wood | Solid White Oak |
|---|---|---|---|
| Janka Hardness | N/A (Wear Layer Varies) | 1200 – 1400 | 1360 |
| Expansion Rate | Low to Medium | Low | High |
| Impact Resistance | Brittle | Moderate | High |
| Acclimation Time | 48 Hours | 72 Hours | 7-14 Days |
| Moisture Tolerance | Limited | Moderate | Low |
The ghost in the expansion gap
Leaving a half-inch expansion gap around the perimeter of the room is the only way to prevent the floor from self-destructing. A floating floor is a single large sheet of material that grows and shrinks as a unit throughout the year. If you pin that floor down by installing kitchen islands on top of it or by jamming it tight against the drywall, it has nowhere to go. When the humidity rises, the floor will bow upward in the center of the room. This puts immense pressure on the locking tongues. If you have already weakened those tongues by hitting them too hard with a rubber mallet during installation, they will snap under the pressure of the expansion. I have walked into houses where the floor was a full two inches off the subfloor because the installer didn’t leave a gap at the baseboards. It looks like a bubble in the middle of the room. At that point, the floor is ruined. You cannot just cut the edges and hope it lays flat; the locking mechanisms have already been stressed beyond their elastic limit.
The moisture vapor variable in laminate failure
Hydrostatic pressure from a concrete slab can turn a high-quality laminate floor into a bloated mess within weeks if a vapor barrier is missing. Even if a slab feels dry to the touch, it is constantly emitting moisture vapor. This vapor gets trapped under the laminate and is absorbed by the HDF core. The tongue and groove are the most vulnerable parts of the plank because they lack the protective melamine coating found on the surface. When the tongue absorbs moisture, it swells. A swollen tongue will no longer fit into the groove. If the installer tries to force a swollen tongue into a groove with a rubber mallet, the tongue will shatter.
“Moisture is the silent killer of every flooring installation; ignore the meter at your own peril.” – TCNA Handbook Insight
This is why I never start a job without my moisture meter. If the slab is over 3% moisture content, we are not laying floor. We are waiting, or we are applying a liquid moisture barrier. I don’t care how fast the homeowner wants the job done. I am not putting my name on a floor that is going to fail because the concrete is still breathing.
The 1/8 inch that ruins everything
A single pebble or a staple left on the subfloor will create a pivot point that eventually destroys the surrounding planks. Cleanliness is the mark of a master installer. I spend more time with a vacuum and a scraper than I do with a saw. If a piece of debris is trapped under the underlayment, every step taken on that plank focuses the entire weight of the person onto that one spot. The plank will flex around the debris, causing the locking mechanism to rub against the adjacent plank. This creates a squeaking sound that will drive a homeowner insane. Over time, that friction wears down the HDF tongue until it turns to dust. This is why I tell my apprentices that the prep is the job. The actual clicking of the planks is just the victory lap. If you treat the prep like an afterthought, your floor will sound like a haunted house within six months. This is especially true in areas near showers where humidity is higher and the wood fibers are more prone to movement.
The installation checklist for professional results
- Verify subfloor flatness within 1/8 inch over a 10 foot span.
- Acclimate planks in the installation room for at least 48 hours at 65 to 75 degrees Fahrenheit.
- Install a 6-mil polyethylene vapor barrier over all concrete substrates.
- Use a dead-blow hammer and a professional-grade tapping block to protect the HDF tongues.
- Maintain a 1/2 inch expansion gap around the entire perimeter and all vertical obstructions.
- Check the milling of every plank for debris or damage before clicking it into place.
- Ensure the relative humidity of the room stays between 35% and 55% year-round.
Hardwood floors versus high end laminate
While solid hardwood floors offer a classic aesthetic, high-end laminate can exceed the scratch resistance of oak by a factor of ten. The mistake people make is treating laminate like it is as tough as it looks. The surface is tough, yes. You can drag a chair across an AC5 laminate and it won’t leave a mark. But the skeleton of the floor is fragile. Hardwood floors are resilient because the entire plank is the same material. Laminate is a composite. It is an engineered system that requires the installer to understand the limitations of the core material. When I am working on a site-finished oak floor, I am worried about the sander and the stain. When I am working on laminate, I am worried about the mallet and the subfloor. They are different disciplines entirely. One is an art of finish; the other is an art of precision engineering. If you treat laminate with the same brute force you might use on a subfloor repair, you will regret it. Respect the tongue, use the right mallet, and keep the subfloor flat. That is the only way to build a floor that lasts.