
The physics of the irregular edge
Scribing hardwood floors to a stone fireplace requires a precise mechanical transfer of irregular contours onto a linear plank. This process ensures a tight-tolerance fit that accounts for wood expansion while maintaining the structural integrity of the installation perimeter according to NWFA standards for natural materials. Most guys skip the leveling compound. They think the underlayment will hide the dip. It won’t. I spent three days grinding concrete on a job last month just so the floor wouldn’t click like a castanet. When you are dealing with a stone fireplace, the subfloor must be perfectly planar because any vertical movement will highlight a poor scribe instantly. You can’t hide a 1/8 inch gap against a rustic fieldstone hearth. The shadows will betray you every time the sun hits that room.
The ghost in the expansion gap
Expansion gaps are the non-negotiable voids required between hardwood floors and vertical obstructions to prevent buckling or cupping. For a stone fireplace scribe, this gap is often hidden through undercutting or a meticulous fit that allows for seasonal movement of the organic wood fibers. It will move. Wood is a hygroscopic material. It breathes. If you pin it against the stone, the floor will lift in the center of the room during a humid summer. I have seen wide-plank walnut floors ruin an entire joist system because the installer forgot that stone does not move but wood does. You have to respect the chemistry of the environment. In a room with a fireplace, you have localized heat which dries out the wood faster than the rest of the house. This creates a micro-climate that demands even more precision. Unlike tile in showers where grout can mask a slight error, wood has no filler that looks natural against stone. The fit must be perfect from the start.
“A floor is only as good as the subfloor beneath it; deflection is the enemy of every joint.” – Master Flooring Axiom
Tools that define the master
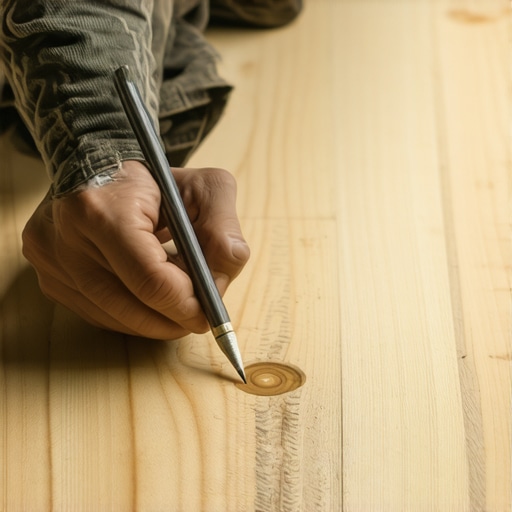
Professional scribing tools include offset compasses, parallel tracers, and high-TPI jigsaw blades designed for hardwood species. Utilizing a weighted compass allows the installer to translate stone protrusions onto the surface of the wood with mathematical accuracy, ensuring a minimalist aesthetic without bulky moldings. You need a sharp pencil. Not a construction crayon. A 2H lead that stays crisp. When I am tracing the face of a jagged granite hearth, I am looking for the highest point of relief. That point dictates my offset. I use a dedicated scribing tool with a brass thumbnut. It feels heavy in the hand. It doesn’t wiggle. If your tool flexes, your line is garbage. You might as well be guessing. I also keep a set of cabinetmaker’s files nearby. A jigsaw gets you 95 percent of the way there, but the last 5 percent is hand-work. It is the difference between a floor that looks like it grew out of the stone and one that looks like it was dropped next to it.
| Material Type | Expansion Coefficient | Scribing Difficulty | Recommended Tool |
|---|---|---|---|
| Solid White Oak | High | Moderate | Carbide Jigsaw Blade |
| Engineered Maple | Medium | High | Fine Tooth File |
| Laminate | Low | Very High | Diamond Blade |
| LVP (Vinyl) | High (Thermal) | Low | Utility Knife |
Why your subfloor is lying to you
Subfloor planarity is the foundation of a successful scribe because any vertical deflection will cause the scribed edge to rub against the stone. Using a 10-foot straightedge to identify dips and crowns is the only way to ensure the hardwood planks remain perfectly flush with the fireplace hearth. I’ve walked onto jobs where the homeowner complained about their laminate floors clicking. It’s always the same story. The installer thought the foam pad would bridge a half-inch valley in the plywood. It doesn’t happen. In my world, we grind or we pour. If that subfloor isn’t flat within 3/16 of an inch over 10 feet, I am not laying a single board. Especially not near a fireplace. If the board tips even slightly toward the stone, the scribe line you spent an hour cutting will now be at the wrong angle. It will look like a hack job. Precision is a vertical and horizontal commitment. You cannot have one without the other.
The molecular reality of the cut
Severing wood fibers during the scribing process requires an understanding of grain direction and blade oscillation. A down-cut jigsaw blade prevents splintering of the wear layer, while a slight back-bevel allows the top edge of the hardwood to seat tightly against the irregular stone surface. When you cut, you aren’t just following a line. You are managing the structural integrity of the plank. I always cut with a 5-degree back-bevel. This means the bottom of the board is slightly shorter than the top. This trick allows the visible edge to touch the stone while leaving a tiny bit of breathing room underneath for any grit or small stone spurs. It makes the fit look tighter than it actually is. It’s a psychological trick of the trade. If you cut it square, any tiny pebble in the stone face will hold the whole board back. We don’t want that. We want it to look like the wood melted into the rock.
- Check moisture content of both subfloor and hardwood (must be within 2 percent).
- Vacuum the stone face to remove loose mortar or dust.
- Acclimate the wood in the room for at least 7 days.
- Secure the starting row with a laser line to prevent drift.
- Use a blue painter’s tape on the board surface to prevent pencil marks from staining the finish.
Why laminate fails where wood triumphs
Laminate flooring lacks the density and repairability required for a deep structural scribe against heavy stone fireplace surrounds. Because laminate is a photograph over a fiberboard core, scribing the edge exposes the yellowish HDF center, which cannot be stained or sanded to match the decorative surface. Hardwood is different. It is honest. If I scribe a piece of solid oak, the edge I expose is still oak. I can hit it with a bit of matching stain or a wax pencil and it disappears. Laminate is a different beast. If you try to scribe laminate to a jagged fireplace, you end up with a frayed, ugly edge that absorbs moisture like a sponge. If a homeowner spills a drink near that hearth, the laminate will swell and pop. This is why I always push for real wood or at least a high-quality engineered product with a thick wear layer. You need material that can handle the knife.
“Wood moves. Stone stays. The scribe is the peace treaty between the two.” – NWFA Installation Guide
The final verification of the fit
Validating the scribe involves dry-fitting the plank and checking for uniformity across the entire length of the fireplace hearth. A master installer uses a feeler gauge or a simple business card to ensure the expansion gap is consistent and sufficient for the local climate conditions. It must fit. There is no room for error. If I can see a gap wider than a credit card, I am doing it over. I’ve spent twenty-five years on my knees. My back hurts and my hands are dry from the oak dust, but when I stand up and see a floor that runs right into a fieldstone fireplace without a single piece of ugly quarter-round molding, it’s worth it. That is the mark of a pro. It isn’t about how fast you can click the boards together. It is about how you handle the obstacles. The fireplace is the ultimate obstacle. It is the test of your patience and your tools. Don’t rush it. Take the time to grind the subfloor. Take the time to sharpen your pencil. The floor will be there long after you are gone. Make sure it doesn’t click.