
The brutal reality of large format tile geometry
Large format tiles demand a perfectly flat subfloor because their inflexibility makes any vertical deviation in the concrete slab or plywood underlayment visible as lippage. High quality thinset mortar and plastic horseshoe shims are the only defense against uneven grout lines and tripping hazards in modern showers. Most guys skip the leveling compound. They think the underlayment will hide the dip. It won’t. I spent three days grinding concrete on a job last month just so the floor wouldn’t click like a castanet. When you are dealing with a 24 by 48 inch porcelain plank, a sixteenth of an inch is the difference between a high end finish and a total tear out. You cannot hide structural failure with pretty ceramic. The physics of the bond depend on the flatness of the substrate. If you have a hump in the middle of the room, that tile is going to rock like a see-saw until it snaps. I have seen it happen on million dollar builds where the installer was too lazy to pull a string line. They rely on the clip system to do the work. Clips are great, but they are not magic. They are meant to align edges, not to bridge a canyon in the subfloor.
Why your subfloor is lying to you
Subfloor flatness is rarely within the ANSI A108.02 standards which require no more than one eighth inch variation over ten feet for large format tile. If your subfloor has deflection, the grout will eventually crackle and pop out of the joints because the structural integrity is compromised. I smell the oak dust on my clothes and remember the time a client asked why I was spending so much time with a straight edge. It is because wood moves and concrete shrinks. A slab poured six months ago is still losing moisture. As it loses moisture, it curls. If you thinset a massive tile directly to a curling slab without a decoupling membrane and proper leveling, you are just waiting for a disaster. The industry calls it lippage. I call it a failure of preparation. You need to verify the floor with a ten foot level. If you see light under that level, you have work to do. Self-leveling underlayment is your best friend here, but even that requires a primer to ensure the bond is not ruined by the dust of the old floor. Don’t even get me started on hardwood floors that people try to tile over. It is a recipe for heartbreak.
“A floor is only as good as the subfloor beneath it; deflection is the enemy of every joint.” – Master Flooring Axiom
The microscopic physics of thinset shrinkage
Thinset mortar undergoes chemical hydration as it cures, which causes microscopic shrinkage that can pull large format tiles out of alignment if not properly shredded or shimmed. Using a medium bed mortar specifically designed for heavy tile is mandatory to prevent slumping during the drying process. When the water leaves the mortar, the volume decreases. For a small subway tile, this is irrelevant. For a tile that weighs forty pounds, it is everything. This is where the plastic shim secret comes into play. Most installers use a leveling clip and call it a day. But a clip only pulls the tiles together. It does not account for the slump that happens as the mortar sets. By inserting a 1/32 inch horseshoe shim under the base of the clip, you create a mechanical stop. It prevents the tile from sinking further than you intended. It is a trick I learned from an old school guy who worked in cathedrals. He used lead scraps, but plastic shims are more consistent today. You are essentially pre-loading the tension of the tile so the mortar can’t win the tug of war as it dries.
[IMAGE_PLACEHOLDER]
The plastic shim secret and the art of the tiny adjustment
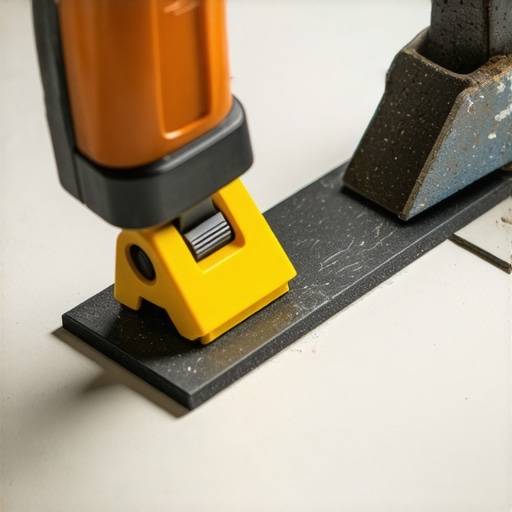
Plastic horseshoe shims allow for micro-adjustments of 1/32 inch or 1/16 inch which are essential when calibrating the height of large format tiles. These shims prevent the tile leveling system from over-tensioning and ensure consistent grout joints even when tile thickness varies slightly between manufacturing batches. Sometimes you get a box of tile where the edges are slightly rectified differently. If you just crank down on the leveling wedge, you might actually bow the tile. Porcelain is strong, but it has a breaking point under tension. By sliding a shim under the clip on the low side, you provide a firm foundation. It is like shimming a cabinet. You are building a flat plane out of imperfect materials. I keep a bucket of blue, red, and yellow shims in my truck at all times. They are more important than my spacers. I have seen guys try to use cardboard or pieces of the tile box. That is amateur hour. Cardboard compresses when it gets wet from the mortar. Plastic stays true. It does not compress. It does not rot. It is the silent partner in a flat floor.
Lippage and the light test
Lippage is the vertical displacement between adjacent tiles and is most visible under low-angle lighting common in modern bathrooms. To eliminate lippage, installers must use directional troweling and back-buttering techniques to ensure 95 percent mortar coverage for wet areas like showers. If you want to see how bad a floor is, turn off the overhead lights and put a flashlight on the floor. Every shadow looks like a mountain. That is what your guests will see when the sun hits the bathroom door. This is why the shim is the secret weapon. You can’t always fix the slab perfectly. But you can manipulate the tile. I spent an entire afternoon once just shimming the edges of a walk in shower. The plumber had messed up the slope and I had to make the transition look natural without a huge trip hazard at the drain. Without those shims, I would have had to tell the homeowner the floor was going to look like a staircase. We don’t do staircases on floors. We do flat.
| Tile Size (Inches) | Allowable Variation (10ft) | Recommended Mortar Type | Shim Thickness Needed |
|---|---|---|---|
| 12×12 Ceramic | 1/4 Inch | Standard Thinset | None |
| 24×24 Porcelain | 1/8 Inch | Medium Bed Mortar | 1/32 Inch |
| 48×48 Large Format | 1/8 Inch | High-Polymer Modified | 1/16 Inch |
| 6×36 Wood Plank | 1/8 Inch | Non-Sag Mortar | 1/32 Inch |
Structural deflection and the bathroom floor
Structural deflection refers to the flexing of floor joists under live and dead loads, which must be minimized to L/720 for natural stone or L/360 for ceramic tile. If the subfloor moves, even the best plastic shims and leveling clips will not prevent grout failure or tile cracking over time. You have to look at the bones of the house. If I walk across the room and the china in the cabinet rattles, I am not laying tile yet. I am sistering joists or adding a layer of 5/8 inch exterior grade plywood. People hate hearing that. They want the pretty floor now. They don’t want to pay for the three days of prep. But I refuse to put my name on a floor that is going to fail in two years. I’ve seen laminate floors installed over bouncy subfloors that felt like walking on a trampoline. Tile is not laminate. It has zero forgiveness. It is a rigid system. If the house moves, the tile breaks. The shim secret only works if the foundation is stable. It is the final touch, not a structural fix.
“Consistency in the mortar bed is the difference between a floor that lasts a decade and one that fails in a season.” – Tile Council of North America Standard
The checklist for a flat bathroom installation
- Verify subfloor flatness with a 10-foot straight edge before any mortar touches the ground.
- Grind down high spots in concrete and fill low spots with a high-quality self-leveling compound.
- Apply a primer to the subfloor to ensure maximum adhesion of the leveling agent and thinset.
- Select a medium-bed mortar with non-sag properties to support the weight of large format porcelain.
- Use a tile leveling clip system in conjunction with plastic horseshoe shims for micro-adjustments.
- Back-butter every single tile to achieve 95% coverage, especially in wet environments like showers.
- Check for lippage using a credit card or a flashlight at floor level after every three tiles laid.
The final word on floor integrity
Successful flooring is about managing the variables that the builder left behind. You are an architect of the surface. When you use plastic shims to level large format tiles, you are acknowledging that perfection requires manual intervention. The chemistry of the grout and the physics of the subfloor must work in harmony. Do not trust the clips alone. Do not trust the slab. Trust your level and your shims. If you take the time to do the structural zooming required to see the tiny gaps, your bathroom shower or kitchen floor will stand the test of time. I would rather spend an extra day on my knees with a grinder than a single hour explaining to a customer why their new floor is cracking. Put the work in during the prep phase. The finish phase is just the victory lap. Keep your spacers clean, your mortar mixed to a peanut butter consistency, and your shims ready. That is how a pro does it.