
The nightmare of the ruined walnut plank
I once walked into a house where a $15,000 wide-plank walnut floor was cupping so bad it looked like a potato chip because the installer didn’t check the crawlspace humidity. It was a tragedy of engineering. But just as bad as structural failure is the slow degradation of the finish from improper care. I have seen homeowners take a metal putty knife to a piece of duct tape residue on a site-finished white oak floor. They scrape. They gouge. They destroy the polyurethane wear layer and then wonder why their floor looks like a disaster area. Tape residue is a chemical bond. To break it without destroying the Janka hardness integrity of the timber, you need to understand the physics of solubility. Most guys reach for harsh thinners that can melt the finish. I reach for the pantry. The olive oil trick is about using a non-polar lipid to swell and detach the synthetic polymers found in pressure-sensitive adhesives without triggering a chemical reaction with the cross-linked resins of a modern floor finish.
Chemical bonds in pressure sensitive adhesives
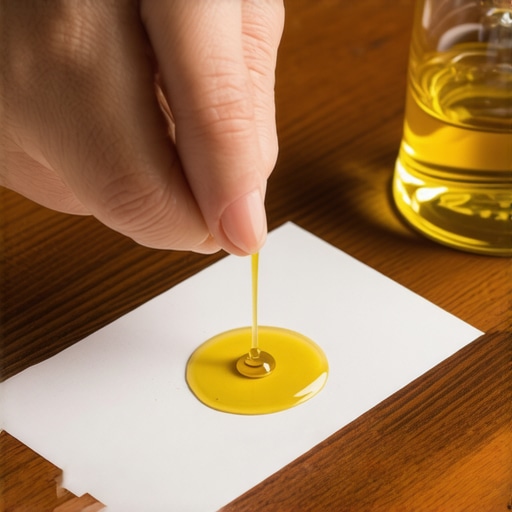
Pressure sensitive adhesives are viscoelastic materials that form a bond when light pressure is applied to marry the adhesive with the surface energy of the floor. These adhesives are usually made from acrylics or rubber-based polymers mixed with tackifiers. When you pull the tape, the adhesive undergoes cohesive failure, leaving behind a sticky mess. On a molecular level, the tape residue is a long chain of polymers that have physically intertwined with the microscopic peaks and valleys of your hardwood floors or laminate planks. If you try to pull it off dry, you risk delaminating the finish. You need a substance that can get between the adhesive and the floor finish to break that mechanical lock. Olive oil is a triglyceride consisting of fatty acids that act as a natural lubricant. It works by migrating into the polymer matrix of the glue, softening it and reducing its shear strength until it can no longer hold onto the wood finish. It is a slow process, but it is the only way to ensure you do not scar the surface.
“A floor is only as good as the subfloor beneath it; deflection is the enemy of every joint.” – Master Flooring Axiom
The physics of the wood finish barrier
Wood finish barriers such as aluminum oxide or water-based polyurethane are designed to repel liquids, but they are not invincible to solvents. When you apply olive oil to a finished floor, the oil sits on top of the cured resin. Because the oil molecules are large, they do not easily penetrate a healthy, intact finish. However, if your hardwood floors have worn thin, the oil can reach the lignin and cellulose of the raw wood. This is where you have to be careful. In a professional installer context, we look at the dry film thickness (DFT) of the coating. A standard residential floor has a DFT of about 3 to 5 mils. If that coating is compromised, the oil will cause a permanent grease spot in the wood fibers. This is why a test spot is not a suggestion; it is a requirement. You are looking for any darkening of the wood itself, which indicates the finish is too porous for this method. If the floor is laminate, the melamine wear layer is usually dense enough to handle the oil without any risk of penetration, as laminate is essentially a high-pressure plastic surface.
Why you should never use oil on tile grout or showers
Tile grout and showers represent a completely different chemical environment where lipids like olive oil can cause catastrophic failure. Grout is a porous cementitious material that acts like a sponge. If you get oil on the grout lines in your bathroom or kitchen, the oil will wick deep into the substrate. Once it is in there, it is almost impossible to remove. This creates two problems. First, it will permanently discolor the grout, creating a dark, splotchy appearance. Second, the oil serves as a food source for mold and mildew. In a high-moisture environment like a shower, you are essentially fertilizing the very things you try to clean. Furthermore, if you ever need to re-grout or seal the tile, the oil residue will prevent the new silicone caulk or sealer from bonding. Stick to specialized alkaline cleaners for grout. If you have tape residue on a shower glass door, oil is fine, but keep it far away from the transition strips and the grout joints.
“The integrity of a finished surface is maintained only through the chemical compatibility of the cleaning agent and the substrate.” – Flooring Science Quarterly
Risks of oil saturation in open grain species
Open grain species like red oak or ash have large vascular tubes called xylem that can suck up liquids via capillary action. If you have a site-finished floor with an open grain, the olive oil can travel horizontally under the finish if there is even a tiny crack. This is the structural zooming reality of flooring. You think you are just cleaning a spot, but on a microscopic level, you are introducing a non-drying oil into the cellular structure of the timber. Once that oil is inside the tracheids and vessels of the wood, it will never dry. This can lead to a condition called finish peeling or ‘fish-eye’ if you ever try to screen and recoat the floor in the future. The new finish will hit those oil-soaked fibers and fail to bond. To prevent this, always use the minimum amount of oil necessary. Do not pour it. Use a cotton swab to apply it only to the adhesive itself. Accuracy is the difference between a clean floor and a ruined investment.
Comparing household solvents for adhesive removal
Household solvents for hardwood floors and laminate range from mild oils to aggressive alcohols. You must choose based on the solvent sensitivity of your floor. While most people want the thickest underlayment, too much cushion actually causes the locking mechanisms on LVP to snap under pressure. Similarly, while people want the strongest cleaner, too much chemical heat will melt your floor’s face. Below is a breakdown of how different liquids interact with common floor types.
| Solvent Type | Floor Compatibility | Pros | Cons |
|---|---|---|---|
| Olive Oil | Hardwood, Laminate | Safe for finish, non-toxic | Leaves greasy residue, slow |
| Isopropyl Alcohol | Laminate, Tile | Fast evaporation, no residue | Can dull some poly finishes |
| Mineral Spirits | Hardwood, Engineered | Professional standard, fast | High odor, flammable |
| White Vinegar | Tile, Grout | Acidic, cuts minerals | Can etch stone, useless on glue |
Precision steps for a residue free surface
Residue free surfaces require a systematic approach that neutralizes the adhesive bond before mechanical force is applied. If you follow these steps, you protect the micro-bevel edges of your planks and keep the finish intact. Use this checklist for every job involving tape on wood.
- Identify the finish type: determine if it is oil-based poly, water-based poly, or a hard-wax oil.
- Test a hidden area: apply oil to a spot inside a closet to check for staining.
- Apply the lipid: use a small amount of olive oil on a lint-free cloth.
- Dwell time: let the oil sit on the adhesive for at least 15 to 20 minutes.
- Mechanical agitation: use a plastic scraper or a credit card, never metal.
- Degrease: clean the area with a pH-neutral hardwood floor cleaner to remove the oil.
- Dry: use a microfiber cloth to ensure no moisture stays in the joints.
Managing residue in high moisture areas
High moisture areas such as kitchens or mudrooms require extra care because the subfloor moisture levels are already fluctuating. If you use the olive oil trick near a dishwasher or a sink, you must ensure that no oil seeps into the expansion gaps at the perimeter. Most installers leave a 1/4 inch or 1/2 inch gap at the walls to allow the floor to breathe. If oil gets into that gap, it can coat the edges of the planks. This is a problem because the edges are often the most vulnerable part of the wood, where the grain is exposed. A saturated plank edge will swell differently than the rest of the board. I have seen guys lose an entire afternoon of work because they were sloppy with cleaning agents near the baseboards. Keep your oil application surgical. If you are working on laminate, remember that the core is usually HDF (High Density Fiberboard), which is basically a sponge for any liquid, including oil. If the oil gets past the wear layer and into the click-lock joint, you are looking at a permanent swell that no amount of drying will fix.
The physics of the bond between tape and polyurethane
Polyurethane bonds are incredibly strong because they are cross-linked polymers. When tape is applied to this surface, the adhesive flows into the texture of the poly. Over time, heat and pressure cause the adhesive to ‘wet out’ the surface, increasing the contact area. This is why tape that has been on a floor for a month is much harder to remove than tape that was just put down. The olive oil works by a process called intercalation. The small fatty acid molecules slip into the gaps between the adhesive and the floor. It effectively acts as a microscopic wedge. This is why the dwell time is so vital. You are waiting for gravity and molecular motion to push the oil under the glue. If you rush it, you are just sliding the scraper over the top of the mess. Patience is a tool just like a hammer or a level. Use it.
Protecting your investment from future adhesive damage
Future adhesive damage can be avoided by using the right products for the job. If you must put something down on your hardwood floors, use delicate surface painter’s tape with a low tack rating. Never use duct tape, packing tape, or even standard blue tape if you plan to leave it for more than 24 hours. The chemicals in those adhesives are designed for permanent bonds, not temporary floor protection. I have seen the ‘waterproof’ marketing on LVP lead people to believe they can use any tape they want. It is a lie. The adhesive can still pull the image layer right off the core if it is strong enough. If you are an architect or a homeowner, treat your floor like the structural component it is. It is a performance surface that requires a specific chemical balance to stay beautiful. Use the oil trick when you have to, but prevent the need for it whenever possible. Your floor is the foundation of your home’s value. Do not let a three-dollar roll of tape ruin a twenty-thousand-dollar installation.