
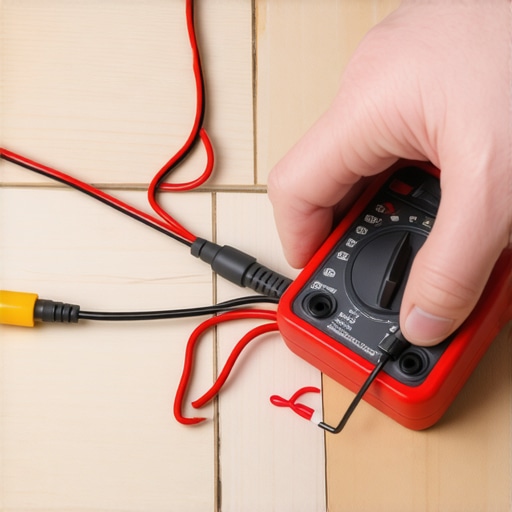
I spent three days grinding concrete on a job last month just so the floor would not click like a castanet. Most guys skip the leveling compound. They think the underlayment will hide the dip. It will not. I am the mechanic with sawdust under my nails and I smell like WD-40 and oak dust because I actually do the work. I have seen fifteen thousand dollar wide plank walnut floors turn into potato chips because of poor prep. But the worst heartbreak is finishing a beautiful tile or laminate installation only to realize the heating element is dead. You must use a ten dollar multimeter before you lay a single square inch of material.
The hidden break in the wire
Underfloor heating cables require electrical resistance testing using a digital multimeter to verify circuit integrity before thin-set mortar or laminate flooring is installed. You check for Ohms to ensure the heating element has not been severed or nicked during the subfloor preparation process. A floor is a performance surface. If you do not test the continuity of your radiant heat system, you are gambling with an expensive tear-out. Most homeowners think waterproof LVP means they can flood a room, but the real danger is a broken wire buried under three hundred square feet of stone. The physics of electricity are simple. Electrons need a continuous path. If that path is broken by a trowel nick, your floor is just a cold slab of useless material. I have seen guys throw a fit when the thermostat shows an error code, but by then it is too late. The grout is dry and the damage is permanent. You need to know the specific resistance rating of your cable. This number is usually on a tag near the lead wires. If your multimeter shows a zero or an infinite reading, you have a short or a break. It is that simple.
“A floor is only as good as the subfloor beneath it; deflection is the enemy of every joint.” – Master Flooring Axiom
The 1/8 inch that ruins everything
Subfloor levelness affects the thermal transfer of underfloor heating because air gaps act as insulators rather than conductors. You must ensure the substrate is within NWFA standards, typically 1/8 inch over 10 feet, to prevent stress points on heating mats. When the subfloor has a dip, the heating cable can bridge that gap. When you walk over it, the floor flexes. That repeated mechanical stress eventually snaps the copper or nickel-chrome core. While most people want the thickest underlayment, too much cushion actually causes the locking mechanisms on LVP to snap under pressure. This same flex ruins heating wires. You need a dense, high-quality modified thin-set to encapsulate the wires. This creates a thermal mass. If you use a cheap, non-modified mortar, the heat will cause the bond to fail over time. The chemistry of the adhesive is just as important as the wiring. Polymers in the thin-set allow for slight expansion and contraction as the temperature fluctuates from sixty to eighty-five degrees. Without those polymers, the mortar turns to dust under the constant thermal cycling. I have seen grout lines crack in showers because the installer did not account for the expansion of the floor when the heat kicked on. It is a structural engineering challenge, not a decorating project.
| Cable Length (ft) | Expected Ohms (Typical) | Allowable Variance (%) | Test Phase |
|---|---|---|---|
| 50 | 45 – 55 | +/- 10 | Pre-Install |
| 100 | 22 – 28 | +/- 10 | Post-Mortar |
| 150 | 15 – 19 | +/- 10 | Final |
Why your subfloor is lying to you
Concrete slabs and plywood subfloors contain residual moisture that can short-circuit or corrode heating elements if a vapor barrier is not used. A calcium chloride test or relative humidity probe should be used to measure moisture vapor emission rates before installing hardwood floors or laminate. Wood is a living material. It breathes. When you put a heating system under it, you are essentially kiln-drying the wood from the bottom up. This is why acclimation is not optional. You need that wood in the room for at least a week with the HVAC running. If you skip this, the planks will shrink until they show a gap wide enough to lose a credit card in. Hardwood floors are sensitive. The Janka scale tells us how hard the wood is, but it does not tell us how it handles heat. Solid oak is a gamble. Engineered wood is the pro move here because the cross-ply construction resists the urge to cup. I have walked into jobs where the installer did not check the crawlspace humidity and the fifteen thousand dollar floor looked like a potato chip within a month. Do not be that guy. Use your tools. Use your meter.
- Set the multimeter to the Ohms setting (usually 200 or 2k).
- Touch the probes to the black and white lead wires.
- Compare the reading to the factory tag.
- Test between the lead wires and the copper ground braid to ensure no leakage.
- Record the numbers on the warranty card immediately.
The ghost in the expansion gap
Expansion gaps around the perimeter of the room allow flooring materials to expand as radiant heat increases the molecular kinetic energy of the planks. Without a 1/2 inch gap, the floor system will buckle or peak at the joints. I hate bulky T-molding as much as the next guy, but you cannot lock a floor under a heavy kitchen island and expect it to move freely. It will buckle. The floor needs to float. If you are doing a shower, the grout must be high-performance to handle the moisture and the heat. Standard grout is too porous. It lets water seep down to the heating mat. Even if the mat is waterproof, the constant moisture can lead to efflorescence. That white crusty stuff ruins the look of a dark tile. I once spent a week fixing a shower where the guy used a metal trowel and nicked the wire. He did not test it. He finished the tile, grouted it, and then found out it was dead. He had to rip the whole thing out on his own dime. That is why the multimeter is the most important tool in your bag. It is a ten dollar insurance policy. You check the resistance when you take it out of the box. You check it after you glue it down. You check it while you are spreading the mortar. If the needle jumps, you stop. You find the nick before it is buried. This is the difference between a master and a handyman. One cares about the physics, the other just cares about the paycheck. Final thoughts on the matter are simple. Respect the trade. Respect the subfloor. Use your meter every single time.