
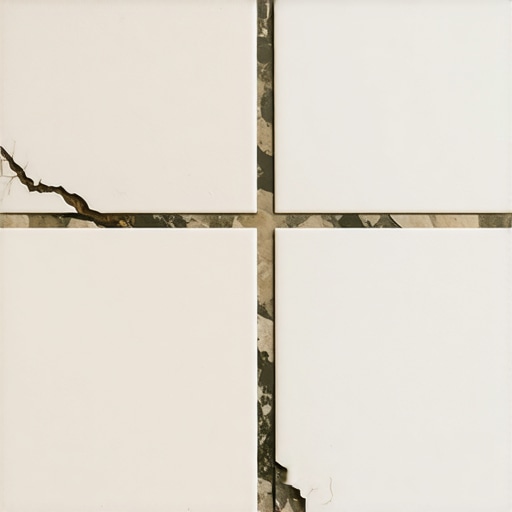
Most guys skip the leveling compound. They think the underlayment will hide the dip. It won’t. I spent three days grinding concrete on a job last month just so the floor wouldn’t click like a castanet. When you see a straight line cracking through your grout, it is not a coincidence. It is a map. It is the floor telling you exactly where the subfloor is moving. I have spent twenty five years fixing these mistakes. I have seen fifteen thousand dollar hardwood floors ruin themselves because the installer ignored the basics of moisture and structural movement. A floor is a system. If one part of that system fails, the whole thing follows. You cannot hide a bad subfloor with expensive tile. The physics of the installation will always win.
The straight line is a blueprint of the subfloor
Straight line cracks in grout signify telegraphing from the subfloor. This happens when movement joints or plywood seams underneath the tile shift. The grout fails because it cannot handle the tensile stress of the shifting substrate, leading to a visible fracture line across the floor surface.
When you look at a crack that runs perfectly straight across several tiles, you are looking at a seam. In a wood subfloor environment, this usually corresponds to the edge of a four by eight sheet of plywood or OSB. If the installer did not leave the required one eighth inch gap between sheets, those boards will press against each other as they expand with seasonal humidity. That pressure has nowhere to go but up. It pushes against the tile. Since tile is rigid and grout is brittle, the grout snaps. This is basic structural engineering. You are trying to bond a completely rigid material to a substrate that lives and breathes. Without a decoupling membrane or proper gapping, the tile is essentially a sacrificial layer. I have walked into showers where the grout lines were shredded because the installer used regular drywall instead of a cementitious backer unit. The moisture gets in, the studs swell, and the grout lines pop like popcorn. It is predictable. It is avoidable. It is the hallmark of a rushed job.
The reality of deflection and structural load
Deflection is the amount of flex in a floor system. Most tile installations require a deflection rating of L over 360 for ceramic. Natural stone requires L over 720 to prevent grout failure. If your floor joists are too small or spaced too far apart, the floor bounces, causing linear cracks.
“A floor is only as good as the subfloor beneath it; deflection is the enemy of every joint.” – Master Flooring Axiom
I see this a lot in older homes where someone decided to replace carpet with heavy porcelain. Carpet is forgiving. It hides a bouncy floor. Tile is the opposite. If your joists are sixteen inches on center but they are only two by eights over a long span, that floor is going to move every time you walk across it. That movement creates a shear force at the bond coat. The thin-set adhesive might hold the tile to the floor, but the grout is the weakest link. It will crack in a straight line along the joist where the flex is most concentrated. You can use the most expensive polymer-modified grout in the world and it will still crack if the subfloor is diving three eighths of an inch every time you step on it. You have to stiffen the system. This might mean adding a second layer of plywood or sistering the joists in the crawlspace. It is hard work. It is dusty. It is necessary.
[IMAGE_PLACEHOLDER]
The impact of moisture on subfloor stability
Moisture vapor emission rates determine the bond strength. High humidity in a crawlspace or a wet concrete slab will cause wood to swell or adhesive to emulsify. This movement results in grout cracking along the most vulnerable structural seams of the installation.
Hardwood floors and laminate are often blamed for similar issues, but tile is the most sensitive to moisture from below. In a concrete slab, you have control joints. These are intentional cuts made by the concrete guys to control where the slab cracks. If you tile directly over a control joint without a crack suppression membrane, that crack will travel right up through your tile. It will be a perfect straight line. You can bet your house on it. I always use a moisture meter. If I see more than twelve percent moisture in a wood subfloor, I am not laying a single tile. I will wait. I will bring in dehumidifiers. I will fix the drainage in the crawlspace. If you do not respect the water, the water will destroy your work. I have seen guys try to use waterproof LVP as a shortcut, thinking they can ignore the moisture. Even then, the expansion and contraction will eventually cause the locking mechanisms to fail. There are no shortcuts in flooring. There is only the right way and the way you have to do twice.
| Subfloor Material | Allowable Deflection | Recommended Underlayment |
|---|---|---|
| Plywood (Single layer) | L/360 | 1/4 inch Cement Board |
| Plywood (Double layer) | L/720 | Decoupling Membrane |
| Concrete Slab | Minimal | Moisture Barrier |
| Green Concrete | High Shrinkage | Crack Isolation Sheet |
Movement joints are not optional
Movement joints must be placed every twenty feet. According to TCNA EJ171, large tiled areas require expansion gaps filled with flexible sealant instead of hard grout. These joints allow the flooring system to expand and contract without cracking the grout.
“Movement joints are essential for the longevity of any rigid flooring installation; they provide a release point for internal stresses.” – TCNA Guidelines
People hate the look of a silicone joint in the middle of a beautiful floor. They want that continuous look. But a floor is a living thing. It moves with the temperature. If you have a thirty foot run of tile and no expansion joint, the tile will eventually tent or the grout will pulverize. In a straight line. Right across the middle. I tell my clients that they can have a small silicone line that matches the grout color, or they can have a jagged crack in six months. Most choose the silicone. You also have to look at the perimeter. If the tile is butt-up against the baseboard with no gap, the floor has nowhere to go. It will buckle. I always leave a quarter inch at the walls. It is hidden by the baseboard anyway. It is simple. It is effective. It is the law of the job site.
The technical difference between grout types
Grout chemistry dictates the flexibility of the joint. Standard cementitious grout is rigid and prone to cracking under stress. High-performance epoxy or acrylic grouts offer better tensile strength and resistance to moisture, though they cannot fix a moving subfloor.
I prefer a high-quality sand-free grout for narrow joints, but if I am worried about minor movement, I might suggest an epoxy. Epoxy is a nightmare to clean up if you are slow, but it is incredibly tough. It is basically plastic. However, even epoxy has a limit. It will not hold a house together. If the joists are moving, the tile itself will eventually snap. I have seen porcelain tiles sheared in half by subfloor movement. Porcelain has a high density and low water absorption, making it very strong, but it is also very brittle. It does not bend. If you want a floor that lasts fifty years, you have to spend the time on the prep. You have to check the Janka rating if you are mixing materials. You have to understand how different materials react to the environment. Hardwood floors will expand across the grain. Tile will not expand at all. When those two meet at a threshold, you need a transition that allows for that fight. If you grout that transition solid, it will fail in a week.
Fixing the crack without tearing up the house
Repairing a straight line crack requires addressing the source. You must remove the old grout using a carbide-tipped saw and replace it with a color-matched caulk or a flexible epoxy to accommodate future movement in the subfloor.
- Inspect the subfloor from the crawlspace or basement for loose joists.
- Remove the cracked grout carefully to avoid chipping the tile edges.
- Check for hollow sounds by tapping the tiles near the crack.
- Install a color-matched flexible sealant in the affected joints.
- Ensure the perimeter expansion gaps are clear of debris and grout.
If you just smear more grout into the crack, it will be back. I guarantee it. You have to give the floor a way to move. I often use a multi-tool to rake out the old stuff. It is a slow, miserable job. You have to be careful not to hit the tile. Once the joint is clean, I look at the substrate. If I can see the plywood moving, I might have to pull a few tiles and install a small piece of crack isolation membrane. It is a surgical fix. It is not perfect, but it is better than a full rip-out. Most of the time, the homeowner just wants the line gone. I explain that the line is a symptom. I fix the symptom, but I warn them about the disease. The disease is a subfloor that was never ready for tile in the first place.