
The subfloor secret that contractors hide
Most guys skip the leveling compound because they think the underlayment will hide the dip, but it never does. I spent three days grinding concrete on a job last month just so the floor wouldn’t click like a castanet. I walked into a luxury condo where the brand-new laminate was bouncing underfoot. The homeowner thought the product was defective, but it was just a lazy installer. The subfloor had a half-inch valley. No amount of foam padding fixes physics. If your base is not flat within three-sixteenths of an inch over a ten-foot span, your expensive floor is already failing. Most people look at the surface, but I look at the slab. I smell like WD-40 and oak dust most days because I am down on my knees checking for deflection. I have seen fifteen-thousand-dollar wide-plank walnut floors cup like potato chips because the installer ignored the crawlspace humidity. It is a tragedy of engineering. Flooring is not a decoration; it is a structural performance surface that must withstand thousands of pounds of pressure and atmospheric shifts. When you see a floor that looks perfect after twenty years, it is because the architect understood the microscopic reality of the subfloor. Surface aesthetics are easy, but structural integrity is hard. Professionals know that the bond between the substrate and the finish is where the battle is won. If you ignore the moisture content or the levelness, you are just building on sand. I have spent twenty-five years fixing these mistakes. I do not care about the color of your trim if your grout is cracking or your planks are peaking. Precision is the only thing that matters in this trade.
The science of grout hydration and color shifting
Grout color changes during the hydration process because Portland cement is a hydraulic binder that undergoes a chemical reaction with water. When grout is wet, the water fills the voids between the sand and pigment particles, altering light refraction and making the color appear significantly darker than it will be once fully cured. This is not a magic trick; it is chemistry. As the water evaporates and the cementitious crystals form, the pigment settles into its permanent state. Most homeowners panic when they see wet grout in their showers because it looks like the wrong shade. The hydration process can take twenty-four to forty-eight hours depending on the ambient humidity and temperature of the room. In high-humidity environments like Houston, the evaporation rate is sluggish, which can lead to uneven drying and color mottling. In a dry climate like Phoenix, the grout might dry too fast, which weakens the structural bond and leaves the color looking chalky. Understanding the water-to-powder ratio is the most important part of the mix. If you add too much water, you dilute the pigment and create a weak, porous grout line that will crumble and stain. If you add too little, the grout will not properly hydrate, leading to a sandy texture that never reaches full strength. This is why testing the color before you commit to the entire floor is the only way to ensure the design matches the reality of the chemistry.
“A floor is only as good as the subfloor beneath it; deflection is the enemy of every joint.” – Master Flooring Axiom
How to use the blow-dryer hack correctly
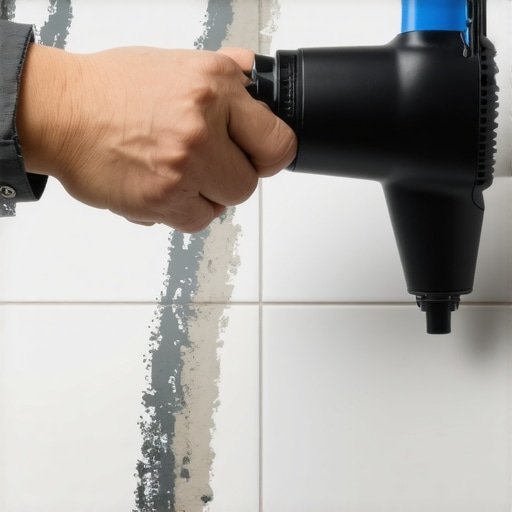
The blow-dryer hack for testing grout color accuracy involves applying a small amount of wet grout to a scrap piece of tile and forcing evaporation with heat. By using a standard hair dryer on a medium heat setting, you can simulate twenty-four hours of air drying in about sixty seconds. This allows you to see the true cured color of the grout before you spread it across your entire bathroom floor. You should apply a dollop of grout about the size of a quarter onto a piece of the actual tile you are using. This is important because the color of the tile and the lighting in the room will affect how the grout shade appears. Hold the blow-dryer about six inches away from the sample and move it in a circular motion. Do not get too close or use high heat, as you do not want to scorch the polymers in the mix. Watch as the dark, wet paste slowly turns into a lighter, matte finish. Once the sample is completely dry to the touch and no longer cool, hold it up against your wall or floor in the actual lighting of the room. This simple step prevents the heartbreak of a grout color that looks too yellow or too grey once it is too late to remove. It is the cheapest insurance policy in the flooring industry. I have seen people rip out entire walk-in showers because the grout dried three shades lighter than the plastic strip on the bag. The plastic strip is a lie. The chemistry of your local water and the humidity of your house will change the final result. Always test a wet sample first. [image placeholder]
Why showers demand specialized grout chemistry
Showers require high-performance grout with low absorption rates because they are constant-moisture environments that promote mold growth and mineral deposits. Standard sanded grout is highly porous and will act like a sponge if not sealed properly. This is why I prefer high-performance cementitious grouts or epoxy options for wet areas. Epoxy grout is a two-part chemical resin that is virtually waterproof and stain-proof, but it is a nightmare to install for the inexperienced. It has a very short working time and requires a specific cleaning technique to avoid leaving a hazy film on the tile. If you are using a standard cement grout in a shower, you must ensure it is modified with polymers. These polymers fill the microscopic voids in the cement matrix, making the grout more flexible and resistant to water penetration. When I analyze a shower failure, I often find that the installer used a cheap, non-modified grout that allowed water to seep behind the tiles, rotting the wall studs. The physics of water movement through grout is called capillary action. Water will find any microscopic path to travel, and once it gets behind the tile, it has nowhere to go. This leads to the dreaded smell of rot and the eventual collapse of the tile system. Always choose a grout with an absorption rate of less than five percent for any shower application. This ensures that the water stays on the surface where it can be directed to the drain by the slope of the floor.
The physics of laminate flooring failure
Laminate flooring fails when the expansion gaps are ignored or when the subfloor exceeds the maximum allowable deviation of three-sixteenths of an inch. Laminate is essentially a high-density fiberboard (HDF) core with a photographic layer and a clear wear layer. Because the core is made of wood fibers, it expands and contracts with changes in relative humidity. If you install laminate tight against the walls without a quarter-inch gap, the floor will have nowhere to go when it expands in the summer. This causes the planks to peak at the joints, creating a tripping hazard and eventually breaking the locking mechanisms. I have seen floors buckle so high they looked like a mountain range because the installer didn’t leave a gap under the baseboards. Furthermore, laminate is a floating floor, which means it is not attached to the subfloor. If the subfloor has dips, the laminate will flex every time someone walks on it. This constant vertical movement puts immense stress on the click-lock joints. Eventually, the thin tongue-and-groove system will snap, and the planks will start to separate. No amount of wood glue can fix a broken locking joint. You have to pull the whole floor up and fix the subfloor. This is why the underlayment is so misunderstood. People buy the thickest foam they can find, thinking it will make the floor feel soft. In reality, too much cushion allows for too much vertical deflection, which accelerates the failure of the joints. You want a high-density, thin underlayment that provides support, not a mattress. A quality underlayment should also include a vapor barrier if you are installing over concrete to prevent moisture from reaching the HDF core.
Hardwood floors and the atmospheric moisture battle
Solid hardwood floors are living products that react to the moisture content of the air and the subfloor through the process of cellular expansion. When I install a solid oak or walnut floor, I am not just laying wood; I am managing an ecosystem. The wood must be acclimated to the home for at least seven days, but time is not the real metric. The only metric that matters is the moisture content measured by a pin-meter. The wood should be within two to four percent of the subfloor’s moisture level. If the wood is too dry when it is nailed down, it will swell and cup when the humidity rises. If it is too wet, it will shrink and leave huge gaps between the planks in the winter. The Janka Hardness Scale is a tool we use to determine how much abuse a species can take, but hardness does not equal stability. For example, Hickory is incredibly hard but notorious for moving. White Oak is much more stable and has closed cellular pores, which makes it more resistant to rot, which is why it was used for ship building. In modern homes with HVAC systems that strip moisture from the air, you must maintain a consistent relative humidity between thirty-five and fifty-five percent. If you let the house get too dry, the wood will splinter and crack. If it gets too humid, the floor will heave. I always tell clients that if they aren’t willing to manage their home’s climate, they should stick to engineered wood or LVP. Engineered wood uses a cross-ply construction that limits the wood’s ability to expand and contract, making it much more forgiving in difficult climates.
“Hydraulic cement grout reaches its final color only after the chemical bond of hydration is complete; any shortcut in drying will distort the visual result.” – Tile Council of North America Standards
The 1/8 inch dip that breaks locking joints
A single one-eighth inch dip in a subfloor creates a void that causes modern click-lock flooring to bounce and eventually shear the locking tongue. When you walk over a hollow spot, the weight of your body forces the plank down into the dip. This movement creates a mechanical leverage that pulls the joint apart. Most installers think they can hide this with a thicker pad, but the pad just compresses more, making the problem worse. To fix this, you must use a high-strength self-leveling underlayment or a cementitious patching compound. You have to find the high spots with a straight edge and grind them down, then fill the low spots. I have spent countless hours with a diamond grinder, creating clouds of concrete dust just to make a floor flat. It is the most important part of the job. If the subfloor is wood, you have to check for loose sheets of plywood and screw them down to the joists to prevent squeaking. Squeaks are caused by the friction of two pieces of wood rubbing together, usually because a nail has pulled loose. If you don’t fix the squeaks before you lay the new floor, you will hear them for the next twenty years. Every time I hear a floor creak, I know the installer was lazy. They didn’t want to spend the extra hour driving screws. Precision in the substrate is what separates a master from a handyman. You have to be obsessed with the flat plane of the room. If the subfloor is right, the rest of the job is easy. If the subfloor is wrong, nothing else you do matters.
Technical comparison of modern flooring materials
The technical performance of a flooring material is determined by its wear layer thickness, core density, and moisture absorption rate. When comparing products, do not look at the price per square foot alone. Look at the mil-thickness of the wear layer on vinyl. A 20-mil wear layer is the industry standard for commercial traffic, while a 6-mil layer is a builder-grade product that will scratch in six months. In the world of laminate, look for the AC rating. AC4 or AC5 is what you want for a durable home. The core of the floor also matters. SPC (Stone Plastic Composite) is much denser and more dent-resistant than WPC (Wood Plastic Composite). However, WPC is warmer underfoot and quieter. You have to decide if you want the rigidity of stone or the comfort of wood fibers. The following table provides a breakdown of how these materials compare in a structural environment.
| Material Property | Solid Hardwood | Engineered Wood | Laminate (HDF) | LVP (SPC Core) |
|---|---|---|---|---|
| Janka Hardness (Avg) | 1200 – 1400 lbf | 1000 – 1300 lbf | N/A (Crating) | N/A (Dent Resistant) |
| Acclimation Time | 7 – 14 Days | 3 – 5 Days | 48 Hours | 0 – 24 Hours |
| Moisture Resistance | Low | Medium | Low to Medium | High |
| Max Span Without T-Mold | Room Width | 30 – 50 Feet | 25 – 30 Feet | 50 – 100 Feet |
| Wear Layer Life | 50+ Years (Refinishable) | 20 – 30 Years | 10 – 15 Years | 10 – 20 Years |
Professional checklist for a fail-safe installation
- Verify subfloor levelness to within 3/16 inch over 10 feet.
- Check moisture content of both the subfloor and the flooring material using a calibrated meter.
- Perform the blow-dryer hack on a grout sample to confirm color match before starting tile work.
- Ensure a 6-mil poly film moisture barrier is used over all concrete slabs for floating floors.
- Leave a minimum 1/4 inch expansion gap at all vertical obstructions and perimeters.
- Undercut door jambs so the floor can move freely underneath the trim.
- Vacuum the subfloor three times to ensure no grit or debris is trapped under the planks.
- Use a tapping block and pull bar to ensure all joints are fully seated without damaging the edges.
Final thought for any homeowner or apprentice: the tools you use and the chemistry you respect define the life of the floor. Do not rush the drying process, do not skip the leveling, and always test your grout. If you follow the physics, the beauty will take care of itself. If you fight the physics, the floor will always win in the end.