
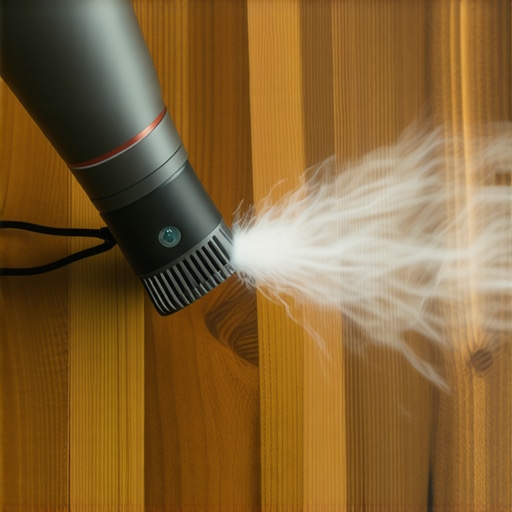
The Hair Dryer Trick for Fixing White Heat Rings on Wood
White rings on a wood surface are a structural failure of the finish layer caused by trapped moisture and thermal expansion. When you see that cloudy circle on your oak table or walnut floor, you are witnessing the refractive index of water molecules suspended within a polymer matrix. This guide explains how to use localized heat to release that moisture without destroying the chemical bonds of your polyurethane or lacquer coating. I have spent twenty five years on my knees with a moisture meter and a level, and I can tell you that wood is not a decoration, it is a performance surface that responds to physics.
The molecular science of white heat rings
White heat rings are moisture emulsions trapped within the upper layers of a wood finish like polyurethane, lacquer, or shellac. They occur when a heat source, such as a hot coffee mug or a pizza box, expands the finish and allows water vapor to penetrate the surface. When the heat is removed, the finish contracts and traps the vapor. This results in light scattering that appears as a white cloud. [IMAGE_PLACEHOLDER] You are not actually looking at damaged wood, you are looking at water that is stuck inside the plastic coating. To fix this, you must apply enough heat to re-open the polymer chain and allow the H2O molecules to evaporate back into the atmosphere. If the ring is dark or black, the moisture has reached the wood fibers and caused rot or oxidation, which a hair dryer cannot fix. You need to understand the difference between a surface blemish and a structural rot issue before you start blowing hot air around your living room.
A walnut floor cupped into a potato chip
I once walked into a house where a $15,000 wide-plank walnut floor was cupping so bad it looked like a potato chip because the installer didn’t check the crawlspace humidity. The homeowner was in tears. The contractor had disappeared. I had to explain that the wood was doing exactly what its cellular structure commanded it to do. It was absorbing moisture from the damp earth below and expanding on the bottom side while the air conditioned top stayed dry. That was a catastrophic failure of subfloor preparation. A white heat ring is the same story but on a microscopic scale. It is a localized moisture imbalance. I fixed that walnut floor by installing a commercial dehumidification system and waiting three months for the wood to reach equilibrium. You can fix your table in twenty minutes because the moisture is trapped in the finish, not the heartwood. You have to respect the material. Wood is hygroscopic. It moves. It breathes. It reacts. If you don’t treat it with the respect its Janka rating deserves, it will fail you every single time.
Thermal physics of the blow dryer method
The hair dryer trick works by using convective heat to raise the temperature of the wood finish to its glass transition point. This is the temperature where a polymer turns from a hard, glassy state to a more pliable, rubbery state. By keeping the hair dryer on a medium setting and moving it constantly, you are vibrating the molecules of the finish. This vibration creates space for the trapped water vapor to escape. It is essential to maintain a distance of two inches to prevent scorching. I have seen guys use heat guns for this, and they end up bubbling the finish because a heat gun is designed for stripping paint, not for delicate restoration. A hair dryer provides a controlled environment. You are looking for that moment of clarity when the cloud disappears. It is the same physics we use when kiln drying lumber to a specific six percent moisture content. You are managing the vapor pressure within the material. If you get it too hot, you break the chemical cross-linking of the polyurethane. If you keep it too cool, the water stays trapped in its cage. You must be the master of the temperature.
“A floor is only as good as the subfloor beneath it; deflection is the enemy of every joint.” – Master Flooring Axiom
Comparing wood repair efficacy
Different wood finishes react uniquely to heat application and require specific intervention strategies based on their chemical composition. While the hair dryer is the safest bet for modern polyurethanes, older shellac or wax finishes might require a different approach. Shellac is made from beetle secretions and has a very low melting point, which makes it incredibly easy to fix but also very easy to ruin with too much heat. Lacquer is more brittle and can crack if the thermal shock is too sudden. Modern water-borne acrylics are the most stubborn because they are designed to be chemically resistant to almost everything. You need to know what you are working with before you start. Use the table below to understand the risks associated with various heat levels and tools. I have seen people try to use a clothes iron, which can work, but it is like using a sledgehammer to hang a picture frame. The risk of permanent charring is significantly higher.
| Repair Type | Tool Used | Heat Level | Danger Level |
|---|---|---|---|
| Hair Dryer | Standard Blower | 130 Degrees | Very Low |
| Clothes Iron | Steam Iron | 200 Degrees | Moderate |
| Heat Gun | Industrial Gun | 300+ Degrees | High Risk |
| Chemical Solvent | Denatured Alcohol | Room Temp | High Risk |
The NWFA stance on finish restoration
The National Wood Flooring Association (NWFA) emphasizes that any repair should maintain the integrity of the wear layer and the coefficient of friction. When you apply heat to a finish, you are technically altering its surface tension. The NWFA guidelines state that site-finished floors must be allowed to cure for at least thirty days before they reach maximum hardness. If you get a heat ring on a floor that was finished last week, do not touch it with a hair dryer. You will ruin the curing process. You have to wait. I have seen installers rush a job and then wonder why the finish peels off like a sunburned back. It is because they didn’t let the chemicals link up properly. The same applies to your furniture. If it was recently refinished, the hair dryer trick might cause the finish to become cloudy permanently because the solvents haven’t fully evaporated. Always check the age of the finish. Patience is a tool just like a hammer or a saw. If you don’t have it, you shouldn’t be working on wood.
“Wood moisture content must be within a 4 percent range of the subfloor before installation.” – NWFA Guidelines
Subfloor vapor and surface finishes
The relationship between subfloor moisture and surface finish performance is the most overlooked aspect of flooring longevity. Even if you are just fixing a heat ring on a dining table, you must understand that the ambient humidity in your room is dictated by your subfloor and crawlspace. If your house is sitting on a damp concrete slab with no vapor barrier, your furniture is constantly absorbing moisture from the air. This makes the finish more susceptible to heat rings. I spent three days grinding concrete on a job last month just so the floor wouldn’t click like a castanet because the slab was uneven and weeping water. People think they can just slap LVP or hardwood down and it will be fine. It won’t. You need a six mil poly film at minimum. You need to know the calcium chloride test results. If the moisture is coming from the bottom, no amount of hair drying on the top will ever keep that floor stable. You are fighting a losing battle against the earth itself.
The ghost in the expansion gap
Expansion gaps are the lungs of a wood floor, allowing it to expand and contract without buckling or cupping. When you apply heat to a localized area to fix a ring, you are causing that specific section of wood to expand. If your floor is pinned against a baseboard with no gap, that expansion has nowhere to go. It will push against the adjacent planks. This is how you get squeaks. This is how you get the ghost in the floor. Every hardwood installation needs at least a half inch gap around the perimeter. I have seen homeowners caulk these gaps because they hate the look of the space. That is a death sentence for the floor. The wood will move. It will buckle. It will snap the tongues and grooves. When you use a hair dryer, keep in mind that you are inducing a small amount of thermal expansion. It is usually not enough to cause a problem, but on a floor with zero expansion gap, you are playing with fire. The floor needs to breathe.
Checklist for thermal moisture extraction
- Clean the surface with a lint free microfiber cloth to remove dust and oils.
- Plug in a hair dryer and set it to the medium heat setting.
- Hold the dryer approximately two inches away from the white ring.
- Move the dryer in a steady circular motion to avoid hot spots.
- Observe the cloudiness closely and stop as soon as the finish clears.
- Apply a high quality carnauba wax or wood conditioner to restore oils.
- Check the surface with a moisture meter if you have one to ensure equilibrium.
- Avoid placing heat sources on the area for at least forty eight hours.
Safety protocols for heat application
Using a heat source on wood finishes requires strict adherence to safety protocols to prevent fires and chemical off-gassing. Some older finishes contain lead or volatile organic compounds that can be released when heated. If you smell a sharp, acrid odor, stop immediately. You are burning the finish. Work in a well ventilated area. Do not leave the hair dryer running in one spot while you go answer the phone. I have seen a guy burn a hole through a cherry veneer because he got distracted. You are the operator of a thermal tool. Treat it with the same caution you would use with a table saw or a router. The finish is a chemical skin. It is flammable. It is delicate. If you push it too far, you will be sanding the whole piece down to the raw wood and starting over. And believe me, nobody wants to sand a floor twice. Do it right the first time and respect the chemistry of the bond.