
I once walked into a house where a $15,000 wide-plank walnut floor was cupping so bad it looked like a potato chip because the installer didn’t check the crawlspace humidity. The homeowner was furious, blaming the lumber yard, the manufacturer, and the finish. But the culprit was the subfloor moisture level and a total lack of perimeter expansion gaps. This is the reality of hardwood floors. If you treat wood like plastic, it will fail. If you ignore the physics of moisture, wood will punish you.
We are going to dissect the physics of hardwood installation, focusing on the techniques that separate a master craftsman from a builder-grade hack. We will analyze the mechanics of the border layout, the chemistry of adhesives, and the hidden structural steps that ensure your floor remains flat, silent, and straight for a century.
The hidden movement of natural wood fibers
Wood is a hygroscopic material that constantly exchanges water vapor with the surrounding atmosphere to reach equilibrium moisture content. This means your hardwood floors are alive, expanding in high humidity and shrinking in dry winter air across their cellular structure. Failing to calculate this movement before laying the first board guarantees structural failure.
The cellular anatomy of wood determines how it moves. Wood cells are shaped like bundles of drinking straws running parallel to the trunk of the tree. When moisture enters these straw-like cells, the walls swell, causing the wood to expand. Crucially, this movement is not uniform. Wood expands up to forty times more across its grain, tangentially and radially, than it does along its length. This directional imbalance is why wide planks are far more prone to cupping and crowning than narrow strips.
When you install a hardwood border, you are running boards perpendicular to the main floor field. This creates a structural intersection where the longitudinal expansion of one board meets the radial expansion of another. If you lock these joints together tightly without accounting for the different rates of movement, the wood has nowhere to go but up. This physical reality is why professional installers obsess over environmental calibration before a single plank is nailed down.
Why your subfloor is lying to you
A subfloor might look flat to the naked eye, but micro-deviations will ruin a high-end hardwood border installation instantly. You must use a ten-foot straightedge to measure deflection and flatness across the entire subfloor surface before starting. Any dip greater than 3/16 of an inch over a ten-foot span will cause your floorboards to flex, rub, and squeak underfoot.
The subfloor is the foundation of your entire installation. If you are installing over concrete, you are dealing with a porous sponge that constantly releases moisture vapor. Many installers make the mistake of trusting a dry-looking concrete slab. They skip the calcium chloride test or the relative humidity probe test. This is a critical mistake. Concrete must be tested to ensure the moisture emission rate is below three pounds per 1,000 square feet over 24 hours.
If you are working over a wood subfloor, you must inspect the joist spacing and plywood thickness. A subfloor that is too thin will deflect under load. This movement stresses the mechanical fasteners and breaks the adhesive bonds. Before laying your hardwood, you must sand down high spots on plywood seams and fill low spots with a high-compressive-strength self-leveling underlayment. The subfloor must be clean, dry, flat, and structurally sound. There are no shortcuts here.
“A floor is only as good as the subfloor beneath it; deflection is the enemy of every joint.” – Master Flooring Axiom
The blue tape secret for straight borders
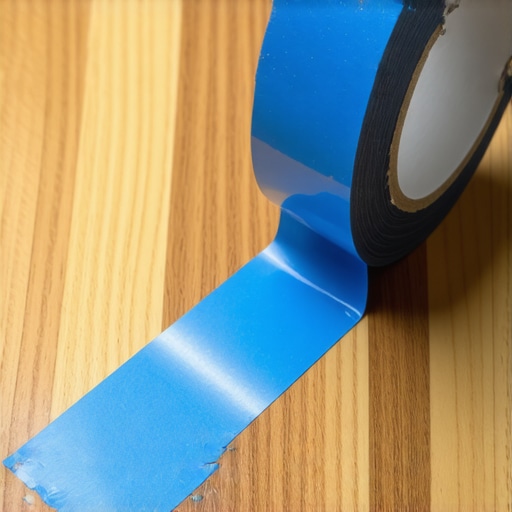
The blue tape method uses high-tensile painter tape to establish a perfectly straight layout line that will not shift under mechanical stress. By anchoring a reference line directly onto the subfloor, you create a physical guide that allows for micro-adjustments during the dry-fit phase. This technique prevents cumulative alignment errors across large rooms.
To execute this secret, you first snap your primary layout lines using a high-visibility chalk line. However, chalk lines are easily smudged, covered in sawdust, or blown away by the exhaust of your nail gun. To preserve this line, you apply high-quality blue painter tape directly along the chalk path. You then re-snap your line directly onto the tape. This provides an indestructible, high-contrast reference marker that remains perfectly visible throughout the entire installation process.
The blue tape also serves as a physical barrier during the adhesive application. When installing a decorative border, you often combine mechanical fasteners with wood glue or polyurethane adhesive. By placing tape exactly where the border edge meets the field planks, you prevent squeeze-out adhesive from contaminating the exposed subfloor or the surface of your finished wood. This keeps your work zone clean and ensures that your expansion gaps remain free of hardened glue ridges that could restrict wood movement.
The mechanical reality of the expansion gap
The expansion gap is not an optional installation detail but a structural safety valve for your entire floor. You must leave a minimum of 3/4 of an inch of open space around the entire perimeter of the room. This space allows the wood to expand during high-humidity seasons without building up destructive compressive stress.
When a floor lacks an expansion gap, the expanding wood planks push against the drywall and framing of the house. Because the framing is immovably rigid, the force is directed back into the floor field. This causes the planks to buckle, lift off the subfloor, or shear their mechanical fasteners. Many rookie installers think they can hide a smaller gap under thin baseboards, but this often leads to system failure when seasonal humidity spikes.
To maintain a clean border while preserving this vital gap, you must undercut the drywall and plaster. This allows the wood to expand underneath the wall plane, giving you the necessary clearance while keeping the visible gap small enough to be covered by standard baseboards and shoe molding. You must also ensure that no spacers, stray nails, or hardened adhesive drops remain in the expansion channel. Even a single localized point of contact can transfer enough force to cause a localized buckle in your floor.
| Wood Species | Janka Hardness Rating | Radial Shrinkage % | Tangential Shrinkage % | Required Acclimation Time |
|---|---|---|---|---|
| White Oak | 1360 | 5.6% | 10.5% | 7 to 10 Days |
| Hard Maple | 1450 | 4.8% | 9.9% | 10 to 14 Days |
| Brazilian Cherry | 2350 | 4.3% | 7.1% | 14 to 21 Days |
| American Walnut | 1010 | 5.5% | 7.8% | 7 to 10 Days |
The chemistry of polyurethane wood adhesives
Modern elastomeric polyurethane adhesives provide a chemical bond that holds wood securely while allowing micro-flexibility during seasonal movement. Unlike rigid water-based glues that crystallize when cured, polyurethane adhesives remain flexible over their entire lifespan. This flexibility is essential for preventing the shear failures that occur when wood expands.
When you are installing a border, you are often working in areas where nailing is difficult or impossible, such as near stone fireplaces or sliding glass doors. In these zones, you must rely on a full-spread glue-down method. The adhesive must be applied using the correct trowel size to ensure 100% transfer to the back of the wood plank. If you use too little adhesive, you will end up with hollow spots that click and pop when walked on.
You must also pay close attention to the moisture vapor transmission rate of your adhesive. High-end polyurethane adhesives often double as moisture membranes, creating a barrier that protects the underside of your hardwood from concrete dampness. Never use cheap, water-based adhesives for hardwood installations. The water in the glue will absorb into the dry wood cells, causing immediate localized swelling and warping along the edges of your freshly laid planks.
The danger of over-cushioned underlayments
While most people want the thickest underlayment, too much cushion actually causes the locking mechanisms on floors to snap under pressure. This is a common failure point in modern click-lock systems and engineered wood floating floors. A thick, squishy foam pad allows the joints to deflect too much when walked on, leading to seam separation and broken joints.
A professional underlayment should have a high density and low compressibility. You want a material that offers excellent sound absorption and moisture resistance without sacrificing structural support. Cork, dense rubber, or high-density cross-linked polyethylene are the industry standards. These materials provide a firm foundation that keeps the tongue-and-groove joints aligned under heavy foot traffic.
For nail-down installations, you should use traditional silicone vapor shielding paper or asphalt-saturated felt. These materials do not provide cushion, but they create a smooth slip plane that prevents the wood from rubbing directly against the plywood subfloor, which eliminates annoying squeaks. They also retard moisture vapor transmission from the basement or crawlspace below, keeping your wood dry and stable.
“Wood moves. It is a physical certainty that cannot be stopped. Your only option is to engineer the floor to accommodate that movement safely.” – National Wood Flooring Association Manual
The precision cut and dry fit layout
A master border installation requires a complete dry-fit of the entire room perimeter before any adhesive or nails are applied. This allows you to verify the squareness of your lines, make micro-adjustments for wall deviations, and ensure that your miter joints fit tightly without any gaps.
You must use a high-tooth-count carbide blade on a precision sliding compound miter saw to make your cuts. Dull blades will tear the wood fibers, leaving frayed edges that are impossible to hide under finish. When cutting the miters for your border corners, do not assume your walls are at a perfect 90-degree angle. They almost never are. You must use an angle finder to measure the exact corner angle and divide it by two to determine your saw setting.
Once your border pieces are cut, lay them out around the perimeter of the room. Use blue painter tape to pull the joints tight together. Inspect every seam under a strong raking light to check for height variations or gaps. Only when the entire border is perfectly aligned and dry-fitted should you begin securing the wood to the subfloor, starting from your primary reference line and working your way outward.
Pre-Installation Checklist for Hardwood Borders
- Measure moisture content of the subfloor and the hardwood planks using a calibrated pin meter.
- Verify that the difference between subfloor and wood moisture is less than 4% for strip flooring and 2% for wide plank flooring.
- Check subfloor flatness using a ten-foot straightedge, correcting any deviation greater than 3/16 of an inch.
- Acclimate the hardwood planks in the installation room under active HVAC conditions for a minimum of seven days.
- Undercut all door casings and drywall to allow the wood to slide underneath for a clean expansion gap.
- Ensure that your compound miter saw is calibrated to make true, splinter-free cuts.
The science of sanding and finishing raw wood
Sanding a newly installed hardwood border requires a strategic progression of abrasive grits to avoid cross-grain scratching at the perpendicular joints. Because the border runs perpendicular to the field, a traditional drum sander moving in one direction will claw deep scratches across the grain of the border planks.
To prevent this damage, you must use a multi-disc planetary sander for the final sanding stages. The rotating action of a planetary sander cuts across the wood fibers in a random pattern, removing scratch marks without gouging the wood. You must start with a coarse grit to flatten the overwood, then step up to medium, and finish with a fine screen disc to polish the surface and open the wood pores for the finish.
When applying the finish, you must choose between a penetrating oil or a film-forming polyurethane. Penetrating oils soak into the wood fibers, highlighting the natural grain while allowing the wood to breathe. Film-forming finishes create a hard protective layer on top of the wood, offering superior scratch resistance but creating a barrier that can crack if the wood shifts too aggressively. Whichever system you choose, ensure the humidity levels are controlled during application to prevent dust nibs and drying defects from ruining your glass-smooth surface.
The final inspection of the completed field
A successful hardwood border installation is defined by the absence of visible gaps, squeaks, and height transitions across the floor. You must vacuum the entire surface clean and inspect every square foot under natural light. Run your hand across the joints to verify that there are no sharp edges or misaligned planks.
Once the floor is finished, you must educate the homeowner on proper maintenance. Tell them to throw away their steam mops immediately. Steam forces moisture deep into the wood joints, causing the finish to peel and the wood to swell. They must use a dry microfiber dust mop and a specialized wood cleaner that does not leave a waxy buildup. Proper humidity control must be maintained year-round using humidifiers in the winter and air conditioning in the summer to preserve the wood in its optimal moisture range.
By following these technical principles, you transform a standard floor installation into an architectural masterwork. The blue tape method, the precise calculation of expansion mechanics, and the selection of high-performance adhesives ensure that your borders will remain tight, straight, and beautiful for generations to come. This is how real floors are built.