
The Sandpaper Trick for Blending Pet Scratches on Hardwood
Every pet owner in Kansas City knows the sound. It’s the frantic “scritch-scratch” of a golden retriever chasing a tennis ball across the living room or a cat launching itself off the hallway floor. While we love our four-legged family members, that sound often results in a heart-sinking sight: white, jagged lines marring the surface of your beautiful floors. Seeing those first claw marks on a newly finished floor feels like a personal affront to your investment.
When homeowners see these marks, they usually fall into two camps. Some go the “viral hack” route, rubbing walnuts or crayons on their floors, while others assume the damage is catastrophic and requires a full hardwood floor refinishing kansas city project. As a flooring professional, I’m here to tell you there is a middle ground. I call it the “Sandpaper Trick.” It is a professional technique used to blend minor surface scratches without the need for heavy machinery or a thousand-dollar invoice. However, before you pick up a sanding block, you need to understand exactly what you are looking at. First, it is vital to know your material; you should How to Tell if Your Hardwood is Solid or Engineered in Seconds, as the depth of your wear layer dictates how much “tricking” you can actually do.
The goal of scratch repair hardwood floors isn’t always to make the floor perfect – it’s to make the damage invisible to the naked eye. Here is how we do it.
Assessment: Is it a Scratch or a Gouge?
Before we talk about sandpaper, we have to talk about depth. Not all damage is created equal. In the world of hardwood, we generally categorize pet damage into three tiers: surface scuffs, finish scratches, and wood gouges.
A surface scuff is merely a transfer of material (like rubber from a shoe) or a slight dulling of the sheen. A finish scratch – the primary target for our sandpaper trick – is a mark that has cut into the protective topcoat (polyurethane or oil) but hasn’t necessarily reached the raw wood fibers. A gouge, however, is a structural tear where the wood itself has been compressed or removed. If you can feel a deep “valley” with your fingernail, you might be looking at a hardwood floor patch situation rather than a simple blend.
To determine the severity, I recommend the “Screwdriver Test.” Take a flathead screwdriver to an inconspicuous area (like inside a closet) and lightly drag it to feel the resistance of your finish. Then, compare that to the feel of the scratch. If the finish is flaking away like dry skin, your floor’s bond is failing. For a more detailed diagnostic, check out The Screwdriver Test for Deciding Between a Kansas City Hardwood Refinish or a Total Replacement. If the scratch is white and “bright,” it usually means you’ve only scratched the finish. This is good news; it means the sandpaper trick will work wonders.
The Tools You Need for Professional Blending
One of the biggest mistakes DIYers make is grabbing whatever sandpaper they have in the garage. If you use a 60-grit or 80-grit paper on a localized scratch, you will create a permanent “dip” or “valley” in your floor that will catch the light and look worse than the scratch. Professional hardwood floor repair requires finesse and high-grit progression.
- High-Grit Sandpaper: You need 120-grit, 150-grit, and 180-grit. These are fine enough to smooth the finish without eating into the wood too quickly.
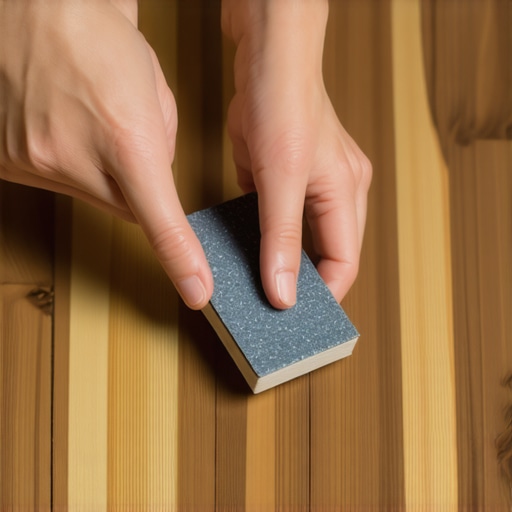
- A Flexible Sanding Block: Never use your bare hand. Your fingers create uneven pressure points. A rubber or foam sanding block ensures the pressure is distributed evenly across the board.
- Tack Cloth: Microfiber isn’t enough. You need a sticky tack cloth to remove every microscopic particle of dust before re-coating.
- Matching Finish: This is the “secret sauce.” If your floors were finished with a modern penetrating oil like Rubio Monocoat or Loba, blending is easy. If they are traditional high-gloss polyurethane, you’ll need a matching sheen (Satin, Semi-Gloss, or Matte).
- Mineral Spirits: For cleaning the area and testing how the “wet” wood will look once finished.
Step-by-Step: The Sandpaper Trick
Now that you have your tools, let’s get to work. The “Sandpaper Trick” relies on a technique called feathering. This is how we trick the eye into seeing a flat surface when, in reality, we’ve slightly altered the topography of the finish.
Step 1: Cleaning and Preparation
You cannot sand a dirty floor. If there is wax, floor cleaner residue (looking at you, Murphy’s Oil Soap), or pet dander in the scratch, you will grind that “gunk” into the wood fibers, causing the new finish to peel. Clean the area with a damp cloth and a bit of mineral spirits. Let it dry completely.
Step 2: The “Feathering” Technique
Start with your 120-grit sandpaper on the block. The most important rule in scratch repair hardwood floors is to always sand with the grain. Never sand across the boards. Lightly sand the scratch, extending your strokes about 2 to 3 inches past the ends of the scratch. This “feathers” the edges so there isn’t a hard line between the repaired area and the original floor.
Progress to the 150-grit, then the 180-grit. By the time you finish with the 180-grit, the white “line” of the scratch should be gone, replaced by a dull, smooth patch. If the scratch was deep enough to remove the stain, you may need to apply a tiny amount of matching stain with a Q-tip at this stage. If you find a hole that won’t sand out, you might need to use The Wood Glue and Sanding Dust Trick for Making Hardwood Patches Invisible.
Step 3: Managing Dust
In the professional world, we use heavy-duty HEPA-filtered vacuums for sanding and refinishing hardwood floors to keep the home pristine. For a small DIY repair, you still need to be diligent. Vacuum the area, then use your tack cloth. Run your hand over the wood; it should feel as smooth as glass. Any grit left behind will be magnified once the finish is applied.
Step 4: Re-coating (The “Drop-In”)
Using a small artist’s brush or a lint-free cloth, apply a very thin layer of finish to the sanded area. Do not “puddle” the finish. You want to “drop it in” and then wipe the edges so they blend into the surrounding floor. If you are using a hard-wax oil like Rubio Monocoat, this process is incredibly forgiving. If you are using polyurethane, you may need to wait for it to dry and then lightly “buff” the edges with a maroon pad to match the sheen perfectly.
Why “Viral Hacks” Fail (The Walnut vs. Sandpaper Debate)
You’ve probably seen the videos: someone rubs a walnut half over a scratch and, like magic, it disappears. While this makes for a great TikTok, it’s a nightmare for refinishing hardwood floor contractors.
Walnuts contain natural fats and oils. When you rub them into a scratch, those oils saturate the raw wood fibers. While this darkens the scratch and makes it blend temporarily, those oils never “dry” or cure. They remain in the wood, creating a “contaminant zone.” If you ever decide to do a professional wood floor refinishing kansas city project later, the new finish will likely fail to bond in those spots, leading to peeling and “fish-eyes.” The sandpaper trick is superior because it actually removes the damaged finish and replaces it with a permanent, cured protective layer. Don’t trade a five-minute fix for a lifelong floor problem.
When DIY Isn’t Enough: The Kansas City Professional Standard
The sandpaper trick is perfect for the occasional claw mark or the “zoomie” track in the hallway. However, there are times when DIY efforts are like putting a Band-Aid on a broken bone.
In Kansas City, our floors live through extreme environmental shifts. We have humid, heavy summers and bone-dry, sub-zero winters. This causes hardwood to expand and contract significantly. If your pet damage includes deep urine stains (which turn the wood black due to an ammonia reaction with the tannins in oak) or if the scratches cover more than 20% of the room, localized blending won’t cut it. The sheer volume of “blended” spots will create a patchy, mottled look that ruins the room’s aesthetic.
When the damage is widespread, it’s time to look into professional hardwood floor refinishing kansas city. A professional crew can perform a “screen and coat” (buffing the top layer and adding a new coat) or a full sand-to-raw-wood restoration. If you aren’t sure which one you need, try The Tape Test for Deciding if Your Kansas City Hardwood Needs a Full Sanding or a Simple Screen and Coat.
Large-scale projects require professional-grade dustless sanding systems. These systems hook directly to the sanding equipment, ensuring that 99% of the wood dust is evacuated to a trailer outside your home. This is the “Kansas City Professional Standard” – keeping your air clean while making your floors look brand new.
Prevention: Protecting Your Investment
Once you’ve mastered the sandpaper trick or had a pro come in for old hardwood floor restoration, you want to keep the floors looking that way. Prevention is always cheaper than repair.
- Trim the Talons: Keep your pet’s nails trimmed and, more importantly, buffed. Sharp edges do the damage; blunt edges just slide.
- Strategic Rug Placement: Identify the “pivot points” in your home – where your dog rounds the corner to the kitchen or where they jump off the couch. These areas should have high-quality area rugs with non-slip pads.
- The Humidifier Factor: Kansas City winters are brutal on wood. When the air gets dry, the wood shrinks, and the finish can become more brittle and prone to scratching. See Why Your Hardwood Planks Shrink in Winter and the Humidifier Fix to learn how to keep your wood “supple” and resistant to damage.
Conclusion
Your hardwood floors are one of the most valuable parts of your home, and living with pets shouldn’t mean living with ugly floors. The sandpaper trick is a vital skill for any homeowner, allowing you to maintain the beauty of your wood between professional servicings. By feathering your edges and using the right high-grit progression, you can make those minor accidents disappear.
However, if your floors have seen years of “ruff” love and the scratches have turned into a dull, grey haze across your entire home, it might be time for a professional touch. Don’t settle for “good enough” when it comes to your home’s value. Contact Justin Kelley at Premium Flooring Co. today for a professional evaluation of your hardwood floor refinishing kansas city project. We specialize in bringing old floors back to life with the precision and care your home deserves.