
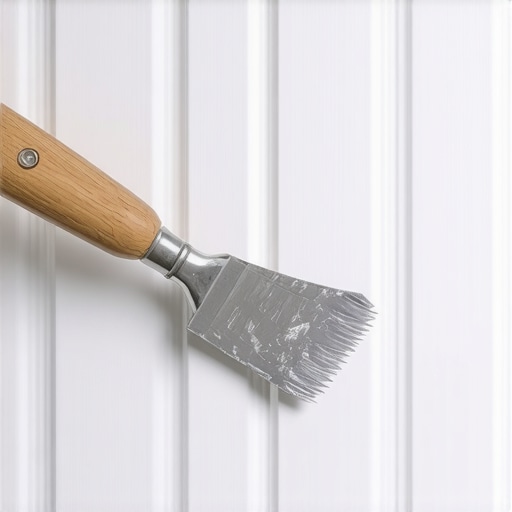
The Putty Knife Trick for Fixing Gouges in Painted Trim
There is a specific kind of sinking feeling that occurs when you hear the “thump” of a vacuum cleaner hitting a baseboard or the “clatter” of a child’s toy scraping against a door casing. You look down, and there it is: a deep, jagged gouge in your once-pristine, semi-gloss white trim. For homeowners who take pride in their property, these “battle scars” are more than just minor nuisances; they are blemishes that catch the light and scream for attention.
As the founder of ONiT Painting, I’ve seen thousands of these gouges across homes in Carmel, Fishers, and Zionsville. Most DIY enthusiasts – and even some less-experienced house painters in Indianapolis – approach these repairs by simply slapping some wood filler into the hole, wiping it roughly with a finger, and hoping for the best. The result is almost always a visible patch that looks worse than the original damage.
Today, I’m going to share a trade secret that our professional crews use to make these repairs literally invisible. We call it the “Putty Knife Trick.” It isn’t just about the tool itself; it’s about how you prepare that tool and the specific technique used to manipulate the material. By the end of this guide, you’ll understand how to achieve a level of finish that rivals a factory-new installation.
Why Standard Wood Filling Often Fails
If you’ve ever tried to fix a trim gouge only to have the repair look like a “dimple” or a “hump” after you paint it, you aren’t alone. Standard wood filling fails for three primary reasons: material shrinkage, improper application pressure, and over-sanding.
Most consumer-grade wood fillers are water-based. While they are easy to clean up, they contain a high percentage of moisture that evaporates as the product cures. As that moisture leaves, the filler shrinks. This is why you often see a concave dip where the gouge used to be. Furthermore, many DIYers don’t realize that wood trim is a living material that expands and contracts with the seasons. In the Indianapolis area, our humid summers and bone-dry winters cause significant movement. If you use a filler that is too brittle, it will simply pop out or crack within six months. This is very similar to why your new hardwood floor has gaps between the planks; the material is reacting to its environment, and your repair must be able to withstand that movement.
Finally, there is the issue of “flashing.” When you apply a patch and don’t feather it correctly, the texture of the filler differs from the texture of the surrounding wood. When interior painters in Indianapolis apply the finish coat, the paint absorbs differently into the patch than it does into the sealed wood, creating a visible “hot spot” when the sun hits the trim.
The “Trick”: Sharpening and Technique
The secret to a perfect repair isn’t found in a specialized chemical; it’s found in the preparation of your putty knife. Most putty knives bought at a big-box store in Noblesville or Fishers come with a blunt, squared-off edge. This is fine for scraping loose paint, but it is terrible for precision filling.
Step 1: Sharpening the Knife
Professional painters often treat their stiff putty knives like wood chisels. To perform the Putty Knife Trick, you need a 1.5-inch or 2-inch stiff-blade putty knife (not the flexible kind). Take a diamond sharpening stone or a fine-grit whetstone and hone the edge of the knife at a 30-degree angle. You aren’t trying to make it razor-sharp enough to shave with, but you want a crisp, beveled edge that can “cut” the putty and shear off excess material flush with the surface of the wood. This sharpened edge allows you to apply maximum pressure into the gouge without leaving a “mound” of excess material on the surrounding paint.
Step 2: The Double-Knife Method
One of the biggest mistakes you can make is working directly out of the putty can. This introduces air and contaminants into the container, drying out the remaining product. Instead, use the “double-knife” method. Scoop a golf-ball-sized amount of putty onto a larger, 6-inch taping knife – this serves as your “palette.” Use your smaller, sharpened knife to work small amounts of material from the palette into the gouge. This keeps your primary tool clean and gives you better control over the volume of material you’re using.
Step 3: The Kneading Secret
If you are using a professional-grade oil-based putty (like Crawford’s), it must be kneaded. When you first take it out of the can, it may feel oily or stiff. Roll it between your palms and work it with your fingers until it reaches the consistency of soft modeling clay. If the putty feels too oily – which can happen in our humid Indiana summers – here is a pro tip: roll the putty ball across a piece of clean cardboard. The cardboard will wick away the excess linseed oil, leaving you with a more workable, non-greasy material. This level of preparation is also why the putty knife trick for fixing gouges in engineered hardwood is so effective; the material consistency is everything.
Step-by-Step: The Professional Repair Process
Now that your tools are prepped, let’s walk through the actual repair. This is the exact process our interior painters in Indianapolis use when prepping high-end trim for a refresh.
1. Prep the Gouge
Use the corner of your sharpened putty knife to “clean” the gouge. You want to remove any loose wood fibers or paint flakes. If the gouge was caused by a vacuum cleaner, there might be rubber transfer or floor wax inside the hole. If you don’t remove this, the putty won’t stick. Wipe the area with a bit of denatured alcohol to ensure a clean bond.
2. The Fill
Take a small amount of kneaded putty on the tip of your sharpened knife. Push it into the gouge at a 45-degree angle. The goal is to “pack” the hole from the bottom up. Don’t just swipe over the top; you need to force the air out. This is especially important for cabinet painting in Indianapolis, where the surfaces are often vertical and the lighting is unforgiving.
3. The Scrape
Once the gouge is packed, turn your sharpened putty knife so the beveled edge is almost flat against the trim. In one firm, smooth motion, scrape across the repair. Because your knife is sharpened like a chisel, it will shear off the excess putty perfectly flush with the wood. If done correctly, you should see the gouge filled perfectly, with almost no residue on the surrounding paint. This technique is similar to the painter’s tape trick for scribing straight lines on cabinet trim – it’s all about creating a clean, mechanical break between the repair and the finished surface.
4. Drying and Curing
Patience is the hallmark of a professional. Oil-based putties don’t “dry” through evaporation; they “cure” through oxidation. Depending on the depth of the gouge and the humidity in your home, this could take 24 to 48 hours. Do not rush to paint over it, or the solvents in the paint will liquefy the putty, leading to a saggy, messy repair.
Choosing Your Weapon: Putty vs. Filler vs. Bondo
Not all gouges are created equal. The material you choose depends on the location and the severity of the damage.
- Painter’s Putty (e.g., Crawford’s): Best for small interior gouges, nail holes, and cracks in trim. It stays slightly flexible and doesn’t shrink.
- Water-Based Wood Filler: Good for large areas that need to be sanded flat, but prone to shrinkage. Use this only if you plan on doing a “two-pass” fill.
- Two-Part Wood Filler (Bondo): This is the “heavy artillery.” Exterior painting in Indianapolis often requires Bondo because it handles the extreme temperature swings of the Midwest without cracking. It uses a chemical hardener and sets up in 15 minutes. It’s perfect for door sills or exterior window casings in Fishers or Carmel that have suffered significant rot or physical damage.
Choosing the wrong material is a leading cause of repair failure. It’s a similar concept to why your new grout looks faded after only one week; if the chemistry of the repair material doesn’t match the environment, the aesthetic will fail quickly.
Finishing Touches: Sanding and Color Matching
If you used the sharpened putty knife trick correctly, you should have very little sanding to do. However, for a truly invisible finish, a light touch with 220-grit sandpaper is recommended once the putty is fully cured.
The Flashlight Test: Take a high-lumen flashlight and hold it flush against the wall, shining the light across the trim (grazing light). This will highlight any imperfections, humps, or dips. If you see a shadow, you need more sanding or a second, thinner “skim” coat of putty. This attention to detail is how professional painting contractors in Noblesville ensure their work looks flawless under any lighting condition.
When it comes to painting the repair, don’t just dab paint on the hole. You need to “feather” the edges. Use a small artist brush or a 1-inch trim brush. Apply the paint to the center of the repair and lightly flick the brush outward into the existing paint. This prevents a hard “ring” from forming around the patch. If you are dealing with pet damage specifically, you might find the sandpaper trick for blending pet scratches on hardwood useful, as the blending principles are very similar.
When to Call a Professional Painting Contractor in Noblesville
While the Putty Knife Trick is a game-changer for individual gouges, there comes a point where DIY repair is no longer efficient. If your baseboards look like they’ve been through a war zone, or if you are preparing your home for sale in the competitive Carmel or Zionsville markets, a professional refresh is often the better investment.
At ONiT Painting, we specialize in high-end residential interiors. We don’t just paint; we restore. Our crews are experts at identifying the right materials for every substrate, ensuring that your “invisible” repairs stay invisible for years to come. We also utilize advanced techniques like the blue tape secret for perfectly straight hardwood borders and the wood glue and sanding dust trick for making hardwood patches invisible to ensure every transition in your home is sharp and professional.
Conclusion
Fixing a gouge in your trim doesn’t have to be a source of frustration. By sharpening your putty knife, kneading your material, and using the double-knife method, you can move beyond “good enough” and achieve a professional-grade finish. It is these small, disciplined details that separate a DIY project from a masterpiece.
If you have a project in Zionsville, Fishers, or anywhere in the greater Indianapolis area that requires a professional touch, I invite you to reach out to us at ONiT Painting. We would love to help you bring the “wow” factor back to your home’s interior. Whether it’s a single room or a full exterior transformation, we bring the same level of precision and “insider” knowledge to every job we touch.
Ready to transform your home? Contact ONiT Painting today for a professional consultation and quote!