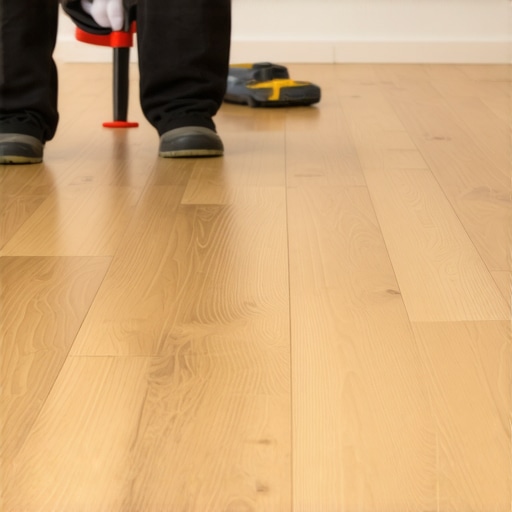
Why Your Laminate Floor Feels Spongy and How to Firm It Up
I spent thirty years with sawdust under my nails and the smell of WD-40 on my clothes. I have seen every flooring disaster a person can imagine. Most guys skip the leveling compound. They think the underlayment will hide the dip. It won’t. I spent three days grinding concrete on a job last month just so the floor wouldn’t click like a castanet. The homeowners had bought the most expensive planks they could find, but they ignored the substrate. That is like putting a silk suit on a pig. If you walk across your room and feel a bounce, you are not just dealing with a minor annoyance. You are witnessing the slow death of your floor. Laminate is a floating system, but it is not a hovercraft. It needs a rigid, flat foundation to survive the mechanical stress of your daily life.
The physics of the hollow click
A spongy laminate floor is caused by vertical deflection when the planks are not supported by a flat subfloor. This gap between the laminate and the base layer allows the locking mechanism to bend. Excessive underlayment or trapped moisture often exacerbates this structural instability and movement. When you step on a plank that is hovering over a dip, the tongue and groove joint acts as a fulcrum. It was never designed to handle that kind of torque. The core of these planks is usually High Density Fiberboard, or HDF. While HDF is incredibly dense, it is also brittle under specific shear forces. Every time that floor flexes, you are micro-fracturing the locking mechanism. Eventually, that sponginess turns into a visible gap or a snapped joint. You might notice that the sound changes from a solid thud to a plastic click. That is the sound of air being compressed and the planks rubbing against each other in a way they were never meant to. It is the beginning of the end for your installation.
Why your subfloor is lying to you
Subfloor flatness is the most ignored metric in residential construction. A subfloor might be level but it is rarely flat. Dips and valleys exceeding one eighth of an inch over a ten foot radius create air pockets that cause the floor to bounce and eventually fail. People get confused between level and flat. A floor can be slanted like a ramp and still be flat enough for laminate. But a floor that is perfectly level but has a two inch bowl in the middle is a disaster. I have walked onto job sites where the subfloor looked like the surface of the moon. The contractor told the owner that the padding would smooth it out. That is a lie. Underlayment is for sound dampening and minor thermal insulation. It is not a structural filler. If your subfloor has a valley, the laminate will bridge that valley. When you step on that bridge, it collapses into the hole. That is the bounce you feel. You need a ten foot straightedge to truly see what is happening. Anything more than an eighth of an inch of light under that bar means you have work to do before the first plank goes down.
“A floor is only as good as the subfloor beneath it; deflection is the enemy of every joint.” – Master Flooring Axiom
The danger of excessive underlayment
Thick foam underlayment is a common trap for DIY installers. While it feels soft, it provides too much compression. This lack of support forces the thin tongue and groove joints to bear the weight of foot traffic, leading to snapped edges and permanent floor damage. I see this all the time. A homeowner wants a floor that feels soft underfoot, so they buy the thickest, cheapest foam they can find at the big box store. They might even double it up. This is a catastrophic mistake. Laminate requires a high density underlayment with a very low compression rate. Think about it. If the pad is squishy, the entire floor moves down when you walk. But it does not move down uniformly. The plank you are standing on sinks, while the plank next to it stays put. This puts all the pressure on the thin plastic or wood locking lip. You want an underlayment that has a high PSI rating. It should feel firm to the touch, almost like a piece of rubber or heavy felt. If it feels like the packaging material used for a television, throw it in the trash.
| Underlayment Type | Density (lb/ft3) | Compression Resistance | Best Use Case |
|---|---|---|---|
| Standard Foam | 1.5 – 2.0 | Very Low | Temporary setups only |
| High-Density Felt | 10.0 – 12.0 | High | Standard HDF Laminate |
| Acoustical Rubber | 25.0+ | Extreme | Multi-story condos |
| Natural Cork | 12.0 – 14.0 | High | Premium installations |
The ghost in the expansion gap
Proper expansion gaps are required around the entire perimeter of a laminate installation to prevent the floor from binding against walls. Without this space, the floor will arch upward as it expands with humidity, creating a spongy or bouncy feel in the center. Wood and HDF are hygroscopic. They breathe. They take in moisture from the air and they grow. In a humid summer, your floor might grow by a quarter of an inch across the span of a room. If that floor is jammed tight against the baseboards or a door frame, it has nowhere to go. The force of that expansion has to be released somewhere. Usually, it pushes the floor upward, creating a bubble. This is what we call crowning. When you walk on that bubble, it feels like you are walking on a cloud, but not the good kind. You are feeling the tension of a floor that is literally trying to rip itself apart. You must leave at least a quarter inch gap, though three eighths is better for larger rooms. Cover it with your baseboards or shoe molding, but never, ever pin the floor down with nails through those moldings.
The science of the click lock
The mechanical integrity of a laminate floor depends on the tongue and groove locking system remaining in a state of constant tension. Any vertical movement breaks this tension, leading to friction and the eventual degradation of the HDF core material. When we talk about the chemistry of these floors, we are looking at the resins used to bind the wood fibers. These resins are strong, but they are susceptible to heat and vibration. When a floor is spongy, the friction between the tongue and the groove generates heat on a microscopic level. This heat can cause the resins to soften. Combined with the mechanical rubbing, the HDF turns back into sawdust inside the joint. This is why you sometimes see a fine white or brown powder appearing in the seams of a bouncy floor. That is the floor literally grinding itself into dust. Once that joint is gone, there is no way to fix it without replacing the planks. Firming up the floor early is the only way to save your investment.
“The National Wood Flooring Association standards dictate that any substrate must be flat within 3/16 inch in a 10 foot radius for proper floating floor performance.” – NWFA Technical Manual
The checklist for a firm foundation
- Check subfloor flatness with a ten foot straightedge before installation.
- Verify that moisture levels in concrete slabs are below 3 percent.
- Use a high density underlayment with a thickness not exceeding 3mm.
- Leave a minimum 3/8 inch expansion gap around all vertical obstructions.
- Acclimate the planks in the room for at least 48 hours prior to clicking them together.
- Ensure no heavy cabinetry or kitchen islands are installed on top of the floating floor.
The regional impact of humidity
If you live in a place like New Orleans or Houston, the humidity is your primary enemy. In those swampy environments, a standard laminate might expand so much that it buckles within a week if you did not leave a massive expansion gap. You might even need to look at waterproof laminates that use a stone plastic composite core instead of HDF. On the other hand, if you are in the dry heat of Phoenix, the floor might shrink. This creates a different kind of sponginess where the planks pull apart and the underlayment shifts. In either case, the local climate dictates how you prep the site. You cannot ignore the ambient air. You need a hygrometer in the room. If the humidity is swinging more than twenty percent between seasons, your floor is going to move, and you better have built in the tolerances to handle it. Do not think that just because the floor is inside a house that the weather does not matter. The house is a living, breathing structure.
How to firm up a floor after it is installed
Fixing a spongy floor after the fact is difficult but possible through the injection of specialized floor repair resins. These low viscosity adhesives fill the voids beneath the planks, hardening into a solid support that eliminates vertical movement without requiring a full tear out. If you have one or two spots that are driving you crazy, you can use a repair kit. You drill a tiny hole, usually 1/16 of an inch, in the seam or the plank. Then you inject a pressurized adhesive that spreads out into the dip under the floor. This adhesive expands slightly and then hardens. It is like a targeted shot of self-leveling compound. You then plug the hole with a color-matched wax stick. It is a surgical fix. However, if the whole floor is spongy, you have no choice. You have to pull up the baseboards, unclick the floor, and address the subfloor with a real leveling agent. It is a painful lesson, but your feet will thank you for the solid ground. A floor should feel like rock, not a sponge.