The Secret to Removing Old Grout Without Damaging Your Tiles
I spent three days grinding concrete on a job last month just so the floor wouldn’t click like a castanet. Most guys skip the leveling compound and think the underlayment will hide the dip, but it never does. Grout removal is the same kind of technical nightmare if you treat it like a demolition project instead of a surgical extraction. I have seen countless DIYers and even a few green contractors take a hammer and chisel to a beautiful porcelain floor, only to end up with a pile of chipped edges and ruined subfloors. You have to respect the bond between the material and the substrate. Grout is not just a filler, it is a cementitious or epoxy-based structural component that locks your tiles into a rigid grid. When you decide to pull it out, you are fighting against a chemical and mechanical bond that was designed to last a century. If you go in hot and heavy, the tile will lose. I smell like oak dust and WD-40 most days, and my knees have the permanent calluses of a man who has spent twenty-five years on a floor. I know when a grout joint is ready to give up and when it is going to fight back. Removing grout without damage is about controlling vibration and understanding the Mohs scale of hardness. You are working in a space often no wider than one-eighth of an inch. There is no room for error. One slip of a rotary tool and you have a permanent scar across a tile that might be out of production. We are going to look at the physics of the joint and the chemistry of the grout itself to ensure your tiles remain pristine while the old, moldy sand is sent to the dumpster.
The invisible bond holding your floor together
Grout removal requires breaking the mechanical bond between the cementitious matrix and the tile shoulder without applying lateral pressure. To remove grout safely, you must use tools that vibrate at high frequencies or utilize manual abrasion to slowly disintegrate the grout structure. Applying too much force will cause the tile to chip or crack because of the rigid nature of the installation. I have walked into jobs where the homeowner tried to use a flathead screwdriver and a mallet. It is a disaster. Every strike sends a shockwave through the ceramic or stone. If that shockwave hits a void in the thin-set underneath, the tile snaps. This is why we use oscillating tools or specialized hand scrapers. We want to turn the grout into powder, not chunks. You need to understand that grout is essentially a bridge. If you collapse the bridge too fast, the abutments, which are your tiles, will crumble. We focus on the center of the joint first to create a relief gap. Once the center is gone, the tension is released, and the grout clinging to the edges can be carefully scraped away. This process respects the integrity of the installation. We are not just removing dirt; we are performing a controlled demolition of a structural element.
Tools that respect the ceramic edge
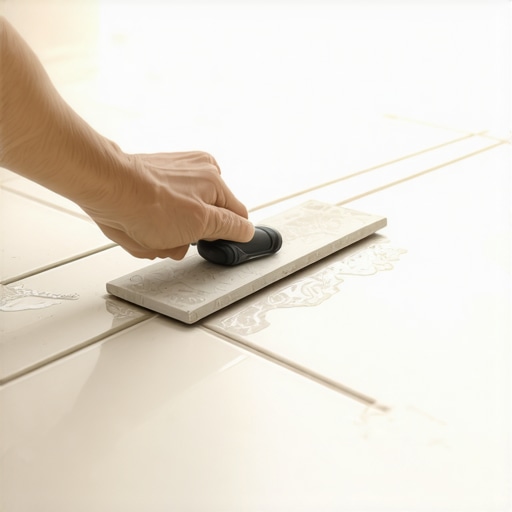
Selecting the right tool for grout removal depends on the width of the joint and the hardness of the grout material. An oscillating multi-tool with a diamond-grit blade is the standard for professional results because it provides vertical vibration rather than rotational force. This reduces the risk of the tool jumping across the face of the tile and causing deep scratches. For tighter joints, a manual carbide-tipped grout saw offers the most control. I have seen guys try to use a dremel with a high-speed bit, and while it works, it is dangerous. One sneeze and you have a three-inch gouge in a piece of marble. The oscillating tool is the king of the job site for a reason. It stays in the channel. You also need to consider the dust. Old grout is full of silica and potentially old adhesives. A shop vac with a HEPA filter is not optional; it is a safety requirement. I keep my vac nozzle right at the blade. It keeps the line of sight clear and keeps the silica out of my lungs. If you cannot see the edge of the tile, you will hit the edge of the tile. It is that simple. I also recommend a good set of knee pads. If you are comfortable, you are steady. If your knees are screaming, you will rush the job, and rushing is how tiles get broken. I have seen it happen a thousand times.
| Tool Type | Ideal Joint Width | Risk Level | Primary Benefit |
|---|---|---|---|
| Manual Carbide Scraper | 1/16 to 1/8 inch | Low | Maximum precision and no dust cloud. |
| Oscillating Multi-Tool | 1/8 inch and wider | Medium | Speed and efficiency for large rooms. |
| Reciprocating Grout Blade | 1/4 inch and wider | High | Aggressive removal of thick sand grout. |
| Diamond Hand Pad | Any width | Low | Cleaning the tile shoulders after removal. |
The structural reality of the substrate
The stability of the subfloor and the quality of the original thin-set determine how easily grout can be removed without causing tile delamination. If the subfloor is bouncy or made of thin plywood, the tile is already under stress and any vibration from a power tool might cause the bond to fail. I always check for deflection before I start. If I see the tiles moving even a fraction of a millimeter, I stop the power tools and go manual. You have to be an investigator. Look at the cracks. If the grout is cracking in a straight line down the center, the floor is moving. If the grout is crumbling into powder, it was a bad mix. A bad mix is actually easier to remove, but it means you have to be careful not to damage the thin-set underneath. You do not want to dig too deep. You only need to remove about two-thirds of the grout depth to get a good bond for the new material. If you go all the way to the subfloor, you risk hitting the waterproofing membrane in a shower. That is a nightmare you do not want. If you nick that membrane, you are no longer just replacing grout; you are rebuilding a shower pan. I have seen a five-hundred dollar grout job turn into a five-thousand dollar insurance claim because someone got greedy with a grinder. Stay shallow, stay steady, and watch the color of the dust. When the dust changes from grout color to thin-set gray, you are deep enough.
“A floor is only as good as the subfloor beneath it; deflection is the enemy of every joint.” – Master Flooring Axiom
Why your shower floor is crying
Moisture saturation in shower grout changes the structural integrity of the material and requires a slower, more methodical removal approach. In wet environments, grout often becomes soft or harbor mold that has traveled deep into the cement matrix. This moisture can also weaken the bond of the tiles to the backer board. When you start removing grout in a shower, you are often dealing with a damp environment that clogs up diamond blades and creates a slurry instead of dust. You need to let the area dry out for at least forty-eight hours before you start. Use a fan or a dehumidifier. Dry grout is brittle, and brittle grout is easy to remove. Wet grout is like cutting through old chewing gum. It is messy and unpredictable. Also, be aware of the corners. Most showers use caulk in the change of plane, but some hack installers put grout in the corners. That grout will always crack. When you remove it, you have to be incredibly careful not to pierce the vertical waterproofing. I use a plastic putty knife to scrape the corners after I have loosened the grout with a manual saw. It is about layers. You are peeling back the years of neglect. This is not a race. If you treat a shower floor like a NASCAR track, you will end up with a leak in the kitchen ceiling below.
The danger of the high speed rotary bit
High-speed rotary tools often spin at over twenty thousand revolutions per minute, making them difficult to control when they encounter hard spots in the grout. While many manufacturers market grout removal bits for these tools, I rarely use them on high-end tile. The centrifugal force wants to pull the tool out of the joint. If the bit catches a piece of aggregate, it can skip across the tile surface. I call these tracks ‘the marks of the amateur.’ They are impossible to hide. If you must use a rotary tool, you need a steady-rest attachment that keeps the bit at a consistent depth. Even then, the heat generated by the friction can actually scorch the edge of the tile or cause the grout to glaze over, making it even harder to remove. Heat is the enemy of ceramic glaze. If the tile gets too hot, the glaze can pop off in tiny shards called spalling. You are much better off with the back-and-forth motion of an oscillator. It is more predictable. It is more surgical. I have spent years fixing the mistakes of people who thought a dremel was the answer to every flooring problem. It isn’t. The best tool is often the one that takes the most effort to use because it gives you the most feedback through your hands. You can feel the grout breaking. You can feel the edge of the tile. That tactile feedback is what keeps the floor in one piece.
A checklist for the surgical removal process
- Verify the type of grout (Sanded, Unsanded, or Epoxy) before selecting blades.
- Perform a scratch test on a spare tile to see how much pressure the glaze can handle.
- Tape off the edges of expensive or decorative tiles with heavy-duty painter’s tape.
- Start the extraction in the center of the room to get a feel for the grout hardness.
- Maintain a vacuum nozzle within two inches of the tool at all times to prevent silica buildup.
- Use a manual pick to clear out the stubborn corners where power tools cannot reach.
- Wipe the joints with a damp sponge to inspect for remaining debris before re-grouting.
Material hardness on the Mohs scale
Understanding the hardness gap between your grout and your tile is the ultimate safeguard against accidental damage. Most ceramic tiles sit between a five and a seven on the Mohs scale, while porcelain is even harder. Cement grout is significantly softer, usually hovering around a three or four. This hardness gap is your safety margin. Diamond blades are harder than both, which is why they cut through everything. However, carbide scrapers are designed to eat through cement while struggling against the glass-like surface of a tile glaze. This is why I prefer carbide for the delicate work. If you know you are working with a soft stone like travertine or marble, you have to be ten times more careful. Natural stone is often the same hardness as the grout itself. There is no safety margin there. If you slip on a travertine floor, the tool will eat into the stone just as fast as it eats the grout. For stone, I throw the power tools in the truck and do the whole thing by hand. It takes longer and costs the customer more, but it is the only way to guarantee the floor survives. I have seen a guy ruin a ten-thousand dollar marble foyer because he thought he could speed through it with an angle grinder. He was wrong. The stone was too soft, and the tool was too hungry.
“True craftsmanship is defined by the restraint of the installer, not the power of his tools.” – Master Flooring Axiom
Managing the dust cloud
Silica dust generated during grout removal is a significant health hazard and a nuisance that can coat every surface in a home. When you grind grout, you are aerosolizing crystalline silica. This is the same stuff that causes silicosis. I do not play around with it. Beyond the health risks, the dust is incredibly abrasive. If it settles on a hardwood floor or a countertop and someone wipes it off, it will scratch the finish. I seal off the room with plastic sheeting and use a negative air machine if the job is big enough. You have to think about the HVAC system too. If you do not tape off the return vents, you are just pumping grout dust into every bedroom in the house. I have a very specific setup. I use a high-flow vacuum with a fleece bag and a HEPA filter. I also use a spray bottle to lightly mist the grout joints. This is a trick not many people use. A little bit of moisture keeps the dust down without turning the grout into mud. It also helps cool the blade. Just a mist, mind you. You do not want a puddle. It is about containment. A clean job site is the mark of a pro. If I leave a house and the customer finds dust in their spice rack, I have failed at my job.
Re-grouting for the next decade
The preparation of the joint after removal is more important than the removal itself for ensuring the longevity of the new installation. Once the old grout is gone, the channel must be perfectly clean. If there is dust or old grout chunks left in the bottom, the new grout will not bond. It will sit on top like a scab and eventually pop out. I use a stiff nylon brush and a vacuum to get every single grain of sand out of those joints. Then I wipe it down with a microfiber cloth and a little bit of denatured alcohol. This removes any oils or residues. When you go back in with the new grout, you want a chemical bond. I recommend using a high-performance grout with an integrated sealer. While most people want the thickest underlayment or the most expensive tile, the grout is the weakest link in the chain. It is the part that fails first. By using a modified grout that has some flexibility, you can compensate for the minor movements in the subfloor that caused the original grout to crack. It is about building a system that can breathe and move. A floor is a living thing. It expands and contracts with the seasons. If you lock it in too tight with rigid, old-school grout, it will break again. Give it some room to live, and it will serve you for decades.