The hidden efficiency of the professional flooring world
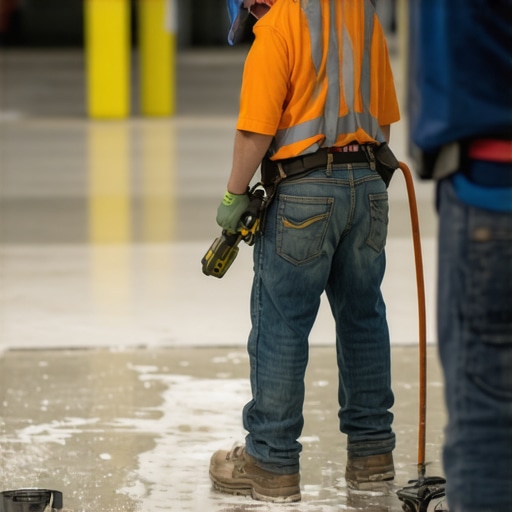
I smell like WD-40 and oak dust most days. My knees have the permanent calluses of a man who has spent twenty-five years crawling across subfloers. I have seen every shortcut in the book. Most guys skip the leveling compound. They think the underlayment will hide the dip. It won’t. I spent three days grinding concrete on a job last month just so the floor wouldn’t click like a castanet. That job was for a massive luxury basement, and the client was obsessed with the idea of a waterproof floor. They bought the expensive tile, the fancy Italian thin-set, and the designer grout. But they were terrified of the timeline. That is when I pulled out a tool that costs less than a decent sandwich. It is a heavy-duty vinyl grout bag. It looks like something a baker uses to frost a cake, but it is the difference between finishing a five-hundred-square-foot room in a day or spending a week scrubbing haze off the tile faces. When you are dealing with large-format tiles or rough-textured stone, the traditional method of smearing grout across the entire surface with a float is a recipe for physical exhaustion and chemical failure. The grout bag changes the physics of the application entirely.
The secret weapon for massive tile layouts
The heavy-duty grout bag is the $10 tool that accelerates large-scale installations by allowing for direct joint injection. This method bypasses the traditional grout float smear technique, significantly reducing cleanup time and preventing grout haze on porous surfaces like natural stone or textured porcelain. It is particularly effective for deep joints and vertical shower walls. Most installers treat the grout float as the only way to get the job done. They are wrong. When you use a grout bag, you are focusing the pressure exactly where it needs to be. You are not fighting the friction of the tile surface. You are using hydraulic force to pack the grout deep into the joint. This is especially vital when you are working with modified grouts that have a fast set time. If you spread that across a hot slab in July, it will skin over before you can wash it. The bag keeps the grout contained and moist until the second it enters the joint.
“A floor is only as good as the subfloor beneath it; deflection is the enemy of every joint.” – Master Flooring Axiom
The molecular reality of grout hydration
Grout is not just colored sand. It is a complex chemical matrix of Portland cement, aggregates, and polymer additives that require a specific water-to-cement ratio to achieve maximum compressive strength. When you use the smear method, you are exposing a massive surface area of the grout to the air, which leads to evaporative moisture loss. This can cause the grout to become brittle and chalky. By using a grout bag, you maintain the chemical integrity of the mix. The hydration process occurs within the joint itself, protected by the tile edges. This ensures that the crystalline structure of the cement forms correctly. I have seen too many showers where the grout started crumbling after six months because the installer added too much water during the cleanup phase. They were trying to get the haze off, and in doing so, they washed out the polymers that provide the waterproof bond. You have to understand that the more water you add during the wash, the more you dilute the pigment and the structural binder. It is a rookie mistake that leads to callbacks and mold growth behind the tile.
Why your subfloor is lying to you
Subfloor flatness and structural integrity are the primary factors in grout joint longevity and the prevention of tile tenting. Even the best grout will crack if the subfloor deflection exceeds L/360 for ceramic or L/720 for natural stone. A subfloor might look flat to the naked eye, but once you put a ten-foot straightedge on it, the lies are revealed. You will find dips, humps, and ridges that will snap the locking mechanisms on laminate or hardwood floors. If you are laying tile, those dips mean you have to use more thin-set, which creates shrinkage stress as it cures. This stress pulls on the grout joints. I always tell my apprentices that if they don’t spend the first day with a grinder or a bag of self-leveling underlayment, they are just building a ticking time bomb. The grout bag helps here too, because it allows you to fill the wider joints that often occur when you are trying to compensate for a slightly uneven layout. But don’t think it is a magic wand. You still need a flat substrate.
Comparing standard flooring materials
| Material Type | Janka Hardness Rating | Typical Expansion Gap | Moisture Tolerance |
|---|---|---|---|
| Solid White Oak | 1360 | 3/4 inch | Low |
| Engineered Maple | 1450 | 1/2 inch | Medium |
| Laminate Flooring | N/A | 3/8 inch | Low to Medium |
| Porcelain Tile | N/A | 1/16 to 1/4 inch | High |
The ghost in the expansion gap
Every hardwood floor and laminate installation requires a perimeter expansion gap to account for hygroscopic movement as the material absorbs and releases moisture from the atmosphere. Wood is a living material. It breathes. If you pin a hardwood floor against a wall without a gap, it will buckle and cup during the humid months. I once walked into a house where a $15,000 wide-plank walnut floor was cupping so bad it looked like a potato chip because the installer didn’t check the crawlspace humidity. The same logic applies to tile, though to a lesser degree. You need movement joints in large tile fields, typically every twenty to twenty-five feet. If you grout those movement joints with rigid cement, they will crack. You have to use a 100 percent silicone sealant that matches the grout color. This allows the floor to shift without shattering the bond coat. Most homeowners think this looks ugly, but a cracked tile is much uglier. Use the grout bag to fill the standard joints, but leave those expansion lines for the silicone gun.
“Moisture is the silent killer of the adhesive bond; never ignore the slab emission rates.” – TCNA Technical Manual
The 1/8 inch that ruins everything
Precision in joint width is the hallmark of a master installer, as variations of even one-eighth of an inch can signal structural movement or poor tile calibration. When you are working in a shower, that small gap is the only thing standing between the water and your subfloor. The grout bag allows you to force grout into those tiny spaces with much more consistency than a float. You can see the grout squeeze out the sides, which tells you the joint is full. A hollow joint is a weak joint. If you just skin the top, the first time someone drops a shampoo bottle, that grout is going to pop out. I have seen guys try to grout hardwood floors to fill gaps. That is a crime. Hardwood needs to move. If you fill it with a rigid filler, the wood will just crush it when it expands and spit it out when it shrinks. For wood, you need specialized wood fillers or epoxy resins that can handle the modulus of elasticity of the specific species.
- Check subfloor moisture levels with an ASTM F2170 relative humidity probe.
- Grind down high spots in concrete slabs using a diamond cup wheel.
- Vacuum all dust and debris from joints before applying grout.
- Mix grout at 300 RPM to avoid air entrainment and pinholing.
- Use a grout bag for all textured or highly porous tile surfaces.
- Maintain a consistent wash schedule to prevent pigment washout.
The contrarian truth about underlayment
While most people want the thickest underlayment possible for laminate or vinyl floors, too much cushion actually causes the locking mechanisms on LVP to snap under pressure. This is a common failure point that I see constantly. People think they are making the floor softer and quieter, but they are actually creating a trampoline effect. Every time you walk on the floor, the joints flex. Over time, that plastic tongue and groove will fatigue and break. You want a high-density, low-compression underlayment. It should feel firm, not squishy. This same principle applies to tile underlayments like uncoupling membranes. They are designed to allow for horizontal movement, but they must be rock-solid in the vertical plane. If there is any bounce in your floor, your grout is going to fail, no matter how good you are with a grout bag. The chemistry of the bond is only as strong as the rigidity of the assembly. I always tell clients to spend their money on the subfloor prep rather than the fancy trim. You can replace a baseboard in an hour, but you can’t fix a bouncy subfloor without tearing the whole room apart.
The physics of the perfect grout mix
Achieving the right viscosity for a grout bag requires a delicate balance of liquid polymers and dry powder to ensure the mix flows through the tip without segregating the aggregate. If the mix is too dry, it will clog the bag. If it is too wet, it will shrink and crack as it dries. You want the consistency of thick peanut butter. When you squeeze the bag, the grout should hold its shape in the joint. This is where the chemistry of admixtures comes into play. Some guys use grout boosters which are essentially liquid latex. These improve the flexural strength and stain resistance. If you are grouting a shower floor, I highly recommend them. The bag makes applying these sticky, high-polymer mixes much easier. A float would just get gummed up. The bag keeps the mess contained. After you have filled the joints, let the grout firm up until it is thumbprint hard before you touch it with a damp sponge. Not wet, damp. If you can squeeze a single drop of water out of your sponge, it is too wet. This is how you maintain the deep, rich color of the grout without the white streaks of efflorescence ruin your hard work. It takes patience, but it is the only way to do it right. It will buckle if you rush it. It will fail if you ignore the moisture. It will last forever if you respect the physics. “,