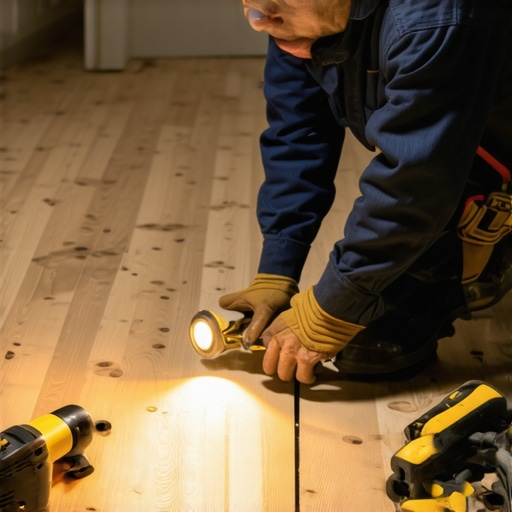
I spent three days grinding concrete on a job last month just so the floor wouldn’t click like a castanet. The homeowner thought I was crazy. They saw a flat surface. I saw a three-sixteenths inch dip that would have snapped every tongue and groove in that walnut plank within a year. Most guys skip the leveling compound. They think the underlayment will hide the dip. It won’t. I’ve spent twenty five years with a moisture meter and a level. I view a floor as a performance surface, not a decoration. I deeply despise builder-grade carpet and unacclimated hardwood. When you walk across a room and hear that high-pitched chirp, it is not the wood talking. It is the sound of friction between a loose fastener and a joist. It is the sound of structural failure at a microscopic level. If you do not kill the ghost in the floorboards now, no amount of expensive hardwood will save you.
The ghost in the floorboards
Subfloor squeaks occur when loose fasteners rub against wood fibers or metal joist hangers. These acoustic irritants are mechanical failures caused by moisture cycles, improper nailing patterns, or structural deflection. You must identify the exact point of friction by using a moisture meter and a straightedge to ensure the OSB or plywood remains immobilized against the floor joists before the hardwood floors are ever delivered to the site.
A floor is essentially a giant drum. If the skin of that drum is not tight against the frame, it vibrates. In the flooring world, vibration is the enemy. When we talk about hardwood floors, we are talking about organic material that breathes. If the subfloor moves, the hardwood moves. If the hardwood moves, the tongue and groove joints rub. That creates a squeak that will haunt you for decades. You have to understand the cellular structure of the wood. Wood is comprised of longitudinal cells that act like straws. When humidity rises, those cells swell. When it drops, they shrink. This constant expansion and contraction puts immense stress on the nails holding your subfloor to the joists. Over time, those nails lose their grip. They become smooth slides for the wood to move up and down on. That is where the noise comes from. You cannot fix this with a thin layer of foam or a thick rug. You fix it with steel and chemistry.
“A floor is only as good as the subfloor beneath it; deflection is the enemy of every joint.” – Master Flooring Axiom
Why your subfloor is lying to you
Plywood and OSB panels often look flat but harbor hidden voids and height variances. These panels are subject to hygroscopic expansion which can cause edge swelling or panel cupping. A subfloor that appears stable may actually have delaminated layers or loose bridge blocking that will cause hardwood planks to creak and pop once the acclimation process is complete.
Don’t trust your eyes. Trust a ten-foot straightedge. If you see a gap larger than one-eighth of an inch over a ten-foot span, the floor is lying to you. It is telling you it is ready for hardwood, but it is actually a trap. On a job last year, I found a subfloor that was three-quarters of an inch out of level across a kitchen. The installer before me just wanted to slap down some laminate and leave. If you put laminate over a dip like that, the locking mechanisms will snap like dry twigs. Hardwood is even less forgiving. Solid three-quarter inch oak has massive internal tension. If it is forced to bridge a gap in the subfloor, it will eventually pull the fasteners right out of the wood. You need to look at the joists. Are they spaced sixteen inches on center? Or did the builder go cheap with twenty-four inch spacing? If it is twenty-four, you have too much deflection. You might need to add a second layer of plywood. This isn’t about being fancy. It is about the physics of load distribution.
The physics of a squeak
Mechanical friction between the fastener shank and the joist lumber creates the audible squeak. When a person walks across the floor, the deflection of the subfloor panel forces the nail to slide within its bore hole. This creates vibrational energy that translates into sound waves. Replacing smooth-shank nails with subfloor screws or ring-shank fasteners increases the withdrawal resistance and eliminates the movement.
Think about a nail like a needle. It enters the wood by pushing fibers aside. Those fibers exert pressure on the nail, creating friction. But wood is not a static material. It dries out. The hole becomes slightly larger than the nail. Now, the nail is just a loose pin. Every time you step near it, the plywood moves down, the nail stays still, and the wood rubs against the metal. To stop this, you need fasteners with threads. Screws don’t just hold by friction. They hold by mechanical interlocking with the wood grain. I prefer a number eight or number nine wood screw with a flat head. You want it to sink just below the surface of the plywood. You also need to look at the chemistry of the bond. Modern construction adhesives are not just glue. They are structural polymers. A high-quality polyurethane adhesive creates a bond that is often stronger than the wood itself. It fills the gaps between the joist and the panel, ensuring there is zero space for movement. If there is no space, there is no squeak.
“The National Wood Flooring Association mandates that subfloors must be clean, dry, and flat to within 1/8 inch in 6 feet or 3/16 inch in 10 feet.” – NWFA Standards
The 1/8 inch that ruins everything
Minor height discrepancies in the subfloor lead to major structural failures in the finish flooring. High spots cause premature wear on the hardwood finish, while low spots create hollow sounds and joint separation. Utilizing a self-leveling compound or a floor sander to achieve flatness tolerances is the only way to ensure the structural integrity of the tongue and groove system.
I’ve seen guys try to shim a floor with shingles or bits of cardboard. It’s amateur hour. Shingles compress. Cardboard rots. If you have a low spot, you use a high-strength, cement-based leveling compound. If you have a high spot, you get out the sander and you grind it down. You have to be careful with the dust. Oak dust is a carcinogen and it gets everywhere. But it is the only way. When you are transitioning from hardwood floors to the tile and grout of showers, this becomes even more critical. Tile doesn’t bend. If the subfloor transitions are not perfectly level, your grout will crack within weeks. The same applies to the hardwood side. If the plank is rocking over a high spot, the tongue will eventually shear off. Then you have a loose board that you can’t fix without tearing up half the room. It is a nightmare that could have been avoided with a simple bag of leveler and a little patience.
Adhesive chemistry and mechanical fasteners
Subfloor adhesives must provide both high shear strength and long-term elasticity to accommodate seasonal wood movement. Using a moisture-cured polyurethane glue creates a hydrostatic barrier and a permanent bond between the subfloor and the joists. This prevents the rhythmic clicking associated with underlayment migration and fastener withdrawal in high-traffic zones.
People ask me why I’m so obsessed with the glue. It’s because I’ve seen what happens when it fails. Cheaper water-based glues can lose their bond if the crawlspace gets too humid. Then you’re back to relying on just the nails. A good polyurethane glue actually expands slightly as it cures, deep into the pores of the wood. It becomes a gasket. This is especially important in kitchens and near bathrooms where moisture is a constant threat. While most people want the thickest underlayment, too much cushion actually causes the locking mechanisms on LVP to snap under pressure. For hardwood, you want a solid, unyielding base. The only thing between your subfloor and your hardwood should be a vapor retarder like silicone vapor shield or fifteen-pound felt paper. No squishy foam. No thick pads. You want the floor to feel like stone under your feet. That density is what gives a home a feeling of quality.
| Fastener Type | Pull-out Strength | Best Use Case |
|---|---|---|
| Smooth Shank Nail | Very Low | Temporary bracing only |
| Ring-Shank Nail | Medium | General subfloor nailing |
| Subfloor Screw | High | Fixing existing squeaks |
| Structural Adhesive | Extreme | Preventing joist separation |
Data for the structural perfectionist
The Janka Hardness Scale measures the resistance of a wood species to denting and wear. However, the subfloor thickness and joist span determine the static load capacity of the entire system. For solid oak flooring, the moisture content of the subfloor must be within four percent of the finish material to prevent cupping or crowning.
If you live in a place with high humidity, like the coastal regions, you can’t just install wood and leave. The wood needs to acclimate. I’ve seen five-inch white oak planks turn into U-shapes because the installer didn’t wait for the moisture levels to equalize. He didn’t check the subfloor. He didn’t check the humidity in the crawlspace. He just wanted his check. If you’re installing hardwood floors over a crawlspace, you better have a six-mil poly vapor barrier on that ground. If not, the moisture will migrate up through the subfloor and hit the bottom of your hardwood. The top of the board is finished and sealed, but the bottom is raw. The bottom swells, the top stays the same size, and the board cups. It’s basic science, but people ignore it every day because they’re in a hurry.
A checklist for a silent home
Total silence requires a systematic approach to fastener density and structural reinforcement. Every joist must be inspected for crowning, and every subfloor panel must be gapped by one-eighth inch to allow for linear expansion. Follow this protocol to ensure your hardwood installation remains quiet for the life of the building.
- Walk the entire floor and mark every squeak with a wax crayon.
- Check the crawlspace for loose joist hangers or missing bridge blocking.
- Drive subfloor screws into the joists at six-inch intervals along the panel edges.
- Sand down any swollen seams where moisture has caused the OSB to mushroom.
- Vacuum every square inch of the subfloor to remove debris that could cause crunching.
- Verify the moisture content of both the subfloor and the new hardwood.
- Apply a bead of structural adhesive to any visible gaps between joists and subflooring from below.
The final word on floor structural integrity is simple. Do not rush the prep. I see kids coming into the trade now who want to use the newest gadgets and the fastest tools. They want to finish a thousand square feet in a day. You can’t do that if you’re doing it right. You have to listen to the floor. You have to feel the resistance of the screw as it bites into the joist. If it spins, you missed. If it doesn’t pull the board down tight, you haven’t fixed the problem. My knees might be shot and I might smell like sawdust and WD-40, but my floors don’t squeak. That is the difference between a floor that looks good in a photo and a floor that lasts for a century. Do the work. Fix the subfloor. The hardwood is just the icing on the cake. The subfloor is the cake itself. If the cake is rotten, the icing won’t matter. Get it right the first time so you don’t have to see me again in five years to tear it all out.