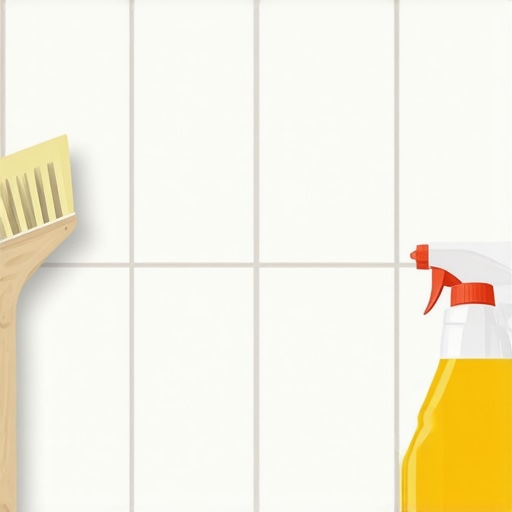
I can smell the floor wax and oak dust on my clothes as I sit here at my desk, looking at another photo sent by a frustrated homeowner. It is always the same story. They spent thousands of dollars on a custom tile job, and six months later, the pristine white grout lines look like they have been soaked in tea. Most of the people walking into my shop want a magic bottle of spray that will turn the clock back. I have to tell them the truth that no one at the big box stores will mention. Your grout is not just dirty. It is undergoing a chemical and structural change. I once spent three days grinding concrete on a job last month just so the floor would not click like a castanet, and let me tell you, fixing yellow grout requires that same level of respect for the materials. You are dealing with a porous cementitious product that is reacting to your water, your soap, and your subfloor environment. If you want white grout, you have to understand the physics of what happens below the surface.
The hidden chemistry of yellowing grout lines
Grout yellowing occurs when minerals in water or chemical residues from cleaning products settle into the microscopic pores of cement based mixtures. When you look at grout through a magnifying glass, it does not look smooth. It looks like a volcanic landscape full of craters and tunnels. Standard grout is made of Portland cement and sand. This mixture is naturally alkaline and highly absorbent. When you shower, the water does not just run off the tile. A percentage of it is absorbed into the grout. If your water contains even trace amounts of iron or manganese, those minerals will stay behind when the water evaporates. Over time, these minerals oxidize. This is essentially rust forming inside your floor. Another major culprit is the very thing you use to clean. Many homeowners use oily soaps or floor cleaners that promise a shine. Those oils penetrate the pores and go rancid or attract dust like a magnet, creating a dingy yellow hue that no amount of scrubbing will remove.
“A floor is only as good as the subfloor beneath it; deflection is the enemy of every joint.” – Master Flooring Axiom
The mistake of using bleach on porous binders
Bleach and harsh acids actually weaken the structural integrity of grout and can accelerate the yellowing process by stripping away protective sealers. I see this every week. Someone comes in complaining that their grout is crumbling. I ask what they use to clean it, and they say they use a heavy bleach solution every Sunday. Bleach is a base, and while it kills mold, it also breaks down the polymers that keep your grout together. Even worse, if you have any iron in your water, bleach acts as an oxidizer that turns that iron bright yellow or orange instantly. You are essentially dyeing your floor. If you have laminate or hardwood floors adjacent to your tile, these harsh chemicals can also drift or wick into the wood fibers, causing permanent finish failure. I have seen the edges of beautiful white oak planks turn black because someone was too aggressive with the bleach in the bathroom next door. You need a pH neutral cleaner that is specifically designed for stone and tile, not something that belongs in a laundry room.
Why your subfloor might be the real problem
Moisture wicking from a damp crawlspace or a poorly cured concrete slab can carry salts and minerals upward through the tile assembly. This is called efflorescence, but when it is mixed with iron, it looks yellow. I tell my customers that a floor is a system, not a layer. If the installer did not put down a proper moisture barrier, the grout is the exhaust vent for the moisture trapped in the subfloor. As that moisture moves toward the air in your room, it carries everything it picked up in the concrete. This is why you see yellowing in specific patches. It is where the moisture vapor transmission rate is the highest. If you are in a high humidity region like Houston, this is a constant battle. The air is so heavy that the floor never truly dries out. This creates a breeding ground for bacteria that secrete yellow waste. It is a biological and structural mess that a simple scrub brush cannot fix.
| Grout Type | Porosity Level | Stain Resistance | Best Use Case |
|---|---|---|---|
| Sanded Cement | Very High | Low | Large joints in low moisture areas |
| Unsanded Cement | High | Low | Wall tile with thin joints |
| High Performance Cement | Medium | Medium | Residential bathrooms |
| Epoxy Grout | Zero | Extreme | Showers and high traffic kitchens |
The simple fix that actually works
The only permanent way to fix yellow grout is to remove the top layer of contaminated material or use a high quality epoxy grout colorant to seal the pores. If the staining is superficial, you can use a steam cleaner. The heat opens the pores and the pressure pushes the minerals out. But if the yellowing is deep, you are looking at a mechanical solution. I recommend a grout saw to remove the top 1/8 inch of the material. This is tedious work, but it is the only way to get back to clean material. Once you have a fresh surface, you do not just leave it. You must use a penetrating sealer or, better yet, a grout colorant. A grout colorant is essentially an epoxy paint designed for grout lines. It is non porous. It creates a shield that water cannot penetrate. This stops the oxidation of minerals and prevents soap scum from ever entering the cement matrix again. It is the closest thing to a permanent fix that exists in the industry.
The canary in the coal mine for hardwood and laminate
Yellowing grout is often an early warning sign that the moisture levels in your home are high enough to damage your hardwood floors. I have walked into houses where the homeowner was worried about the bathroom tile, but when I pulled out my moisture meter and checked the laminate in the hallway, the readings were off the charts. Laminate floors have a fiberboard core. If the humidity that is staining your grout is also getting under your laminate, that floor is going to swell and peak at the joints. Solid hardwood will start to cup. You will see the edges of the boards lifting higher than the centers. This is why I tell people to stop looking at the grout as an isolated issue. It is a symptom of the environment. If you do not fix the ventilation or the subfloor moisture, you are going to be replacing more than just a few grout lines. You will be tearing out your entire living room floor in two years.
“Moisture movement is the primary catalyst for aesthetic failure in cementitious binders.” – Master Flooring Axiom
A maintenance checklist for a white floor
- Use only pH neutral cleaners specifically labeled for natural stone or tile.
- Dry your shower walls and floors with a squeegee after every use to prevent mineral buildup.
- Reseal your cement based grout every six to twelve months depending on traffic.
- Check the caulking at the base of your shower to ensure water is not getting behind the tile.
- Maintain indoor humidity levels between 30 and 50 percent to protect all flooring types.
- Never use wax based cleaners on tile that sits next to laminate or hardwood.
- Test your water for iron content if you notice yellowing in multiple areas of the home.
- Avoid using stiff wire brushes that can scratch the tile glaze while cleaning grout.
The chemical reality of epoxy alternatives
If you are tired of the cycle of cleaning and sealing, you need to look at epoxy grout. Unlike the stuff you find in a bag, epoxy is a two part resin system. It is not porous. It does not need to be sealed. It is essentially plastic. It is much harder to install because it is sticky and has a short working time, but it will never turn yellow from water minerals. I tell my clients that if they are building a new shower, they should insist on epoxy. It costs more upfront, and your installer will probably complain because it is a pain to clean off the tile during installation, but it saves you a decade of headaches. In the flooring world, you pay now or you pay later. Choosing a cheap cement grout is just a way to delay the cost of maintenance. I have seen epoxy floors that look the same twenty years later. That is the goal. We want a floor that performs like a structural component, not a temporary decoration that fails the first time you take a hot shower.