Most guys skip the leveling compound. They think the underlayment will hide the dip. It won’t. I spent three days grinding concrete on a job last month just so the floor wouldn’t click like a castanet. That is the reality of modern flooring. If you do not respect the physics of the substrate, the finish will fail you every single time. I have seen fifteen thousand dollar wide-plank installations turn into kindling because of a two percent difference in moisture. When we talk about a shower floor sinking, we are not talking about a cosmetic issue. We are talking about a structural catastrophe waiting to happen behind your tile. I have walked onto jobs where the homeowner complained about a soft spot near the drain and ended up tearing out the entire subfloor because the joists were rotting from a slow, invisible leak. It is never just the grout. It is always what is underneath.
The physics of the structural dip
A sinking shower floor usually results from structural deflection in the plywood subfloor or the compression of an improperly mixed mortar bed. If the subfloor lacks the necessary stiffness or the mortar lacks a high sand-to-cement ratio, the weight of water causes the assembly to dip. When you step on a shower floor and feel even a millimeter of movement, you are witnessing the failure of the bond between the substrate and the waterproofing layer. This movement is called deflection. In the world of the TCNA, we measure this with L over 360 for ceramic tile and L over 720 for natural stone. If your joists are spaced twenty-four inches on center and you are using thin three-quarter inch plywood, that floor is going to bounce. That bounce translates into tension on the drain flange. Over time, that tension breaks the seal. Once the seal is gone, water migrates into the mud bed. A wet mud bed loses its structural integrity. It becomes a heavy, soggy sponge that puts even more stress on the joists, leading to the sinking sensation you feel under your heels.
“A floor is only as good as the subfloor beneath it; deflection is the enemy of every joint.” – Master Flooring Axiom
The chemistry of the bond and the mud bed
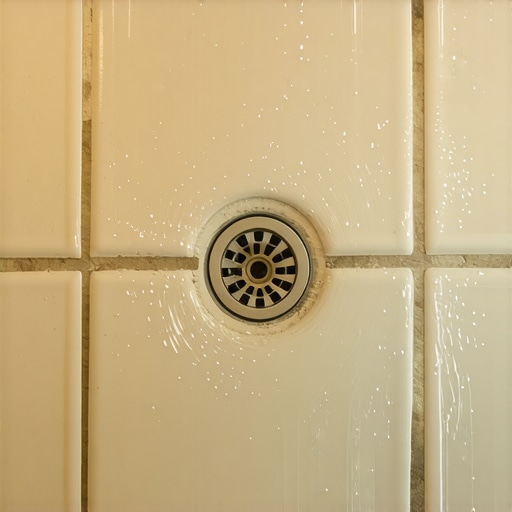
The mortar bed or mud bed is a precise chemical mixture of portland cement and graded sand that must achieve specific compressive strength. A standard 4-to-1 or 5-to-1 sand-to-cement ratio is required to ensure the bed is porous enough to allow water to migrate to the weep holes but dense enough to support the weight of the tile and the user. If the installer uses too much water in the mix, the bed becomes brittle. If they use too little, the cement does not hydrate properly. This leads to a crumbly substrate that cannot hold the weight of a person. When this bed begins to crumble, the tile starts to tent or sink. This is not a failure of the tile itself. The tile is just the messenger. The real culprit is the molecular failure of the portland cement bond. [image_placeholder_1] This is why I always tell people to stay away from the pre-mixed bags of ‘just add water’ mortar unless they know exactly how the slump should look. You want a dry-pack consistency that holds its shape when you squeeze it in your hand, but doesn’t leave your palm dripping wet.
The ghost in the expansion gap
Expansion gaps are required at every perimeter and change of plane to allow for the natural movement of the building structure. Without these gaps, the shower floor is locked in a cage. As the house settles and the temperature changes, the subfloor expands. If there is no gap, the floor has nowhere to go but up or down. This pressure often focuses on the weakest point of the installation, which is usually the area around the drain flange. While hardwood floors or laminate require huge gaps at the wall, a shower floor needs a movement joint filled with 100 percent silicone sealant, not grout. Grout is rigid. It does not move. When the house moves, grout cracks. When grout cracks, water enters. It is a simple, brutal cycle that ends with a rotted subfloor and a sinking drain. I have seen bathrooms where the installer ran the tile tight against the wall and the pressure actually snapped the flange of the drain right off the PVC pipe.
Why your subfloor is lying to you
Plywood and OSB may look flat to the naked eye, but they are often full of microscopic dips and ridges that compromise waterproofing. Before a single drop of thin-set touches the floor, the subfloor must be verified with a ten-foot straightedge. If there is a gap larger than an eighth of an inch, the floor is a lie. You cannot fix a bad subfloor with more thin-set. Thin-set is an adhesive, not a leveler. Using it to fill holes causes shrinkage cracks as it cures, which pulls at the waterproofing membrane. In the humid environments of coastal regions, these wood subfloors can also absorb moisture from the air before the shower is even built, leading to swelling. You must ensure the wood is within two to four percent of its equilibrium moisture content before you seal it. If you lock that moisture in, the wood will eventually rot, and the floor will sink into the crawlspace.
| System Component | Requirement | Failure Result |
|---|---|---|
| Subfloor Thickness | 1 1/8 inch total | Excessive Deflection |
| Mortar Ratio | 4:1 Sand to Cement | Structural Crumbling |
| Pre-Slope | 1/4 inch per foot | Standing Water / Rot |
| Drain Flange | Integrated Bonding | Leaking at Junction |
The 1/8 inch that ruins everything
Precision in the pre-slope is the difference between a dry subfloor and a rotted joist system. The pre-slope is the layer of mortar beneath the waterproofing liner. It must slope exactly one-quarter inch per linear foot toward the drain. If the pre-slope is flat, water sits on the liner forever. It never reaches the weep holes in the drain flange. This standing water creates a hydrostatic pressure that eventually forces its way through the smallest pinhole in the liner or the flange connection. When that water hits the plywood, the wood fibers expand and then soften. This softening is what causes the ‘sinking’ feeling. You are literally stepping on wood that has the consistency of wet cardboard. This is a common failure in builder-grade homes where the crew is rushing to finish three showers a day. They skip the pre-slope and put the liner flat on the subfloor. It is a death sentence for the bathroom.
The drain flange fix that actually works
To fix a sinking shower floor, you must often replace the traditional three-piece clamping drain with a modern integrated bonding flange. Traditional drains rely on a mechanical connection that is prone to human error. An integrated bonding flange, like those used in topical waterproofing systems, provides a massive surface area for the membrane to bond to. This eliminates the need for a secondary pre-slope because the waterproofing is directly under the tile. When you install these, you must ensure the flange is recessed into the subfloor so it does not create a hump. A hump at the drain causes water to pool around the edges of the flange, which is exactly where you do not want it. You need a flush transition that allows for a continuous, unbroken path for the water to travel from the tile surface into the throat of the drain.
“Tile and stone are not waterproof. They are the finish. The system beneath is the vessel.” – Master Flooring Axiom
The checklist for a permanent fix
- Verify subfloor stiffness and add blocking between joists if deflection exists.
- Install a cement backer board or a high-quality uncoupling membrane over the wood.
- Ensure the pre-slope is perfect before the waterproofing layer is applied.
- Use a flood test to verify the integrity of the pan for twenty-four hours.
- Apply a high-performance, polymer-modified thin-set for the tile bond.
- Maintain movement joints at all transitions using 100 percent silicone.
Why grout fails when the substrate moves
Grout is the canary in the coal mine for shower failures. When you see cracks in your grout lines, specifically around the drain or at the wall, the floor is telling you it is moving. Many people try to fix this by smearing more grout into the crack. This is like putting a band-aid on a broken leg. The crack is there because the substrate deflected. If you do not stop the movement, the grout will just crack again. Even worse, those cracks are now highways for water to get into the mud bed. Unlike hardwood floors where movement is expected and managed through gaps, tile demands total rigidity. If the subfloor is sinking, the grout is the first thing to shatter. This is why I prefer epoxy grouts in high-use areas, though even epoxy cannot withstand a failing subfloor. It will simply take longer to show the damage.
The danger of laminate and hardwood in the splash zone
Installing laminate or hardwood floors adjacent to a failing shower is a recipe for a multi-room disaster. When a shower floor sinks and leaks, the water travels along the subfloor via capillary action. It will move out of the bathroom and into the hallway or bedroom. Laminate floors are particularly susceptible because their core is often made of high-density fiberboard, which acts like a wick. Once that core gets wet, the edges swell and the floor is ruined. Hardwood is a bit more resilient, but even solid oak will cup and crown when exposed to the moisture levels coming from a leaking shower pan. If you see your hallway wood floors starting to warp, go check your shower drain immediately. The two are almost always connected in a leak scenario. You cannot treat these rooms as isolated islands. The subfloor connects them all, and it will carry the water wherever gravity dictates.