
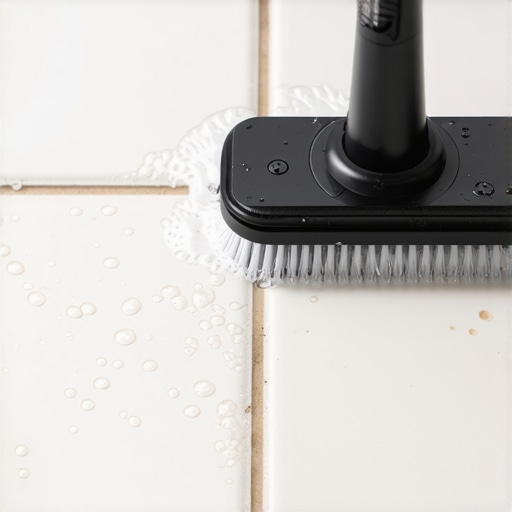
Most guys skip the leveling compound. They think the underlayment will hide the dip. It won’t. I spent three days grinding concrete on a job last month just so the floor wouldn’t click like a castanet. It is that same level of obsessive detail you need when you approach cleaning grout. I once walked into a luxury master suite where the homeowner had taken a high-torque electric scrubber to their shower grout. They thought they were being efficient. Instead, they had blasted the cementitious structural integrity right out of the joints. The water had migrated behind the tile, rotted the backer board, and started weeping into the subfloor. A simple cleaning job turned into a seven thousand dollar tear-out. Grout is not just a filler. It is a bridge between tiles. If you treat it like a sidewalk, you will pay the price in structural failure.
The physics of cementitious grout and why it fails
Grout is a porous mixture of cement and sand that relies on a specific chemical bond to remain stable. When you use an electric scrubber, you are introducing mechanical energy that can exceed the tensile strength of the grout. Standard sanded grout is essentially a bridge of calcium silicate hydrate. It is designed to resist compression, not high-velocity abrasion. If your scrubber operates at too high an RPM, the friction generates heat that can microscopically fracture the grout surface. This opens up capillaries that allow water to penetrate deeper than ever before. You are not just removing dirt. You are potentially removing the very material that keeps your shower waterproof. You must understand the Mohs hardness of your grout versus the abrasive rating of your brush head. A nylon brush is usually safe, but a polypropylene brush can be aggressive enough to score the surface of softer grout mixes used in older homes.
The danger of mechanical energy on aged joints
An electric scrubber provides consistent torque that can easily overcome the weakened bonds of aged or unsealed grout. Many homeowners assume that because grout feels hard like stone, it can handle industrial-grade scrubbing. This is a fallacy. Over years of exposure to acidic soaps and hard water, the surface of the grout undergoes a process called leaching. The calcium is stripped away, leaving a brittle skeleton. When you hit that skeleton with an electric scrubber spinning at 300 RPM, you are essentially sandblasting your own bathroom. This is why we see so many shower failures in homes older than ten years. The mechanical action of the scrubber vibrating against the edge of the tile can also cause microscopic chipping. This is particularly true with rectified porcelain tiles where the edges are sharp and prone to flaking under high-frequency vibration.
“A floor is only as good as the subfloor beneath it; deflection is the enemy of every joint.” – Master Flooring Axiom
The chemistry of surfactants and grout pore saturation
Cleaning grout effectively requires a balance between chemical surfactants and mechanical agitation to lift debris without destroying the substrate. You should never start with the scrubber. You start with chemistry. A pH-neutral cleaner is your best friend here. Acidic cleaners like vinegar or lemon juice are the enemy of grout. They react with the calcium carbonate in the cement and dissolve the bond. I have seen guys use “extra strength” acidic cleaners and then wonder why their grout turned to powder under the brush. You need a surfactant that lowers the surface tension of the water. This allows the cleaning solution to penetrate the microscopic pores of the grout through capillary action. Once the dirt is emulsified, the electric scrubber should only be used to gently lift the slurry to the surface. It is a tool for agitation, not for excavation. If you find yourself leaning on the machine to get the dirt out, your chemical pre-treatment has failed.
Structural risks to adjacent hardwood and laminate floors
Using an electric scrubber often involves significant amounts of water that can migrate and ruin nearby hardwood or laminate flooring. This is where most DIY projects go south. You are focused on the shower floor, but the scrubber is slinging water and cleaning agents everywhere. If that moisture hits the edge of a laminate floor, the fiberboard core will soak it up like a sponge. Laminate is basically high-density cardboard with a picture of wood on top. Once it gets wet, it swells and the joints peak. You cannot fix that. Hardwood is even worse. Solid oak will cup if the humidity in the room spikes from the steam and spray of a long scrubbing session. I always tell my crews to tape off the transitions with painters tape and plastic sheeting. You need a dry zone at least three feet wide around any area where you are using a powered cleaning tool. Moisture management is the hallmark of a professional installer. If you see water pooling near your baseboards, stop immediately and dry it with a shop vac.
| Scrubber Tool Type | Recommended RPM | Bristle Stiffness | Surface Suitability |
|---|---|---|---|
| Handheld Spin Scrubber | 200 to 300 | Soft Nylon | Polished Marble and Ceramic |
| Drill Attachment | 500 to 800 | Medium Nylon | Sanded Grout and Porcelain |
| Industrial Floor Buffer | 175 | Standard Poly | Commercial Slate and Quarry Tile |
| Sonic Scrubber | Up to 10000 VPM | Ultra Soft | Delicate Glass Tile Grout |
Protecting the integrity of your shower waterproofing
The primary function of grout in a shower is to shed water toward the drain and prevent saturation of the setting bed. If you scrub too hard, you thin the grout line. A thin grout line is a weak grout line. According to the Tile Council of North America, grout should be full and flush with the shoulder of the tile. When you use a power tool and create a concave dip in the grout, you are creating a trough. This trough holds water. Standing water is the mother of mold and mildew. It also puts constant hydrostatic pressure on the sealant. If the sealant fails, the water goes into the mud bed. I have seen joists rot out under showers because someone thought they were doing a great job cleaning the grout every weekend with a power brush. You have to respect the architecture of the assembly. Clean it, but do not erode it.
“Grout is a decorative and functional element, but it is not a structural adhesive; it requires maintenance, not abuse.” – TCNA Technical Guide
Step by step professional scrubbing protocol
Follow this checklist to ensure you do not turn a simple cleaning task into a renovation nightmare.
- Inspect for loose or cracked grout before applying any water or mechanical force.
- Vacuum the area to remove loose grit that could act as an abrasive under the scrubber.
- Apply a pH-neutral cleaner and allow it to dwell for at least ten minutes to break down oils.
- Select the softest brush head available for your electric scrubber to start.
- Move the scrubber in a slow, circular motion without applying downward pressure.
- Rinse frequently with clean water and a sponge to see your progress.
- Use a wet vacuum to remove the dirty slurry immediately so it does not settle back into the pores.
- Test the grout for dryness with a moisture meter before applying any new sealer.
The ghost in the expansion gap
Every wet area has expansion joints that are filled with caulk rather than grout, and these areas must never be touched by a mechanical scrubber. Look at the corners of your shower or where the wall meets the floor. That should be a flexible sealant. If you run an electric scrubber over silicone or urethane caulk, the bristles will grab the edge and peel it right out of the joint. Once that seal is broken, water has a direct path to the wall studs. People think they can just scrub right through the corners, but that is a recipe for a mold colony behind the tile. You clean those areas with a soft microfiber cloth and nothing else. The vibration of a machine can also shake loose the bond between the caulk and the tile. If you see the caulk starting to pull away, you have already gone too far with the machine. Stop and wait for it to dry, then replace the caulk entirely. It is the only way to keep the assembly watertight.
Why your subfloor is lying to you
A subfloor might look solid from the top, but repeated aggressive cleaning can cause hidden rot that only manifests when the floor starts to bounce. This is the structural zooming I talk about. You think you are just cleaning tile. In reality, you are managing the moisture levels of the entire floor assembly. If your scrubbing process involves a lot of standing water, that water is looking for a way down. Gravity is a constant. It will find a hairline crack in the grout or a pinhole in the sealer. Once it hits the subfloor, the plywood or OSB begins to delaminate. The adhesive holding the wood layers together fails. You will not see this for months or even years. But one day, you will walk across the floor and hear a squeak. Then you will feel a dip. That is the sound of your subfloor dying because you were too aggressive with your cleaning routine. Always use the minimum amount of water necessary. Use a damp method, not a wet method.
The one eighth inch that ruins everything
The thickness of your grout joint determines how much mechanical stress it can handle before it snaps. Narrow joints, typically one eighth of an inch or less, are usually filled with unsanded grout. This material is very soft because it lacks the aggregate reinforcement of sand. If you take a power scrubber to an eighth-inch joint, you can remove half the grout in a single pass. You have to be extremely careful with high-end marble or glass installations where these tight joints are common. The sand in sanded grout acts like the rebar in concrete. It provides structural body. Without it, the grout is just a brittle paste. Use the lowest speed setting on your scrubber for these areas. If the machine does not have variable speed, do it by hand. It is not worth the risk of gouging out the joint and having to color-match a repair. Matching old grout is nearly impossible because of the way the pigments fade and the dirt embeds over time.
Post cleaning recovery and sealing protocols
Once you have finished scrubbing, the job is only half done because the grout is now wide open to every stain in the building. The mechanical action of the scrubber has stripped away any remaining old sealer. You have essentially performed a micro-dermabrasion on your floor. If you do not reseal it, the grout will look worse in a month than it did before you started. But you cannot seal wet grout. You have to wait. I tell people to wait at least twenty four hours with a fan running. If you seal moisture into the grout, you will get efflorescence. That is the white, chalky powder that ruins the look of a dark grout. It is caused by minerals in the water being pushed to the surface as the moisture evaporates. Use a high-quality penetrating sealer. Avoid the cheap spray-on stuff from the big box stores. You want something that actually bonds with the silicates in the grout. Apply it with a small brush or a roller bottle, and wipe the excess off the tile immediately. This creates a hydrophobic barrier that makes the next cleaning session much easier and keeps the subfloor safe from your future cleaning efforts.