
Most guys skip the leveling compound. They think the underlayment will hide the dip. It won’t. I spent three days grinding concrete on a job last month just so the floor wouldn’t click like a castanet. That job was a nightmare. The previous installer thought a bit of extra glue could bridge a half-inch valley in the slab. It didn’t work. Within six months, the porcelain started popping like popcorn. I could smell the stagnant water trapped under the loose plates. It smelled like a basement that had given up on life. Fixing a loose tile is not about the tile itself. It is about the failure of the interface between the substrate and the ceramic. If you hear that hollow thud when you walk across your kitchen, you are listening to a structural failure in progress. You do not need a contractor to charge you five hundred dollars for a three hour job, but you do need to understand the physics of why that bond broke in the first place.
The hollow sound of a failing bond
A hollow sound under your tile indicates a delamination between the thin-set mortar and the subfloor or the tile itself. This air pocket creates a drum effect when struck. Identifying these spots early prevents the tile from cracking under the weight of foot traffic or heavy appliances. You can locate these failures by sliding a heavy metal rod or even a golf ball across the surface. When the pitch drops and the sound becomes resonant, you have found your ghost. This space is a vacuum of support. Without a solid foundation, the tile acts as a lever. Every time you step on it, the edges lift or the center bows. Eventually, the brittle grout will give way, turning into a fine powder that vacates the joints. This is where the real trouble starts. Moisture from mopping or spills will migrate into that void. On a wooden subfloor, this leads to rot. On concrete, it leads to efflorescence, that white, salty crust that ruins your finish. You are not just fixing an aesthetic problem. You are sealing a wound in your home’s envelope.
The anatomy of the 1/8 inch that ruins everything
Deflection is the primary reason tiles come loose over wooden subfloors. If your joists are too far apart or the plywood is too thin, the floor flexes beyond the limits of the brittle mortar. Tile is rigid; wood is flexible. When they fight, the tile loses. The Tile Council of North America specifies an L/360 limit for floor deflection. This means that if you have a ten foot span, the floor should not bend more than one third of an inch under a concentrated load. If your subfloor is bouncing, no amount of glue will keep that tile down for long. You must also consider the expansion gap. Houses are living things. They expand in the summer and shrink in the winter. If your tile is installed tight against a wall or a kitchen island, it has nowhere to go. It will tent. It will pop. I have seen entire rows of tile lift off the ground like a mountain range because the installer forgot to leave a quarter inch gap at the perimeter. This gap is usually hidden by the baseboard, but its absence is the silent killer of many professional-grade installations.
“A floor is only as good as the subfloor beneath it; deflection is the enemy of every joint.” – Master Flooring Axiom
The toolbox of a surgical repairman
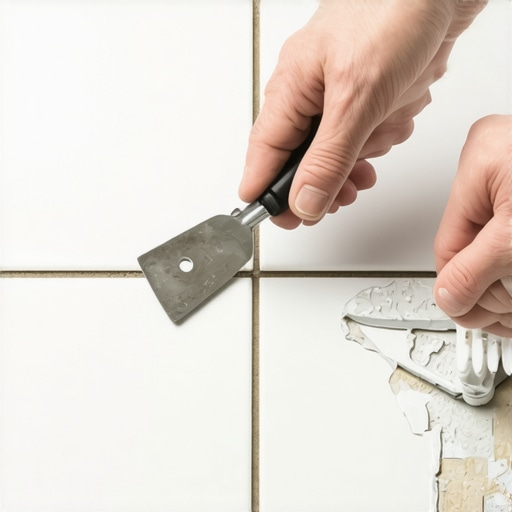
Success in tile repair requires specialized tools designed to remove material without damaging the surrounding ceramic. You cannot simply pry a tile up with a screwdriver. You will chip the neighboring tiles and turn a minor fix into a full room replacement. You need an oscillating multi-tool equipped with a diamond-grit grout blade. This tool uses high-frequency vibration to pulverize the grout without the violent impact of a hammer and chisel. You also need a high-quality hammer and a flat-blade masonry chisel, preferably one with a hand guard. For the adhesive phase, a 1/4 inch by 1/4 inch square-notch trowel is standard for most floor tiles. Do not forget the vacuum. Dust is the enemy of adhesion. If you leave even a microscopic layer of grout dust on the subfloor, your new thin-set will bond to the dust, not the floor. It will fail again within weeks. This is the difference between a handyman and a craftsman. The craftsman knows that cleanliness is the most vital part of the chemistry. [image_placeholder_1]
The violent removal of old grout
Removing the grout is the most dangerous stage for the health of your floor. One slip of the blade and you have a permanent scar on a tile you cannot replace. Set your oscillating tool to a medium speed. Do not force the blade. Let the diamond grit do the work. You should smell a faint burning scent, that is the friction of the stone. Move the tool slowly along the joints surrounding the loose tile. You must remove the grout all the way down to the subfloor. If you leave a bridge of grout, the tile will stay locked in place by friction, and you will break the edges when you try to lift it. This process is loud and dusty. Wear a respirator. The silica dust from grout is not something you want in your lungs. Once the grout is gone, use the vacuum to clear the channels. You need to see the bottom of the joint. Only when the tile is completely isolated can you begin the extraction. This is a game of patience. If you rush, you will pay for it in cracked porcelain and regret.
The surgical extraction of the ceramic plate
Lifting the tile requires even distribution of pressure to avoid snapping the piece. If the tile is already completely loose, it might just lift out with a suction cup or a bit of prying. Most of the time, however, a portion of the old mortar is still holding on for dear life. Take your flat chisel and find a spot where the grout is completely removed. Gently tap the chisel under the edge of the tile at a very shallow angle. Do not use the floor as a fulcrum for prying. Instead, use the chisel to shear the bond of the old thin-set. Work your way around the perimeter. You will hear a series of small pops. This is the sound of the mortar crystals snapping. If the tile refuses to budge, do not force it. You may need to use a heat gun to soften the adhesive if it was installed with an organic mastic rather than a cement-based thin-set. Once the tile is out, set it aside in a safe place. You now have a hole in your floor that reveals the history of the previous installer’s mistakes. Examine the back of the tile. If the back is clean, the mortar failed to bond to the ceramic. If the mortar is stuck to the tile but not the floor, the substrate was the problem.
Scrubbing the ghost of old mortar
A new bond will not form over the top of old, crystallized thin-set. You must scrape the subfloor until it is flat and smooth. This is the part everyone hates because it is tedious and messy. Use your masonry chisel or a floor scraper to knock down the ridges of the old adhesive. You do not need to remove every single atom of the old mortar, but you need to remove enough to create room for the new layer. If you don’t, the repaired tile will sit higher than its neighbors. This creates a lip-page issue. A lip-page is a tripping hazard and a magnet for dirt. It also looks like amateur work. Once the floor is scraped, do the same for the back of the tile. Be careful not to scratch the finished surface. I like to lay the tile face-down on a piece of carpet or a thick towel while I work on the back. Use a wet sponge to wipe away the remaining dust. The surface should be slightly damp but not soaking wet when you apply the new mortar. This prevents the dry concrete or wood from sucking the moisture out of the thin-set too quickly.
The chemistry inside the bag
Modern thin-set is a marvel of polymer engineering designed to bridge the gap between different material densities. For a repair, I always recommend a high-polymer, modified thin-set. These products contain powdered latex or acrylic resins. When you add water, these polymers rehydrate and create a flexible matrix within the cement. This allows the bond to absorb a small amount of movement without fracturing. Follow the mixing instructions on the bag to the letter. Most people add too much water because they want the mix to be easy to spread. This is a mistake. Too much water dilutes the polymers and weakens the final crystalline structure. The consistency should be like thick peanut butter. It should hold its shape when you pull the trowel through it. If it slumps, it is too wet. Let the mix slake for ten minutes after the initial stir. This allows the chemicals to fully activate. If you skip the slaking process, your mortar will have a short pot-life and a weak bond. It is chemistry. You cannot rush it.
| Adhesive Type | Setting Time | Moisture Resistance | Best Use Case |
|---|---|---|---|
| Polymer-Modified Thin-set | 24 Hours | High | Wet areas and heavy traffic |
| Unmodified Thin-set | 24-48 Hours | Medium | Natural stone over cement |
| Mastic | 12-24 Hours | Low | Dry walls only |
| Epoxy Grout | 4-8 Hours | Extreme | Industrial kitchens |
The mechanics of back-buttering
Applying mortar only to the floor is a recipe for another failure. You must use a technique called back-buttering. Spread a thin, flat layer of thin-set onto the back of the tile using the flat side of your trowel. This ensures 100 percent coverage and fills the microscopic pores of the ceramic. Then, use the notched side of the trowel to apply mortar to the subfloor. Run your trowel lines in a single direction. Do not make swirls or circles. Straight lines allow air to escape when you press the tile down. If you trap air, you create the same hollow sound you just tried to fix. Press the tile firmly into the mortar bed. Give it a slight wiggle back and forth to collapse the ridges and ensure total contact. Use a level or a straightedge to check the height against the surrounding tiles. If it is too low, pull it up and add a bit more mortar. If it is too high, press harder. Wipe away any excess thin-set that has squeezed up into the grout joints. You need that space for the grout later.
“Adhesion is a mechanical lock; without a clean surface, the lock remains open.” – TCNA Handbook Commentary
The quiet time of the cure
The greatest temptation is to grout the tile immediately after setting it. Resist this. The moisture in the thin-set needs to evaporate. If you seal the joints with grout too early, the water gets trapped. This weakens the bond and can cause the grout to discolor. Most modified thin-sets require at least 24 hours to cure in normal humidity. If you are working in a damp area like a bathroom, give it 48 hours. Keep people and pets off the tile during this window. Even a small amount of weight can shift the tile and break the developing bond. This is why I always leave a piece of blue painter’s tape over the repair as a visual reminder to stay off. Once the time has passed, the tile should feel as solid as a rock. If you tap it now, it should produce a sharp, high-pitched click. That is the sound of success. That is the sound of a mechanical bond that will last for another thirty years.
The art of matching old grout
Grout color changes over time due to dirt, light exposure, and cleaning chemicals. If you use the same color name that was used ten years ago, it probably won’t match. You may need to buy a few small bags and do some testing. Mix a tiny amount and let it dry. Grout always looks darker when it is wet. If the match is still off, you can use grout stains later to blend it in. Use a rubber grout float to push the mixture into the joints at a 45 degree angle. This ensures the joint is packed from bottom to top. Do not leave any voids. Let the grout sit for about fifteen to twenty minutes until it feels firm to the touch. Then, use a damp, not dripping, sponge to wipe away the excess. If your sponge is too wet, you will wash the pigment out of the grout and leave it looking blotchy. Use a clean bucket of water for every few wipes. You want to see the edges of the tile clearly. A hazy film will form as it dries. You can buff this off with a microfiber cloth after a few hours.
Maintenance for the structural integrity
To keep your floor from failing again, you must manage the environment. Stop using harsh acids or bleach to clean your tile. These chemicals eat away at the grout and the thin-set underneath. Use a pH-neutral cleaner. Check your caulking at the baseboards and around the cabinets. If the caulk is cracked, water will get under the floor. If you have a leak in your dishwasher or refrigerator, fix it immediately. Standing water is the primary enemy of subfloor stability. If you live in a region with high humidity, consider a dehumidifier for your crawlspace or basement. Wood subfloors expand significantly when they absorb moisture, and that movement is what snaps the mortar bonds. A floor is a system. The tile is just the skin. If you take care of the skeleton, the skin will stay beautiful forever.
- Identify the hollow spots using the tap test.
- Remove the grout using an oscillating tool.
- Shear the bond of the old mortar with a flat chisel.
- Scrape the subfloor and the tile back to bare material.
- Back-butter the tile for maximum coverage.
- Allow 24 hours of cure time before grouting.
- Seal the grout to prevent moisture penetration.