
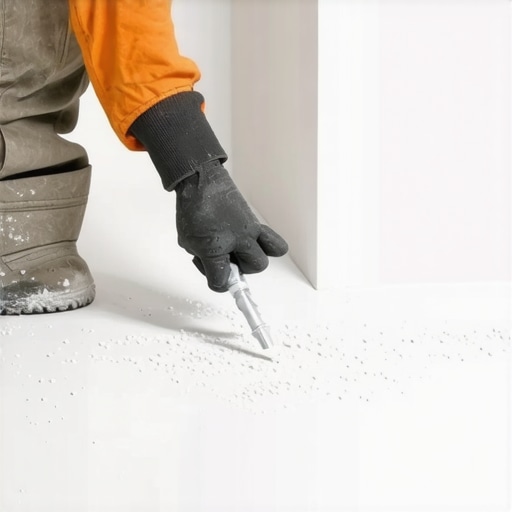
Most guys skip the leveling compound. They think the underlayment will hide the dip. It won’t. I spent three days grinding concrete on a job last month just so the floor wouldn’t click like a castanet. When it comes to a shower pan, that flex is not just an annoyance, it is a ticking time bomb for your plumbing. If you feel the floor move under your feet while you are lathering up, you are looking at a structural failure in the making. That movement, even if it is just a fraction of an inch, puts immense stress on the drain assembly. Eventually, the seal fails. Then you have water rotting out your joists and feeding a colony of mold in the dark. Repairing this requires more than a bit of caulk. You have to address the void between the bottom of the pan and the subfloor.
The ghost in the shower floor
Fixing a shower pan flex involves filling the structural void beneath the acrylic or fiberglass base to ensure uniform support. This process usually requires the injection of high-density, closed-cell expanding foam or the application of a fresh mortar bed if access allows. When a builder installs a pre-fabricated shower base without a mortar bed, they are relying on the thin fiberglass ribs to support hundreds of pounds of weight. Over time, those ribs compress or snap. The resulting air pocket is what causes that sickening sink when you step in. You are essentially standing on a plastic bridge with no pillars. Every step you take acts like a hammer on the drain flange, slowly backing off the nut or tearing the rubber gasket. This is why you cannot ignore the bounce.
“A floor is only as good as the subfloor beneath it; deflection is the enemy of every joint.” – Master Flooring Axiom
The physics of this problem are simple but brutal. If the pan moves 1/8 of an inch, but the drain pipe is rigid, something has to give. Most modern drains use a compression fitting. That movement causes friction against the O-ring. Heat and mechanical wear eventually degrade the rubber. If you have a glued PVC connection, the flex can actually crack the hub of the drain. I have seen pans that moved so much they snapped the 2-inch P-trap right off the riser. You are not just fixing a floor; you are saving your house from a slow-motion flood. The first step is determining if you have access from below. If you can see the subfloor from a basement or crawlspace, the fix is relatively straightforward. If you are on a slab or a second floor with finished ceilings below, things get more invasive.
The physics of structural deflection
Deflection is the measurement of how much a surface bends under load, and for showers, the goal is zero movement. To understand why your pan is failing, you have to look at the Janka scale and the TCNA standards. While Janka measures hardwood hardness, the principle of resistance to indentation applies here. A shower pan must be rock solid. The Tile Council of North America specifies that floors must meet an L over 360 rating for deflection. This means the floor should not bend more than the length of the span divided by 360. For a standard shower, that tolerance is nearly non-existent. Most cheap acrylic pans are manufactured to be lightweight for shipping, not for durability. They need a solid base to survive.
| Fix Method | Required Access | Structural Integrity | Typical Cost |
|---|---|---|---|
| High-Density Foam | Side or Bottom | Medium-High | $50-$150 |
| Mortar Bed Injection | Bottom Only | Very High | $100-$300 |
| Access Panel Shimming | Side Only | Medium | $20-$50 |
| Total Tear Out | Full Access | Maximum | $2,000+ |
If you decide to go the foam route, you cannot use the standard stuff from the hardware store meant for windows and doors. That is open-cell foam. It is soft and will compress under the weight of a person. You need closed-cell, high-density polyurethane foam. This material has a compressive strength measured in PSI that can easily support a 300-pound person without deforming. The foam must be injected through small holes in the subfloor or through the side of the pan skirt. As it expands, it fills every nook and cranny. You must be careful not to over-inject. Too much pressure can actually lift the pan off the floor or crack the fiberglass. It is a delicate balance between filling the void and creating a hydraulic jack that destroys your plumbing.
Why your subfloor is lying to you
The subfloor may look flat, but microscopic dips can cause the pan to bridge across high spots and create a trampoline effect. Most builders use OSB, oriented strand board, for subflooring. OSB is notorious for swelling at the edges when it gets wet. If any moisture got under that pan during construction, the edges of the boards might have peaked. This creates a high spot that the pan sits on, leaving the rest of the base hanging in the air. When you step on it, you are bending the plastic over that hump. This is the same reason why hardwood floors or laminate will click and pop if the floor is not leveled to within 1/8 inch over a 10-foot radius. In a shower, the stakes are simply higher.
- Check for drain movement by watching the flange as someone steps into the pan.
- Inspect the perimeter caulk lines for cracking which indicates the pan is sinking.
- Measure the distance from the pan rim to the floor to see if it varies under load.
- Check the crawlspace for water stains around the drain pipe riser.
- Use a level on the pan floor to find where the slope has been compromised.
If you have access from below, the best fix is to cut a small section of the subfloor out and pack the area with a stiff mortar. I prefer using a deck mud mix, which is one part Portland cement to four parts sand. It has almost no slump. You pack it in tight, shove it under the pan, and then replace the subfloor section. This creates a stone-like base that will never move. If you cannot get underneath, you might have to go through the wall. Often, the back of the shower shares a wall with a closet. Cutting a hole in the drywall allows you to see the underside of the pan. From there, you can slide in plastic shims or inject your foam. It is much easier to patch drywall than it is to replace a shattered shower base.
“Deflection is the silent killer of grout and the primary cause of pan failure in modern residential construction.” – TCNA Technical Guide
The 1/8 inch that ruins everything
Small gaps between the pan and the studs can lead to lateral shifting which eventually destroys the waterproof seal at the wall. When I install a floor, whether it is laminate or tile, I am obsessed with the perimeter expansion gap. But a shower pan needs to be locked in. If there is a gap between the pan flange and the 2×4 studs, the whole unit can shift side to side. This movement tears the grout or silicone between the bottom row of wall tile and the pan. Water then gets behind the pan and rots the wall studs. You must ensure the pan is screwed into the studs or held in place with clips as per the manufacturer’s instructions. If the pan was never secured, no amount of foam underneath will stop the wall-side leaks.
Chemical adhesives also play a role in this repair. If you are shimming a pan, you should use a high-quality construction adhesive that remains slightly flexible. Brittle glues will snap when the house settles. The goal is to create a monolithic structure where the pan, the subfloor, and the joists act as one unit. If you are in a high-humidity area like Florida, the moisture in the air can actually weaken the bond of cheap adhesives over time. You need materials rated for wet environments. This is not the place to save five dollars on a tube of glue. Spend the money on a professional-grade polyurethane sealant that can handle the vibration and the weight cycles of daily use.
The structural foam solution
Injecting two-part structural foam requires precision to avoid lifting the drain assembly out of alignment. When you start the injection process, you must have a person standing in the shower. Their weight acts as a counter-pressure to the expanding foam. If the shower is empty, the foam can easily lift the pan up, creating a back-pitch issue where water no longer drains. I usually have a heavy guy stand right over the area where the flex is most prominent. We inject the foam in small bursts, waiting for the chemical reaction to finish before adding more. You can hear the foam crackle as it expands. Once it hardens, it is like standing on a block of concrete. The bounce is gone, the drain is safe, and the floor feels solid. This is the difference between a handyman fix and a master floor installation approach. You treat the cause, not just the symptom. Your plumbing will thank you ten years from now. The floor will no longer sing its creaky song, and you can shower without the fear of ending up in the basement.