
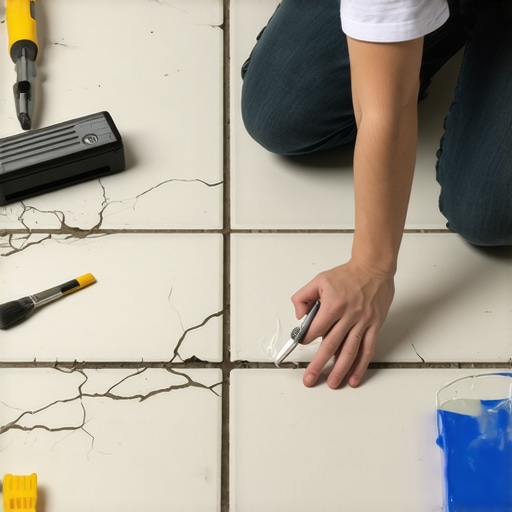
Replacing a single cracked tile is a surgical procedure that requires the precision of a master craftsman and the patience of a saint. Most homeowners see a crack and think of a cosmetic blemish, but a professional sees a structural failure. I spent three days grinding concrete on a job last month just so the floor wouldn’t click like a castanet because the original installer thought they could bridge a half-inch dip with extra thin-set. It does not work that way. A floor is a performance surface, and when one piece fails, it is usually a symptom of a deeper pathology within the subfloor or the adhesive bond itself.
The hidden physics of tile failure
A single cracked tile is often the result of subfloor deflection or a lack of expansion joints that force the rigid ceramic to absorb structural movement. To fix it properly, you must understand that the tile is part of a system. When a house settles or the humidity shifts, the subfloor moves. If the tile is bonded too rigidly without an uncoupling membrane, the stress has nowhere to go but through the weakest point of the tile itself. Unlike hardwood floors which can expand and contract across their cellular structure, or laminate which floats as a unified raft, tile is brittle. It demands a perfectly flat and stable substrate. If your subfloor is bouncing more than the allowable L/360 limit, you are not just replacing a tile, you are fighting physics. You must diagnose if the crack is a hairline stress fracture or a full-depth structural break before you even touch your chisel.
“A floor is only as good as the subfloor beneath it; deflection is the enemy of every joint.” – Master Flooring Axiom
The ghost in the expansion gap
Expansion gaps are the lungs of a flooring system and their absence is the primary cause of perimeter pressure that leads to mid-field cracking. I have seen showers where the tile was butt-jointed against the wall with no room for the house to breathe. The result is always the same. The pressure builds until a tile tents or cracks right down the middle. When you replace your single tile, you must ensure you are not recreating the same pressure cooker environment. This means cleaning the surrounding grout joints completely to ensure the new tile has its own 1/16 inch or 1/8 inch buffer. Without this gap, the new tile will likely crack within six months as the house undergoes its seasonal shift. You are looking for a structural release, not just a visual fix. Every joint must be clear of old debris before the new mortar is applied.
Why your subfloor is lying to you
The subfloor may look flat to the naked eye but a ten-foot straightedge often reveals the dips and humps that cause ceramic modules to fail under point loads. Most guys skip the leveling compound. They think the underlayment will hide the dip. It won’t. When a heavy appliance or a person’s heel hits a tile over a hollow spot, the tile flexes beyond its tensile capacity. This is why you must inspect the void left behind after you pull the old tile. If the thin-set coverage was less than 95 percent in a wet area like showers, you have found your culprit. You need to fill that void and create a flat plane before the new tile goes down. If you ignore the subfloor, you are just waiting for the next crack to appear. The substrate is the foundation of your reputation.
Tools of the trade for precision extraction
Success in single tile repair depends on using the right tools to isolate the damage and prevent collateral damage to the adjacent pieces. You cannot just start swinging a hammer. You need an oscillating multi-tool with a diamond-grit blade to remove the grout first. This disconnects the broken tile from its neighbors. Next, you need a high-quality carbide-tipped chisel and a 16-ounce hammer. I prefer a small masonry chisel for better control. You also need a shop vacuum with a HEPA filter because tile dust is a respiratory nightmare. Do not forget your safety glasses and knee pads. Your body is your most important tool, and 25 years in the trade will tell you that your knees are the first things to go if you do not protect them. Professionalism starts with the gear you bring to the site.
| Adhesive Type | Bond Strength (PSI) | Flexibility Rating | Best Use Case |
|---|---|---|---|
| Standard Thin-set | 200-300 | Low | Concrete slabs, basic ceramic |
| Polymer-Modified Mortar | 400-600 | Medium | Plywood subfloors, porcelain |
| Epoxy Mortar | 1000+ | High | Commercial kitchens, high moisture |
| Mastic | 150-200 | Very Low | Dry wall applications only |
The chemistry of the modern adhesive bond
Modern thin-set mortars are not just sand and cement but complex chemical formulations designed to create a molecular bridge between the tile and the substrate. When you select your replacement adhesive, you must choose one that matches the environment. For showers, you need a modified thin-set that can handle constant saturation. The latex and polymer additives in these mortars allow for a microscopic amount of flex. This is vital. If the adhesive is too rigid, it will snap. If it is too soft, the tile will shift. The hydration process of the cement creates a crystalline structure that grows into the pores of the tile. This is why you must back-butter the new tile. Applying a thin layer of mortar to the back of the tile ensures 100 percent coverage and a bond that will last for decades. This is the difference between a handyman and a master installer.
A guide to the surgical tile swap
The process begins with the complete removal of the surrounding grout to ensure that no vibrations are transferred to the healthy tiles. Use the oscillating tool to grind away the material until you see the edge of the tile. Once the perimeter is clear, use a masonry bit to drill several holes into the center of the cracked tile. This weakens the structural integrity of the piece. Start from the center and gently tap your chisel to break the tile into manageable shards. Always work from the center out toward the edges. This protects the adjacent tiles from chipping. Once the tile is gone, you must scrape the old thin-set off the subfloor until it is smooth. This is the most tedious part of the job, but it is the most important. If the new tile sits even a fraction of an inch too high, it will catch a toe and eventually pop loose.
- Remove all existing grout around the target tile with a diamond blade.
- Drill relief holes in the center of the broken tile to dissipate tension.
- Chisel out the fragments starting from the center and moving outward.
- Scrape the substrate clean of all old adhesive and dust.
- Dry-fit the new tile to ensure it sits flush with the surrounding floor.
- Back-butter the new tile with polymer-modified thin-set for maximum bond.
- Set the tile and use spacers to maintain perfect alignment.
- Allow the mortar to cure for 24 hours before applying the matching grout.
Matching the unmatchable grout color
Grout color changes over time due to dirt, UV exposure, and cleaning chemicals, making a perfect match for an old floor a significant challenge. Even if you have the original bag of grout from ten years ago, it will not match the floor today. You have to play chemist. Sometimes I mix two different shades of dry grout to get the right tone. I always do a test patch and let it dry completely because grout looks darker when it is wet. If the floor is in a high-traffic area, the existing joints are likely stained. You might need to use a grout colorant or a professional-grade deep cleaner on the entire floor after the repair to make everything look uniform. It is about the final visual harmony, not just the technical fix. If the repair stands out, you have failed the aesthetic test. You want the homeowner to forget which tile was ever broken.
“Consistency in the grout joint is the signature of a craftsman; even a single deviation ruins the geometry of the room.” – Tile Council Standards
The 1/8 inch that ruins everything
Precision in the depth of the mortar bed is the difference between a flat repair and a trip hazard that will eventually fail. If you apply too much thin-set, the tile will sit high, creating a lippage issue. If you apply too little, the tile will sound hollow when walked upon. I use a notched trowel specifically sized for the tile, usually a 1/4 inch by 1/4 inch for standard square tiles. You must press the tile firmly into the bed and then lift it back up once to check the coverage. If you don’t see 100 percent transfer of the mortar to the back of the tile, add more. Then, use a rubber mallet to gently beat the tile into place until it is perfectly level with its neighbors. Use a small level or a straightedge to verify. In the world of flooring, 1/8 of an inch might as well be a mile. There is no room for error when you are working with a rigid surface. This is why we take our time and focus on the details that others ignore.
The impact of local climate on curing
Environmental factors such as high humidity or extreme dry heat will drastically alter the open time and curing schedule of your repair materials. In the swampy humidity of the South, your thin-set might stay wet and workable for a long time, but it will take much longer to reach full strength. Conversely, in an arid desert climate, the subfloor can suck the moisture out of the mortar so fast that it doesn’t have time to properly hydrate, leading to a weak, powdery bond. You must compensate for these conditions. I sometimes dampen the subfloor with a sponge in dry climates to prevent the substrate from stealing the mortar’s water. In humid areas, I might use a fan to keep air moving, but never directly on the new grout, as that can cause it to crack. Understanding the atmosphere is just as important as understanding the materials. You are working with a living, breathing building. Respect the environment and the floor will respect you back with decades of service.