
How to Fix That One Squeaky Board in the Middle of the Hallway
The sound of a floorboard groaning under your weight is more than a minor domestic annoyance. It is a specific signal of mechanical distress within the structural layers of your home. As a floor installer who has spent twenty-five years on my knees with a double-pinned moisture meter and a six-foot level, I can tell you that every squeak is a cry for help from the physics of friction. You are hearing two surfaces rubbing together under a load. Usually, this is a loose fastener moving inside a wood cavity, or a subfloor panel rubbing against a joist. It is a performance failure of the assembly.
The subfloor secret that contractors hide
A squeaky board is fixed by identifying the source of friction and eliminating the movement through mechanical fastening or structural bonding. Most squeaks originate from the subfloor panels rubbing against the floor joists or the finish flooring rubbing against the subfloor. Fixing it requires stabilizing the loose component permanently. Most guys skip the leveling compound. They think the underlayment will hide the dip. It won’t. I spent three days grinding concrete on a job last month just so the floor wouldn’t click like a castanet. The homeowner thought I was crazy for charging for three days of prep before a single board went down. But when that floor was finished, it was as silent as a tomb. That is the difference between a floor that looks good and a floor that is built to perform. If you skip the prep, you are just waiting for the friction to start. Most squeaks in the middle of a hallway are not even the hardwood floors themselves. They are the subfloor panels rubbing against the joists because someone used the wrong fasteners or failed to apply a proper bead of subfloor adhesive during the framing stage. When the wood dries and shrinks, it pulls away from the nail, creating a gap that allows for the vertical movement you hear as a chirp.
[image-placeholder]
The physics of friction under your feet
To understand the squeak, you must understand the chemistry of the wood cell. Wood is hygroscopic. It breathes. It absorbs moisture from the air when your teenager takes twenty-minute showers in the nearby bathroom, and it releases that moisture when the heater kicks on in the winter. This constant expansion and contraction works fasteners loose over time. A nail is held in place by the friction of the wood fibers pressing against the metal shank. As the wood shrinks, that pressure drops. When you step on the board, the nail stays still while the board moves. The metal-on-wood contact produces that high-pitched groan. In hardwood floors, the squeak often happens between the tongue and the groove of adjacent boards. If the floor was not acclimated to the home for at least seven to ten days before installation, the boards will shrink too much. This leaves the tongue rattling inside the groove like a loose tooth. You are not just fixing a sound. You are repairing a mechanical failure of the joint.
“A floor is only as good as the subfloor beneath it; deflection is the enemy of every joint.” – Master Flooring Axiom
Why your subfloor is lying to you
Subfloor deflection is the primary cause of floor noise and grout failure in residential construction. If the joists are spaced too far apart or the plywood is too thin, the floor will flex when you walk on it. This flex destroys the bond between materials and causes noise. In many modern builds, builders use 24-inch on-center joist spacing with thin OSB. This is a recipe for a lifetime of squeaks. If your hallway is next to tile work, this deflection is what causes the grout to crack and crumble. You cannot fix a structural deflection issue with a simple finish nail. You have to address the span and the thickness of the subfloor. If you have access to the floor from below, such as a crawlspace or basement, you can install sister joists or solid blocking to stop the bounce. If you are working from above, you might need to use specialized breakaway screws that grip the subfloor and pull it tight to the joist without leaving a visible head on your hardwood floors.
The myth of the magic lubricant
Some people will tell you to throw baby powder or WD-40 into the cracks of your laminate or hardwood. Do not do this. It is a temporary fix that creates a long-term disaster. Powder is an abrasive that will eventually wear down the finish and the wood fibers, making the gap even larger. Oils will stain the wood and make it impossible to refinish the floor later because the finish will not bond to the contaminated surface. You need a structural solution, not a cosmetic one. If the squeak is in a floating laminate floor, it is likely because the subfloor has a dip of more than 1/8 inch over a ten-foot radius. Laminate requires a perfectly flat surface because the clicking mechanisms are fragile. When the floor dips, the plastic tongue bends. If it bends too far, it snaps. Once that mechanism is broken, no amount of lubricant will save it.
Surgical strikes for hardwood floors
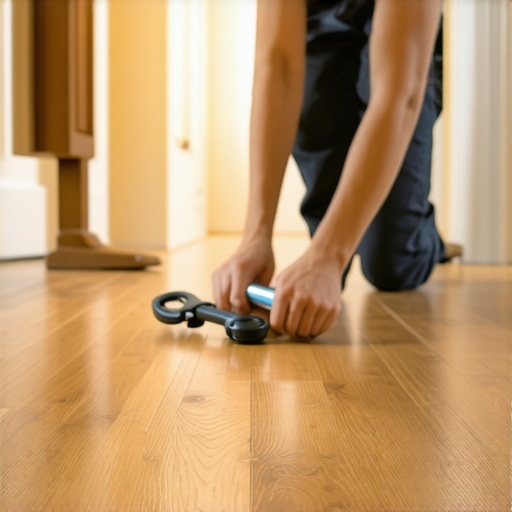
Fixing a squeak from above requires specialized fasteners like the Squeeeeek No More system which uses screws designed to snap off below the surface of the wood. This allows you to pin the floorboard to the joist without leaving a gaping hole in your finish. For solid hardwood floors, you must locate the joist first. Use a stud finder or the old-fashioned hammer-tap method. Once you find the solid wood, you drill a pilot hole through the hardwood and the subfloor. Drive the screw in until the board is cinched tight. Then, you use the tripod tool to snap the head of the screw off. The small hole that remains can be filled with a color-matched wood putty. It is nearly invisible. This is the only way to fix a middle-of-the-hallway squeak without ripping up the whole floor. If you are dealing with engineered wood, be careful. The thin veneer can splinter if you do not use a high-speed drill bit.
| Fastener Type | Pull-out Resistance | Primary Use Case | |
|---|---|---|---|
| Smooth Shank Nail | Low | Temporary bracing only | |
| Ring-Shank Nail | Medium | Standard subfloor attachment | |
| Construction Screw | High | Joist-to-subfloor bonding | |
| Finish Screw | High | Top-down hardwood repair |
Laminate and the floating floor trap
Laminate floors often squeak because the expansion gaps at the perimeter are too small or the underlayment is too thick. If the floor cannot move as one unit, it will bind at the walls and cause the joints to rub together in the center of the room. I have seen many DIY jobs where the homeowner pushed the laminate tight against the drywall. When the humidity rises, the floor expands. Since it has nowhere to go, it arches up. This arch creates a hollow space. When you walk on it, the floor snaps down against the subfloor. To fix this, you must remove the baseboards and verify that there is at least a 3/8 inch gap around the entire perimeter. If the gap is missing, you have to use a toe-kick saw to trim the edges of the floor. Also, remember that while most people want the thickest underlayment, too much cushion actually causes the locking mechanisms on LVP and laminate to snap under pressure. You want a high-density, low-loft underlayment for maximum silence.
The anatomy of a mechanical failure
We need to talk about the chemistry of adhesives. If you are building or repairing, you should know that modern polyurethane adhesives are far superior to old-school water-based glues. Polyurethane expands slightly as it cures, filling the microscopic voids between the wood and the metal. This prevents the fastener from ever moving. If you have access to the underside of the squeaky hallway, you can run a bead of subfloor adhesive along the seam where the joist meets the plywood. Then, drive a small shim coated in glue into the gap. Do not drive it in too hard or you will lift the floorboard and create a new hump. You just want to fill the void. This creates a permanent, silent bond that withstands the seasonal humidity changes from nearby showers or basement dampness.
“Deflection in the subfloor is the primary cause of ceramic tile failure and joint noise in timber framing.” – TCNA Handbook for Ceramic, Glass, and Stone Tile Installation
The 1/8 inch that ruins everything
Precision is the difference between a floor that lasts fifty years and one that fails in five. A subfloor must be flat within 1/8 inch over a 10-foot span to prevent mechanical noise in hardwood and laminate systems. If your hallway floor has a hump or a dip, the boards will never sit still. They will always be in a state of tension. This tension is what leads to the snapping and popping sounds. If you are installing a new floor, do not trust the subfloor. Use a long straightedge. Sand down the high spots on the joists and fill the low spots with a high-strength, cementitious leveling compound. This is the only way to guarantee a silent walk. If you are fixing an existing floor, you have to work within the constraints of what is there, but knowing where the dips are will tell you exactly where to place your mechanical fasteners.
Tools for the structural surgeon
- Verify moisture levels with a pin-type meter to ensure the wood is stable.
- Check the joist span for deflection using a string line.
- Inspect the expansion gap at the perimeter by removing a section of baseboard.
- Identify the friction point using a stethoscope or by having someone walk while you feel the floor.
- Apply mechanical fasteners like breakaway screws or structural adhesive from below.
- Fill all fastener holes with high-solids wood filler to prevent moisture intrusion.
When the grout starts to scream
If your squeak is coming from a tiled area in the hallway, you have a much bigger problem. Tile and grout are rigid. Wood is flexible. If the subfloor moves, the tile cannot. Instead, the grout cracks or the tile de-bonds from the thin-set. If you hear a squeak under a tile floor, it means the subfloor is rubbing against a nail. Over time, this movement will turn your grout into powder. You cannot fix this from above without breaking the tile. You must go underneath and stiffen the subfloor. If you do not, you will eventually have to replace the entire floor. This is why I always insist on a double-layer subfloor for tile installations. The first layer is glued and screwed to the joists, and the second layer is offset to break the seams. This creates a rigid platform that keeps the grout intact and the floor silent.
The final verdict on permanent silence
Silence in a floor is a result of rigidity and the elimination of friction. Whether you are dealing with hardwood floors, laminate, or tile, the principles remain the same. You must stop the movement. Use the right fasteners, respect the expansion gaps, and never ignore the subfloor. If you take the time to do the structural work, you will never have to listen to that hallway scream again. It takes more effort than a bottle of wood glue, but the result is a floor that feels as solid as the earth itself. Do not settle for builder-grade shortcuts. Fix it once, and fix it right.