
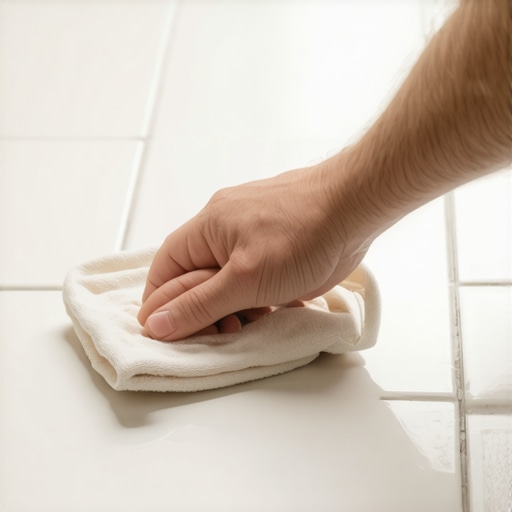
I spent three nights on my knees in a Chicago penthouse last November because a rookie installer thought he could skip the final wipe on a thousand square feet of polished nero marquina. The heat in the building was cranked to eighty degrees. The grout flashed in less than ten minutes. By the time I arrived, the floor looked like it had been dusted with flour, a white, stubborn film that mocked the high-end marble beneath it. I had to use every trick in the book, from dry-buffing with cheesecloth to specific acidic compounds, just to save the client’s twenty-thousand-dollar investment. This is the reality of the flooring trade. It is not about the pretty pictures in magazines. It is about the chemistry of Portland cement and the physics of surface tension. If you leave grout haze to sit, you are not just looking at a cosmetic issue. You are looking at a mineral bond that becomes harder than the tile itself over time.
The molecular anatomy of a cementitious film
Removing dried grout haze from polished tiles requires a sequence of mechanical friction and chemical dissolution to break the bond of Portland cement minerals. You must identify the grout type, whether polymer modified or epoxy, before applying any acidic neutralizers to avoid damaging the polished tile surface or the fresh joints. Grout haze is essentially a microscopic layer of cement binders, pigments, and sand particles that have adhered to the surface of the tile during the hydration process. When water evaporates from the grout slurry left on the tile face, the remaining minerals begin to carbonate. This carbonation creates a crystalline structure that is surprisingly resilient. On a polished surface, this film disrupts the path of light, changing the refractive index and making the tile look dull or dirty. The longer you wait, the more the polymers in the grout cross-link, making the film almost impenetrable to standard household cleaners.
Mechanical agitation before chemical warfare
The first step in haze recovery is always mechanical agitation using a dry, non-marring abrasive to break the surface tension of the dried minerals without scratching. Most homeowners reach for a wet mop immediately, which is a catastrophic mistake. Water reactivates the cement particles and spreads them thinner across the pores of the tile, often making the haze more even and harder to detect until it dries again. Instead, use a white nylon scrub pad or a piece of heavy burlap. Work in small circular motions. You want to see the haze turn into a fine dust that can be vacuumed away. This process removes the bulk of the material before you introduce any liquids. If the haze is stubborn, you might need a professional grade floor buffer with a white polishing pad. This is where the physical work happens. There are no shortcuts. Your knees will hurt, and your shoulders will ache, but the mechanical break is what saves the tile finish.
“A floor is only as good as the subfloor beneath it; deflection is the enemy of every joint.” – Master Flooring Axiom
[IMAGE_PLACEHOLDER]
The acid test for polished porcelain
Acidic cleaners are the primary weapon against cement based haze because they dissolve the calcium carbonate that holds the grout film together on the tile surface. However, you must be extremely cautious with polished natural stone like marble or limestone, as even a mild acid will etch the surface and destroy the shine. For polished porcelain or ceramic, a weak solution of sulfamic acid is usually the industry standard. This acid is crystals mixed with water, which allows for precise control over the strength of the solution. You apply the solution, let it dwell for exactly two to three minutes, and then agitate it with a brush. The acid eats the cement but leaves the tile intact, provided the tile is truly porcelain. Always test a small, inconspicuous area first. If the tile starts to fizz or lose its luster, stop immediately. You are dealing with a stone that requires an alkaline approach or professional diamond polishing.
| Cleaner Type | Grout Compatibility | Tile Surface Risk | Dwell Time |
|---|---|---|---|
| Sulfamic Acid | Standard Cement Grout | High risk for marble/limestone | 2 to 5 minutes |
| Phosphoric Acid | Polymer Modified Grout | Moderate risk for glazes | 1 to 3 minutes |
| Alkaline Stripper | Epoxy Grout Residue | Low risk for most tiles | 10 to 15 minutes |
| Neutral Cleaner | Daily Maintenance | Safe for all surfaces | No limit |
Why your mop is making things worse
Using a traditional cotton mop to remove grout haze is like trying to dry a car with a wet sponge; you are just moving the problem around. Most people use too much water, which causes the microscopic cement particles to flow into the tiny texture of the tile. This is called redistributing the solids. When the water evaporates, the minerals are left behind in an even thinner, more tenacious layer. I always tell my crew that the secret to a clean floor is the bucket count. You need two buckets. One for the cleaning solution and one for the rinse water. You change the rinse water the second it looks cloudy. If you can’t see the bottom of the bucket, you are just painting the floor with gray water. Professionals use microfiber cloths because they actually lift and trap the particles rather than pushing them. It will take ten times as many towels as you think. It is a slow, methodical process of wiping, folding, and discarding.
Recovery protocols for epoxy based residues
Epoxy grout is a different beast entirely because it does not rely on a cementitious bond but rather a two part chemical reaction that creates a plastic like resin. If you let epoxy grout dry on the surface of a polished tile, you are in for a nightmare. Standard acids will not touch it. You need a specialized epoxy haze remover, which usually contains heavy solvents like benzyl alcohol or specialized surfactants. These chemicals work by softening the resin so it can be scraped away. You have to be careful with the dwell time here. If you leave the solvent on too long, it can seep into the actual grout joints and soften the grout you want to keep. It is a delicate balance. I have seen guys ruin entire bathrooms by being impatient with epoxy. You apply the gel, wait for the residue to wrinkle, and then use a plastic putty knife to lift it. Then you neutralize the area with a wash of soapy water to stop the chemical reaction.
“Grout residue must be removed before it undergoes final carbonation, as delayed cleaning increases the risk of surface etching.” – Tile Council of North America Guidelines
Environmental factors that accelerate haze formation
The climate inside the room during installation plays a massive role in how difficult the haze will be to remove later. In the swampy humidity of Houston or Miami, the grout stays wet longer, giving you a wider window for cleaning but also increasing the risk of efflorescence. In the dry heat of Phoenix or during a Chicago winter when the furnace is running, the moisture leaves the grout almost instantly. This is called flashing. When grout flashes, the polymers bond to the tile surface before you even finish the first pass with your sponge. If you are working in a dry environment, you must work in smaller sections, perhaps only ten square feet at a time. You also need to consider the temperature of the tile itself. If the sun is hitting a dark polished floor through a window, that surface can be twenty degrees hotter than the ambient air, causing the grout to bake onto the finish.
Essential post removal checklist
- Vacuum the floor thoroughly after dry buffing to remove all loose cement dust.
- Neutralize the floor with clean water after any acid wash to prevent long term etching.
- Check the floor from a low angle with a flashlight to spot any remaining ghosting.
- Wait at least seventy two hours before applying any sealers to the grout joints.
- Dispose of all used microfiber cloths to avoid reintroducing minerals in future cleanings.
- Use a pH neutral cleaner for the first thirty days to allow the grout to reach full hardness.
The ghost in the expansion gap is usually the dust you didn’t vacuum up. It hides under the baseboards and then migrates back onto the floor the first time someone walks by. A floor is a structural system. Every part of it interacts with the other parts. If you have a bouncy subfloor, the grout will crack, and that cracking will create more dust that looks like haze. People think that a thicker underlayment will solve their problems, but too much cushion actually causes the locking mechanisms on modern floors to snap under pressure, or in the case of tile, it causes the grout to pulverize. Success in flooring comes from respecting the materials and the time they require. You cannot rush a chemical cure. You cannot ignore the microscopic reality of the surface you are working on. If you treat the floor with the respect an engineered surface deserves, it will shine for decades. If you treat it like an afterthought, it will haunt you every time the light hits it at the wrong angle.