
The microscopic bond between pigment and polyurethane
Removing dried paint from hardwood floors requires breaking the chemical bond between the dried pigment and the protective finish without dissolving the finish itself. You must identify whether the paint is water-based or oil-based and use a mechanical or chemical strategy that respects the Janka hardness of the wood species.
I once walked into a house where a $15,000 wide-plank walnut floor was cupping so bad it looked like a potato chip because the installer didn’t check the crawlspace humidity, but even worse was the DIY paint job the homeowner attempted afterward. They had spilled a gallon of eggshell latex and tried to scrub it off with a wire brush and turpentine. The result was a ruined finish that required a full sand and refinish. Hardwood is a living, breathing structural material. It responds to moisture, heat, and chemicals. When paint dries on a floor, it creates a mechanical key into the microscopic textures of the wood grain or the finish. You are not just cleaning a surface. You are performing a surgical separation of two bonded polymers. If you rush, you will gouge the wood. If you use the wrong solvent, you will melt the polyurethane. You have to understand the physics of adhesion to win this fight.
The physics of the paint bond
Paint adheres to hardwood through two primary mechanisms which are mechanical interlocking and polar attraction. When a liquid drop of paint hits your floor, it seeks out every microscopic valley in the wood grain. As the carrier, either water or mineral spirits, evaporates, the resin molecules begin to cross-link. This creates a solid plastic film that is literally molded to the texture of your floor. If your floor has a high-gloss finish, the paint has less to grab onto. If you have a wire-brushed or hand-scraped texture, that paint is now buried in the structural geography of the timber. You cannot simply wipe it away because the paint has established a grip that resists lateral shear. You must use heat or chemistry to weaken that grip before applying mechanical force. This is why a scraper alone is dangerous. Without softening the paint, the force required to pop the droplet off will often take a flake of the wood finish with it.
“The success of any coating or removal process is contingent upon the surface energy of the substrate and the cohesive strength of the material being applied.” – Master Flooring Axiom
Why your scraper is a surgical tool
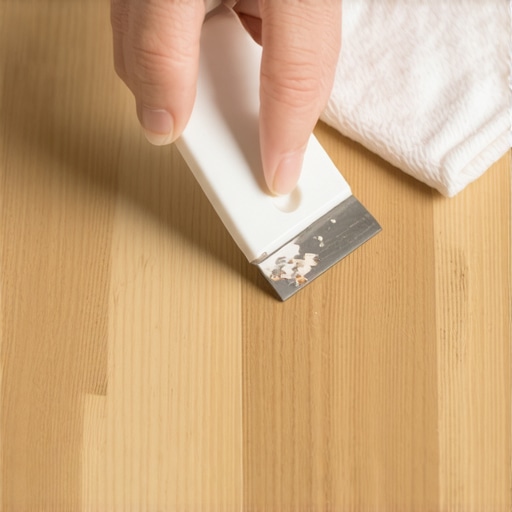
A plastic putty knife or a dull metal scraper is your primary instrument for removing dried paint from hardwood because it allows you to apply targeted pressure to the bond line. You must work at a low angle, usually less than fifteen degrees, to slide the blade under the edge of the paint spot without digging into the wood fibers.
The choice of tool depends entirely on the finish of your floor. Modern pre-finished floors often have an aluminum oxide topcoat. This is incredibly hard and scratch-resistant, which gives you more leeway with a metal blade. However, a site-finished floor with a simple oil-based poly is much softer. For these, I always start with a plastic scraper or even an old credit card. The goal is to find a weak point in the paint droplet. Often, the edges of the paint are thinner and more brittle. By applying a steady, horizontal pressure, you can sometimes trigger a cohesive failure where the paint snaps away from the floor in one piece. If the paint is stubborn, do not increase the downward pressure. That is how you create a permanent scar in your oak or maple. Instead, move to the next phase of the operation which involves heat or solvents.
The thermal expansion strategy
Heat guns or specialized infrared heaters can soften dried paint by raising its temperature until the resins reach their glass transition state. This makes the paint flexible and gummy, allowing you to peel it away from the rigid wood surface without using aggressive chemicals that might stain the timber.
Heat is a double-edged sword in the world of flooring. Too much heat will cause the finish on your hardwood to blister or discolor. You should use a heat gun on its lowest setting and keep it moving constantly. Never point the heat at one spot for more than a few seconds. You are looking for the exact moment the paint changes from a hard crust to a soft skin. Once it reaches this state, you can gently lift it with your plastic tool. This is particularly effective for thick globs of paint or older, lead-based paints that have become brittle over decades. Keep in mind that as the paint cools, it will re-harden and re-bond. You have to work in small sections. This method is superior for textured floors where the paint has filled the grain because the softened paint can be pulled out of the crevices more easily than a dry, brittle flake.
The solvent selection matrix
Choosing the right solvent depends on the chemical composition of the paint and the durability of the floor finish. Denatured alcohol is the standard for latex paint because it softens the acrylic resins without attacking most polyurethane finishes, while mineral spirits are better suited for oil-based paint spills.
Before you pour any liquid on your floor, you must perform a test in a closet or under a baseboard. Apply a small drop of your solvent and wait ten minutes. If the floor finish becomes tacky or dull, you cannot use that chemical. For most modern floors, a 50/50 mix of water and white vinegar is a safe starting point for fresh latex, but for dried paint, you need something stronger. Isopropyl alcohol is an excellent tool. It breaks the bond of acrylic paint very effectively. You should soak a cotton swab in the alcohol and dab only the paint spot. Let it sit for sixty seconds. This allows the solvent to penetrate the paint film. You will see the paint start to wrinkle. That is the sign that the solvent has broken the interfacial tension. You can then wipe it away with a microfiber cloth. Do not use paint stripper. Paint stripper does not discriminate between the paint and your floor finish. It will eat everything down to the raw wood.
| Paint Type | Recommended Solvent | Risk to Finish | Action Time |
|---|---|---|---|
| Latex / Acrylic | Isopropyl Alcohol | Low | 1-2 Minutes |
| Oil Based | Mineral Spirits | Moderate | 3-5 Minutes |
| Dried Varnish | Denatured Alcohol | High | 30 Seconds |
| Unknown Spatter | White Vinegar / Water | Very Low | 5 Minutes |
The 1/8 inch that ruins everything
Precision is the difference between a successful repair and a floor that needs to be sanded. If you stray even an eighth of an inch outside the paint zone with a sharp metal tool or a harsh solvent, you risk creating a visible halo or a physical dip in the floor.
Flooring is a game of tolerances. When I am installing a floor, I worry about the 1/8 inch gap at the perimeter for expansion. When I am cleaning a floor, I worry about the 1/8 inch around the paint spot. If you use a rag soaked in solvent and rub a wide area, you are stripping the protective oils and resins from the surrounding wood. This creates a dull spot that will catch the light and look like a permanent stain. Use a surgical approach. Tape off the area around the paint with blue painter’s tape if you have to. This protects the healthy floor from your scraping and cleaning agents. If you are dealing with paint that has fallen into the bevels of a pre-finished floor, use a toothpick or a soft-bristled toothbrush. Never use steel wool. Steel wool leaves behind microscopic metal fibers that will rust if they ever get damp, leaving tiny black spots all over your floor grain.
The sequence of professional removal
- Identify the paint type by testing a small flake in water; if it dissolves or softens, it is latex.
- Vacuum the area thoroughly to remove any grit or sawdust that could act as an abrasive.
- Apply a localized softening agent such as alcohol or a specialized commercial floor cleaner.
- Wait for the chemical reaction to occur without letting the solvent dry on the surface.
- Use a plastic scraper at a low angle to lift the softened paint from the wood surface.
- Clean the residue with a damp microfiber cloth and immediately dry the area with a towel.
- Inspect the finish for any dullness and apply a wood-specific polish if necessary.
“A floor is only as good as the subfloor beneath it; deflection is the enemy of every joint.” – Master Flooring Axiom
The regional humidity factor
In humid regions like Florida or the Gulf Coast, your hardwood floors are under constant internal pressure. The wood cells are swollen with moisture. When you use solvents or heat on a floor in a high-humidity environment, the wood is more reactive. Solvents can be pulled deeper into the grain, and heat can cause the moisture inside the wood to turn to steam, leading to localized cupping or finish failure. If you are working in a dry climate like Arizona, the wood is brittle. The finish is more likely to crack or flake if you hit it with a scraper. You must adjust your aggression based on the ambient environment. In a dry house, I rely more on softening agents. In a humid house, I rely more on mechanical removal to avoid introducing more liquids or heat to the already stressed wood fibers.
The final word on preservation
Once the paint is gone, your job is not finished. You have likely removed some of the floor’s natural luster in that spot. Do not reach for a generic floor wax. Most waxes contain silicone which will prevent you from ever being able to re-coat the floor in the future. Instead, use a maintenance product recommended by the manufacturer of your floor. If you have a site-finished floor, a tiny drop of the original finish applied with a q-tip can fill in any microscopic scratches you made during the scraping process. Wood is an investment. It is a structural component of your home that should last a century. Treating it with the respect it deserves means taking the time to remove paint slowly. Avoid the temptation to use heavy machinery or harsh industrial chemicals. The best tool you have is patience. If you spend an hour removing a single paint spill, you have saved yourself the thousands of dollars it would cost to replace the planks. Remember that every floor has a story, and a paint spill is just a chapter you need to edit out carefully. Keep your moisture meter handy, keep your blades sharp, and always respect the grain of the wood.
“, “image”: {“imagePrompt”: “A close-up, high-detail photo of a master floor installer using a plastic scraper to gently lift a dried white paint droplet from a high-quality dark oak hardwood floor. The image shows the wood grain texture and the low angle of the tool. Soft workshop lighting, professional tools nearby.”, “imageTitle”: “Professional paint removal from hardwood”, “imageAlt”: “A specialist removing dried paint from a dark oak floor with a plastic tool.”}, “categoryId”: 12, “postTime”: “2023-10-27T10:00:00Z”}