
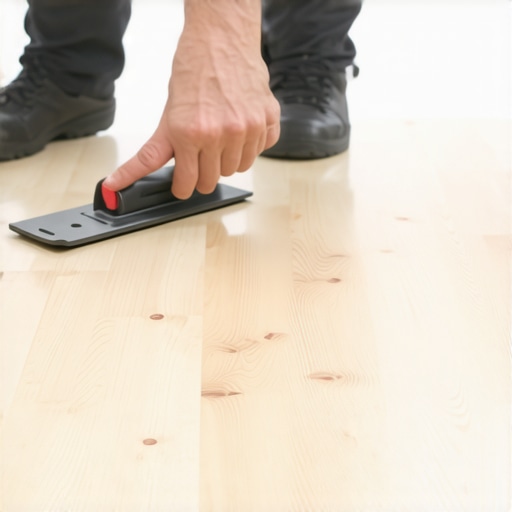
I smell like WD-40 and oak dust. Most days, I am on my knees with a moisture meter, checking the slab for any sign of vapor that might ruin a five-figure installation. I have spent 25 years looking at the cellular structure of timber. I have seen the heartbreak of a floor gone wrong. I once walked into a house where a $15,000 wide-plank walnut floor was cupping so bad it looked like a potato chip because the installer didn’t check the crawlspace humidity before laying the first board. That is the kind of failure that keeps me up at night. When I see a homeowner or a sloppy painter drop latex on a fresh, site-finished white oak floor, my blood pressure spikes. You are not just cleaning a surface. You are performing surgery on a protective polymer layer that is meant to last a decade. Treating hardwood like a piece of plastic is the first mistake. This is a structural engineering challenge. We have to address the chemical bond of the paint without breaking the cross-linked chains of the polyurethane finish underneath. It takes patience and the right mechanical approach. It does not take a belt sander.
The chemical bond between latex and polyurethane
Dried paint on hardwood creates a physical and chemical bond that varies depending on the moisture content of the wood and the resin density of the finish. Latex paint is an aqueous dispersion of acrylic or vinyl resins that hardens as the water evaporates, while polyurethane is a hard, durable plastic coating. Understanding the Janka hardness of your wood species helps determine how much pressure the surface can withstand during the removal process without causing permanent fiber crushing or grain depression. When paint hits the floor, it begins to seek out the micro-fissures in the finish. If the floor was finished recently, the poly might still be outgassing, which can actually cause the paint to bond more aggressively to the surface. We are dealing with two different types of polymers. The finish is usually a long-chain molecule designed to resist abrasion and moisture. The paint is a pigment-heavy film. The goal is to break the adhesion between these two layers without scratching the wear layer. If you go at it with a metal scraper, you are going to gouge the wood. You have to think about the physics of the bond. A drop of paint has a certain surface tension. When it dries, it shrinks slightly, creating internal stress. We use that stress to our advantage.
“A floor is only as good as the subfloor beneath it, deflection is the enemy of every joint.” – Master Flooring Axiom
Why your scraper is a surgical instrument
Mechanical removal of paint requires a plastic putty knife or a wooden tongue depressor to prevent metal-on-finish friction which causes scratches. Using dull edges is preferred over sharp ones to minimize the risk of shaving the wear layer of the hardwood. In the world of professional flooring, the scraper is not a blunt tool, it is a precision instrument used to exploit the weak shear strength of the paint-to-polyurethane bond. If the paint is a large glob, you want to apply pressure at the base. You are looking for that satisfying click when the bond snaps. It is about the angle of attack. A 45-degree angle is usually too steep. You want to be almost parallel to the floor. This minimizes the downward force and maximizes the lateral force. I have seen guys use credit cards or plastic rewards cards. Those work in a pinch because the plastic is softer than the aluminum oxide in a modern floor finish. You are essentially gambling on the Mohs scale of mineral hardness. The paint is soft, the finish is hard, and the plastic is somewhere in the middle. If you use a metal blade, you are harder than both the paint and the finish. That is a recipe for a repair bill. I have seen $20,000 walnut jobs ruined by a five-cent razor blade in the hands of a panicked homeowner. Take your time. Let the tools do the work. If it doesn’t pop off with a light flick, you need to move to the next phase.
The danger of excessive moisture on raw wood
Hardwood floors are hygroscopic materials that expand and contract based on the relative humidity of the surrounding environment, making liquid cleaners a potential risk for edge-wicking. When you use water to soften paint, you risk the liquid seeping into the tongue and groove joints, which can lead to cupping or crowning if the moisture is not managed. This is especially true if the paint is near the perimeter or an expansion gap. Unlike laminate floors, which are essentially high-density fiberboard with a picture of wood on top, real hardwood has a cellular structure that acts like a bunch of straws. If those straws drink up too much water or solvent, the wood fibers swell. When they swell, they push against each other. There is nowhere for that energy to go but up. This is why I tell people to stay away from steam mops and soaking wet rags. In a bathroom, you have showers and grout designed to handle water. In a living room with oak or maple, you have a living, breathing organic material. If you get moisture under the finish, you get delamination. The finish will turn white and peel off like a sunburn. Then you are looking at a full sand and finish. That is a three-day job and a thousand-dollar bill. Keep your cleaning local. Use a damp microfiber cloth, not a dripping one. If the paint is stubborn, we look at chemical assistance, but we do it with a steady hand and a dry eye on the clock.
| Paint Type | Recommended Solvent | Risk Level to Finish | Action Time |
|---|---|---|---|
| Latex (Water-based) | Isopropyl Alcohol (70%) | Low | 30 Seconds |
| Oil-Based (Alkyd) | Mineral Spirits | Moderate | 60 Seconds |
| Dried Splatter (Small) | Mechanical Pressure | None | Immediate |
| Old Enamel | Heat (Low) | High | 15 Seconds |
The chemistry of safe paint solvents
Solvent-based removal involves using isopropyl alcohol or mineral spirits to break the molecular chains of the dried paint without dissolving the polyurethane coating. Chemical compatibility is the most important factor when choosing a cleaning agent for site-finished or pre-finished hardwood floors. If you use the wrong chemical, you will melt the finish. I have seen people use nail polish remover. That is acetone. Acetone is the primary ingredient in floor stripper. You might as well use a blowtorch. Isopropyl alcohol at a 70 percent concentration is usually the sweet spot for latex paint. It softens the acrylic binder just enough to make it gummy. Once it is gummy, it loses its grip on the poly. For oil-based paints, you need mineral spirits. Mineral spirits are a petroleum distillate. They are relatively mild on cured polyurethane but they will eat right through a wax finish. You have to know what is on your floor. If you have a hard-wax oil finish, like a Rubio Monocoat, these solvents will leave a permanent mark. You have to be a detective. Check the original work orders. Look at the sheen. If the floor is very matte, it might be an oil finish. If it is shiny, it is likely a film-forming poly. Always test in a closet or behind a door. This is the golden rule of flooring. I don’t care how sure you are. Test it where nobody can see it. If the finish gets soft or tacky, stop immediately. You are doing more harm than good.
“Deflection is the silent killer of floor joints; a subfloor must be flat within 3/16 of an inch over 10 feet.” – NWFA Technical Standard
The 1/8 inch that ruins everything
Precision cleaning means focusing on the micro-environment of the paint splatter and avoiding the 1/8 inch perimeter of the droplet to prevent solvent bleed into the wood grain. If a solvent bypasses the wear layer, it can cause permanent staining or grain raising which requires abrasive intervention to fix. This is where the capillary action of wood becomes a problem. Wood is porous. Even the best finish has microscopic holes. If you flood the area with alcohol, that liquid is going to find a way down. Once it gets under the finish, it starts to work on the bond from the bottom up. You will see a dark ring form around the paint spot. That is the solvent reacting with the tannins in the wood or just wetting the fibers. It won’t dry out properly because the finish is trapping it. Now you have a permanent blemish. The way to avoid this is to apply the solvent to a Q-tip or a small cloth, not the floor itself. You want to target the paint, not the hardwood. It is a slow process. I have spent hours on my knees with a headlamp, treating each individual splatter like a crime scene. This is why I charge what I charge. It is not just about the work. It is about the specialized knowledge of how these materials interact. You have to respect the 1/8 inch rule. Stay on the target. Don’t let the chemicals wander.
- Inspect the floor with a high-lumen LED light to identify all splatters.
- Identify the paint type by rubbing a small spot with a damp cloth to see if it softens.
- Use a plastic scraper to remove the bulk of the dried material.
- Apply a small amount of 70% isopropyl alcohol to a microfiber towel.
- Rub the spot gently in the direction of the wood grain.
- Clean the area with a wood-safe soap to neutralize any remaining solvent.
- Buff the area with a dry cloth to restore the original sheen.
The ghost in the expansion gap
Paint in expansion gaps or tongue-and-groove joints presents a unique challenge because it can mechanically bridge the space between boards, leading to side-bonding and potential cracking during seasonal shifts. Removing paint from these inter-board crevices requires a non-marring probe to ensure the vertical integrity of the floor boards is maintained without damaging the milling profile. When a floor is installed, we leave a gap at the walls for a reason. Wood moves. It is a dynamic material. If paint fills the gap between two boards, it can act like a glue. This is called side-bonding. When the humidity drops in the winter and the wood tries to shrink, the paint holds the boards together. Instead of small, even gaps between every board, you get one giant crack every four or five boards. It looks terrible and it can even cause the wood to split. If you have paint in the cracks, you need to get it out. I use a plastic dental pick or a thin piece of wood. You have to be careful not to push the paint deeper. You want to hook it and lift it. It is tedious. It is frustrating. But it is necessary for the long-term health of the floor. This is why we tell painters to use high-quality drop cloths, not those thin plastic sheets that tear the moment you move a ladder. A professional floor is a system. Every part of it needs to be able to move independently.
Why your subfloor is lying to you
Subfloor moisture levels can migrate through the hardwood planks and affect how surface contaminants like paint interact with the cured finish. If a concrete slab has a high vapor emission rate, the finish on top of the hardwood may be under stress, making it more susceptible to chemical damage during cleaning. I have seen floors where the finish looked fine, but the moisture from the subfloor was at 12 percent. The wood was swollen and the finish was stretched to its limit. When the homeowner tried to clean some paint splatters with a mild cleaner, the finish just gave up. It clouded over and peeled. They blamed the cleaner. I blamed the lack of a 6-mil poly vapor barrier under the sleeper system. You have to look at the whole picture. If your floor feels soft or if you see grout lines in the subfloor telegraphing through, you have bigger problems than a little paint. But for the immediate task, just know that the state of your subfloor dictates how much abuse the surface can take. A stable, dry floor is resilient. A stressed, damp floor is a ticking time bomb. When you are scrubbing that paint, you are adding energy to the system. You are adding heat through friction and chemicals through the solvent. If the floor is already compromised by subfloor moisture, you are going to see a failure. Always check for signs of moisture before you start a deep clean. Look for darkening in the grain or a slight wave in the boards.
Restoring the sheen after the repair
Sheen matching is the final step in hardwood restoration, requiring a micro-mesh abrasive or a buffing compound to ensure the cleaned area blends with the ambient light reflection of the rest of the floor. If the removal process leaves a dull spot, it is usually because the surface texture of the polyurethane has been altered at a microscopic level. You haven’t removed the finish, but you have scuffed it. To fix this, you don’t need to recoat the whole room. You need to match the grit. Most modern floors are a satin or a semi-gloss. If you have a dull spot, you can use a high-quality floor buffing cream. Apply it with a soft cloth and work in a circular motion. You are essentially polishing the plastic. It is the same principle as detailing a car. You are leveling the surface so that light hits it and bounces back at the same angle as the surrounding area. If the spot is still visible, you might need a touch-up pen or a tiny bit of wipe-on poly. But be careful. Too much and you get a shiny hump. Not enough and it stays dull. It is a game of millimeters. I usually tell people that if you can’t see it from a standing position, leave it alone. Perfection is the enemy of the good when it comes to floor repairs. You have to know when to walk away. The wood will age. The finish will patina. In six months, that spot will disappear into the character of the home. That is the beauty of a real hardwood floor. It is not a sterile surface. It is a piece of history under your feet. Treat it with respect, keep the metal tools away, and watch your moisture levels. Do that, and your floor will outlive you. Final thoughts for the job site, take it slow, use plastic, and keep the chemicals targeted. That is how a pro does it.