
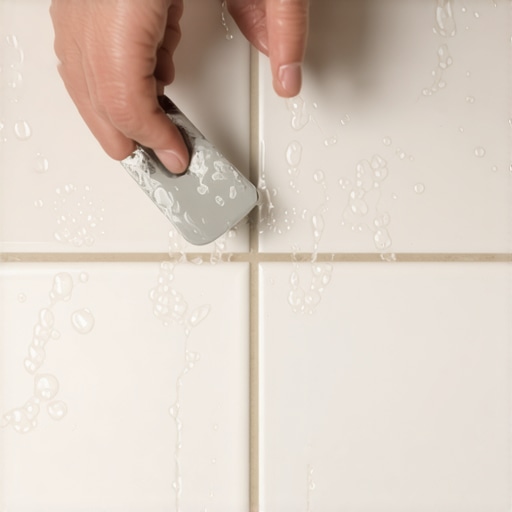
The ghost in the shower floor
Repairing a chipped tile in the middle of a shower requires a surgical approach to maintain the waterproof integrity of the assembly. Most guys skip the leveling compound. They think the underlayment will hide the dip. It won’t. I spent three days grinding concrete on a job last month just so the floor wouldn’t click like a castanet. When you see a chip in the center of a shower, you aren’t just looking at a cosmetic flaw. You are looking at a potential breach in the waterproof envelope that protects your joists from rot. A single fracture in the ceramic or porcelain surface exposes the porous bisque underneath. Once water hits that bisque, it travels. It finds the path of least resistance through the thin-set and into the mud bed. You are not just fixing a chip, you are preventing a structural collapse. This is not about aesthetics. It is about physics and the ruthless nature of water molecules.
The hidden physics of impact and deflection
A chipped tile usually points to a hollow spot in the mortar bed or a heavy object dropped with precise force. If the tile was installed correctly with ninety-five percent coverage as mandated by the Tile Council of North America for wet areas, it should withstand most impacts. When I tap a tile and hear a hollow ring, I know the installer cheated. They used the dot-set method. This leaves air pockets under the tile. Those air pockets act like a drum. When a heavy shampoo bottle falls, there is no solid mass to absorb the energy. The tile flexes. The glaze shatters. If you have multiple chips, you have a subfloor deflection issue. This means your floor is bouncing. No amount of resin can fix a floor that moves. You have to understand that ceramic is rigid. Wood is flexible. If the wood moves more than L over 360, the tile dies.
“A floor is only as good as the subfloor beneath it; deflection is the enemy of every joint.” – Master Flooring Axiom
The chemistry of the resin bond
Repairing a chip without removing the entire tile involves using a high-grade UV-stable epoxy or an acrylic resin kit. These kits are not all created equal. You need a material that matches the refractive index of your tile glaze. Cheap fillers look like gum stuck to a sidewalk. Professional grade resins allow you to mix pigments to match the exact shade of your porcelain. You have to clean the chip with denatured alcohol first. Any soap scum or body oil will kill the bond. I have seen guys try to use grout to fill a chip. That is a joke. Grout is porous. It will hold water and eventually pop out. You need a non-porous synthetic that becomes one with the ceramic matrix. We are talking about molecular adhesion here. The resin must penetrate the pores of the exposed clay to create a mechanical lock.
| Material Type | Repair Method | Durability Rating | Water Resistance |
|---|---|---|---|
| Porcelain | Epoxy Resin | High | 99% |
| Ceramic | Acrylic Filler | Medium | 90% |
| Natural Stone | Polyester Glue | High | 95% |
| Glass Tile | Cold Cure Resin | Low | 85% |
The anatomy of a surgical tile extraction
If the chip is too large for resin, you must remove the tile without piercing the waterproofing membrane underneath. This is where most homeowners destroy their showers. They grab a hammer and a chisel and start swinging. One wrong move and you puncture the Kerdi or the PVC liner. Now you have a leak. I use a multi-tool with a diamond grit blade to carefully grind out the grout around the target tile. You have to go slow. Heat is the enemy. Once the grout is gone, I use a vacuum to clear the debris. Then I drill small holes into the center of the chipped tile to break its tension. I chip away from the center toward the edges. This protects the neighboring tiles from chipping. It is a slow, methodical process that requires patience and a steady hand. If you rush, you will be replacing ten tiles instead of one.
The danger of moisture vapor transmission
The subfloor must be bone dry before you apply any new adhesive or resin to the repair site. I never start a repair until I have checked the area with a pinless moisture meter. If the reading is over 3 percent, I wait. I will set up a fan or a dehumidifier for twenty-four hours. If you trap moisture under a resin patch, the vapor pressure will eventually blow the patch off. This is what we call MVT or moisture vapor transmission. Water wants to evaporate. If you seal it in, it turns into a gas and builds pressure. This is the same reason why hardwood floors cup when the crawlspace is damp. The laws of thermodynamics do not care about your weekend schedule. You cannot rush the drying phase. This is especially true in showers where the mud bed can hold gallons of water without appearing wet on the surface.
The technical checklist for a permanent fix
- Clean the chip area with a stiff nylon brush and denatured alcohol to remove all surfactants.
- Select a resin kit that includes a curing light to speed up the molecular cross-linking.
- Overfill the chip slightly to account for shrinkage as the solvents evaporate from the resin.
- Level the cured resin with a razor blade held at a forty-five degree angle to ensure a flush finish.
- Buff the area with a high-grit polishing cloth to match the sheen of the surrounding glaze.
- Wait seventy-two hours before exposing the repair to direct water pressure or steam.
Why your subfloor is lying to you
A subfloor that looks flat to the naked eye can still have deviations that cause tiles to crack and chip under load. Most people think a level floor is a flat floor. They are wrong. A floor can be level but have a hump every two feet. I use a ten-foot straightedge on every job. If I see a gap larger than one-eighth of an inch over ten feet, I start grinding. In a shower, the slope to the drain complicates things. You are dealing with a compound plane. If the installer didn’t transition the slope correctly, the tiles are under constant stress. This is called lippage. Lippage is a magnet for chips. When the edge of one tile sits higher than the other, your foot or a fallen bottle hits that edge like a hammer. You must eliminate lippage to prevent future damage. This is why I prefer using a leveling system with clips and wedges. It forces the tiles into a singular plane.
“Consistency in the mortar bed thickness is the only way to ensure the long-term survival of a vitreous surface.” – TCNA Technical Bulletin
The 1/8 inch that ruins everything
Small gaps in the grout or the expansion joint at the floor-to-wall transition are the primary entry points for water. When you repair a chip, you must also inspect the surrounding grout lines. Grout is not waterproof. It is water-resistant. If there are pinholes in the grout, the subfloor is getting wet. I always recommend a high-performance epoxy grout for shower floors. It is expensive and a nightmare to install, but it is essentially plastic. It does not absorb water. It does not grow mold. If you are fixing a chip, take the time to scrape out any cracked grout and replace it. Do not use caulk in the middle of the floor. Caulk is for change-of-plane joints only. In the middle of the floor, you need the rigid support of grout to keep the tiles from shifting. A 1/8 inch gap might seem small, but to a water molecule, it is a wide-open highway.
The ultimate price of cheap thin-set
Using a standard unmodified thin-set in a shower is a recipe for bond failure and tile damage. You need a polymer-modified mortar that meets ANSI A118.4 standards. The polymers provide flexibility. They allow the tile to expand and contract with temperature changes without breaking the bond. Think of it like this. When you turn on the hot water, the tile expands. When the cold water hits it, it shrinks. If the mortar is too brittle, it will shear. Once the bond shears, the tile is floating. A floating tile chips easily. I only use high-yield mortars with a high concentration of latex solids. It costs three times as much, but I never have to go back to a job to fix a loose tile. If you are doing a repair, make sure the mortar you use for the replacement tile is compatible with the waterproofing membrane. Some membranes require specific chemical profiles in the adhesive to create a permanent weld. Always read the technical data sheet. It is there for a reason.
The ghost in the expansion gap
Most installers forget to leave an expansion gap around the perimeter of the shower floor, leading to tenting and chipping. Tile is a natural material that reacts to the environment. Even porcelain has a coefficient of thermal expansion. If the tile is locked tight against the walls, it has nowhere to go when it expands. It will push against itself until something gives. Usually, it is the grout that cracks, or the tiles will pop up in the center of the room. This is called tenting. If you see a chip in the middle of the floor, check the edges. If there is no gap filled with 100 percent silicone, the floor is under pressure. You might need to cut a gap to relieve the stress. It is a messy job, but it is the only way to save the rest of the floor. A floor needs to breathe. It needs room to move. If you deny it that room, it will destroy itself. The physics of expansion are non-negotiable. You can either plan for them or pay for them later. Maintenance is not just cleaning soap scum. It is monitoring the structural health of the entire assembly. Watch for cracks. Watch for changes in the grout color. These are the early warning signs of a subfloor that is failing. Don’t ignore them until the chip in the tile becomes a hole in your ceiling below.