
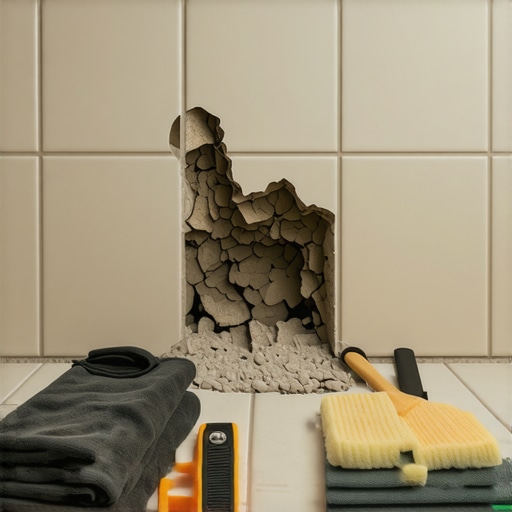
I have spent three decades on my knees with a moisture meter and a level. I know the smell of wet thin-set and the gritty reality of a failed grout joint better than I know the back of my own hand. Most guys skip the leveling compound. They think the underlayment will hide the dip. It won’t. I spent three days grinding concrete on a job last month just so the floor wouldn’t click like a castanet, and that same level of obsessive discipline is required when you are looking at a single cracked tile in your shower. If you think you can just pry it out with a screwdriver, you are going to destroy your waterproofing membrane and turn a twenty dollar repair into a five thousand dollar mold remediation project. This is not about aesthetics, it is about structural engineering on a micro scale. We are dealing with the physics of adhesion and the chemistry of Portland cement.
The surgical extraction of a cracked shower tile
Repairing a single shower tile requires surgical grout removal using an oscillating tool and precise percussive force to break the mortar bond without compromising the underlying waterproofing membrane or adjacent tiles. This process depends entirely on isolating the damaged unit from the rest of the installation by removing the grout perimeter completely. If the grout remains, the vibration from your hammer or chisel will travel through the rigid grout lines and crack the neighboring tiles, creating a domino effect of destruction. This is where the physics of energy transfer meets the reality of ceramic brittle fracture. You must use a diamond-grit blade on an oscillating multi-tool. Do not use a manual grout saw unless you want to be there for three days and end up with carpal tunnel. You need to clear the channel down to the substrate. Once that channel is clear, the damaged tile is an island. Only then can you begin the delicate work of breaking the bond between the tile back and the thin-set bed.
Why your subfloor is lying to you
A floor is never as flat as it looks to the naked eye. In shower environments, the subfloor or the mud bed is the foundation of the entire system. If you have a cracked tile, it is rarely a manufacturing defect in the porcelain itself. Usually, it is a symptom of deflection. Deflection is the technical term for the floor bouncing or flexing under weight. If your joists are spaced too far apart or if the plywood subfloor is too thin, the floor will flex, but the tile and grout will not. They are rigid. When the subfloor moves, the tile snaps. This is the 1/8 inch that ruins everything. In a shower, this crack becomes a highway for water. People talk about waterproof LVP or laminate as if they are magic shields, but even those products fail if the subfloor is a rolling wave of peaks and valleys. When you pull up that single tile, look closely at the thin-set pattern. If you see voids or if the mortar was ‘spot bonded’ with five little dots of glue, you have found the culprit. Spot bonding is a crime against the industry. It creates air pockets that collect moisture and provide no structural support.
“A floor is only as good as the subfloor beneath it; deflection is the enemy of every joint.” – Master Flooring Axiom
The chemistry of the modern adhesive bond
When you go to replace that tile, you cannot just use any bag of stuff from the big box store. You need to understand the difference between unmodified thin-set and polymer-modified thin-set. Standard Portland cement based mortars are crystalline structures. They are strong, but they are brittle. Modern modified thin-sets contain liquid latex or powdered polymers that allow for a tiny amount of flexibility and a much stronger chemical bond to the tile. If you are repairing a porcelain tile, which has a water absorption rate of less than 0.5 percent, a standard mortar won’t even grab onto it. It is like trying to glue two pieces of glass together with school glue. You need those polymers to create a mechanical key into the microscopic pores of the tile. This is the interfacial transition zone, the microscopic layer where the mortar meets the tile back. If this bond fails, the tile will sound hollow when you tap it with a coin. We call that a ‘drummy’ tile. It is the sound of a failed installation.
Precision tools for the extraction process
To perform this repair without tearing up the whole shower, you need a specific kit. I see homeowners try to use a framing hammer and a cold chisel. That is like performing heart surgery with a machete. You need a small, sharp masonry chisel and a rubber mallet to dampen the shock. You also need a vacuum with a HEPA filter because tile dust contains crystalline silica, which is something you do not want in your lungs. The extraction starts at the center of the damaged tile. Tap the center to create a localized fracture. Once the center is broken, you work your way out toward the edges. This pulls the energy of the strike away from the surrounding good tiles. If you work from the edge inward, you risk chipping the neighboring tile’s glazing. It is all about the direction of force.
| Material Type | Water Absorption | Required Adhesive | Typical Usage |
|---|---|---|---|
| Porcelain Tile | Under 0.5% | Polymer Modified Thin-set | Showers and High Traffic |
| Ceramic Tile | 3% to 7% | Standard Thin-set | Walls and Backsplashes |
| Natural Stone | Varies | White Thin-set (Non-staining) | Luxury Floors |
| Laminate | High | None (Floating) | Dry Areas Only |
The ghost in the expansion gap
Every shower installation needs to breathe, but not in the way you think. Thermal expansion and contraction are real forces. When you run a hot shower, the tiles expand. If the installation is ‘locked in’ without any perimeter expansion joints, the tiles will tent or crack. This is why you should never use grout in the corners of a shower. Grout is rigid. You must use a 100 percent silicone sealant in all change-of-plane joints, like where the wall meets the floor. Silicone is flexible. It acts as a shock absorber. When I see a cracked tile near a corner, I usually find that the previous installer crammed grout into that gap. The house settled, the tile had nowhere to go, and it snapped. When you finish your repair, make sure you leave that 1/8 inch gap at the transition and fill it with high-grade silicone, not grout.
The myth of the waterproof grout joint
People think grout is a waterproof barrier. It is not. Grout is a sieve. Whether it is sanded or unsanded, it is a porous material that allows moisture to pass through it via capillary action. This is why the waterproofing behind the tile, the membrane, is the most important part of the assembly. If you live in the swampy humidity of Houston, this is even more critical. The humidity slows the evaporation of water that gets trapped behind the tile. If your repair doesn’t address the grout integrity, you are just masking a leak. I always recommend using high-performance grout with antimicrobial properties for a shower repair. These grouts are denser and resist the staining and mold growth that plague standard Portland cement grouts. You want a grout that has a low water absorption rating to keep the assembly as dry as possible.
- Remove all old thin-set from the substrate until it is smooth.
- Vacuum all dust and debris to ensure a clean bonding surface.
- Apply the thin-set using a 1/4 inch notched trowel for 100 percent coverage.
- Back-butter the tile by applying a thin layer of mortar to the back of the tile itself.
- Press the tile into place and wiggle it slightly to collapse the ridges.
- Use spacers to ensure the grout lines match the existing floor perfectly.
- Wait 24 hours before grouting to allow the moisture to escape the thin-set.
Comparing tile to hardwood and laminate
Homeowners often ask me about putting hardwood floors or laminate in a bathroom. I tell them it is a bad idea. Wood is a hygroscopic material. It absorbs moisture from the air and expands. In a bathroom, the humidity fluctuates wildly. A solid 3/4 inch oak floor will cup and warp within a year. Laminate is even worse. It is essentially compressed sawdust with a picture of wood glued on top. Once water hits the core of a laminate plank, it swells like a sponge and it never goes back down. Tile is the only real choice for a wet zone because it is chemically inert and dimensionally stable. A single tile repair is easy. Replacing a rotted hardwood subfloor is a nightmare that will cost you ten times as much. Stick to porcelain in the shower. It is the only material that can handle the thermal shock and the constant saturation of a modern bathroom.
“Cementitious grout is not a water barrier; the system relies on the membrane beneath to protect the structure.” – TCNA Handbook Principle
The final bond and curing time
The most common mistake in a single tile repair is rushing the cure time. You set the tile, you grout it an hour later, and then you take a shower that evening. That is a recipe for failure. The thin-set needs time to hydrate. This is a chemical reaction, not just drying out. If you introduce water too early, you weaken the crystalline structure of the cement. You need to give it at least 24 hours at room temperature. If you are in a cold climate or a basement, give it 48 hours. The same goes for the grout. Most modern grouts need 72 hours before they should be exposed to a direct stream of water. If you rush this, the grout will wash out or become soft and chalky. Patience is the hallmark of a professional. If you can’t wait three days to use your shower, you shouldn’t be doing the repair yourself. Use a different bathroom or go to the gym. Do it right once so you don’t have to do it again in six months.