
Most guys skip the leveling compound. They think the underlayment will hide the dip. It won’t. I spent three days grinding concrete on a job last month just so the floor wouldn’t click like a castanet. That is the reality of professional flooring. It is not about the shiny top layer. It is about the grit and the physics beneath your feet. I have spent twenty five years on my knees with a moisture meter and a level, smelling like WD-40 and oak dust. I have seen every shortcut in the book and I have seen every one of those shortcuts fail when the humidity hits eighty percent. A floor is a structural performance surface. If you treat it like a rug, you have already lost the battle. If you want a tile job that lasts half a century, you stop looking at the color of the grout and start looking at the tools in your bucket. There is one specific tool that costs less than a sandwich but determines the integrity of every joint in your shower or kitchen. It is the margin trowel. This small piece of flat steel is the difference between a failing polymer bond and a rock solid installation.
The margin trowel is the secret to consistency
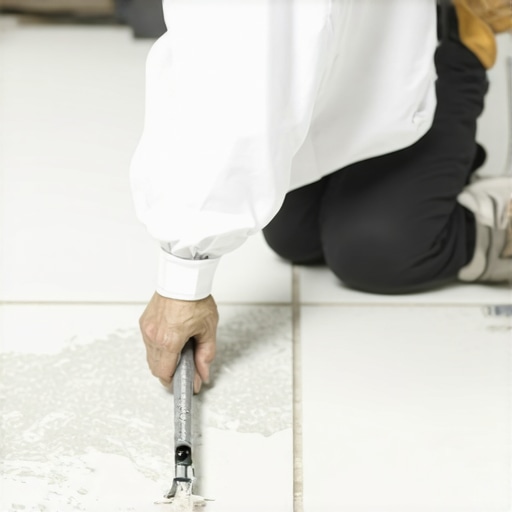
The margin trowel is the most important ten dollar investment for grouting because it ensures a perfect chemical mix without introducing air bubbles. By using this tool to fold the grout rather than a drill paddle, you maintain the structural integrity of the Portland cement and polymer additives. When you mix grout with a high speed drill, you whip air into the paste. Those tiny bubbles become pinholes as the grout cures. Pinholes are the primary entry point for water in showers. Once water gets behind that grout, it starts a slow dance with the thin-set. It weakens the bond. It feeds the mold. I always tell my apprentices that if I see a drill in their grout bucket, they are off the clock. You mix by hand with a margin trowel. You scrape the sides of the bucket to ensure every ounce of powder is hydrated. It is about the chemistry of the hydration process. When water hits that powder, a chemical reaction starts. If you have dry pockets of unmixed grout, those will be the soft spots that crack in six months. A margin trowel lets you feel the resistance. You can sense when the grout has reached the peanut butter consistency required by the Tile Council of North America.
“A floor is only as good as the subfloor beneath it; deflection is the enemy of every joint.” – Master Flooring Axiom
Why your subfloor is lying to you
Subfloors often appear level to the naked eye but contain micro deviations that cause grout to crack and laminate to bounce. Identifying these dips requires a straightedge and a clinical eye for deflection limits. Most homeowners think their plywood is fine. It is not fine. If you have a joist spacing of sixteen inches on center, you have a specific deflection rating. If you add heavy porcelain tile on top of a subfloor that flexes, the grout will pop out. It is simple physics. The tile is rigid. The wood is flexible. Something has to give. Usually, it is the bond at the edge of the tile. This is why the prep work takes three times longer than the actual tiling. I spend my mornings checking for high spots. I grind them down until the dust covers everything. I fill the low spots with self leveling underlayment that flows like water and cures like stone. You want a flat surface, not just a level one. A floor can be out of level but still be flat enough for tile. But if it is not flat, your grout lines will look like a mountain range. Every offset will create a lip. Every lip is a trip hazard and a weak point where the grout will eventually flake away into the vacuum cleaner.
Chemistry of the modern shower floor
Shower floor grout requires a specific density to resist hydrostatic pressure and constant moisture exposure. The margin trowel allows for the precise integration of liquid latex additives which enhance the water resistance of the cured joints. In a shower, the grout is the first line of defense. It is not waterproof, but it is water resistant. Most people do not realize that grout is porous. Water moves through it via capillary action. This is why the mix is so vital. If the mix is too thin, the water moves faster. If the mix is dense and well packed, the water stays on the surface longer, allowing it to hit the drain. I use the margin trowel to pack the grout into the joints. I do not just smear it on top. I push it down until it hits the back of the tile. You want a solid plug of grout. If you leave a void underneath, that is where the bacteria will grow. It is a dark, damp cave for mold. Professional tilers know that the sound of the trowel scraping the bucket tells you if the mix is right. It should be a heavy, wet sound. If it sounds like soup, you are in trouble. If it sounds like sand, you are too late.
| Grout Type | Janka Hardness Impact | Moisture Resistance | Acclimation Time |
|---|---|---|---|
| Sanded Grout | High | Moderate | 24 Hours |
| Unsanded Grout | Low | Moderate | 24 Hours |
| Epoxy Grout | Extreme | Maximum | 72 Hours |
| High Performance Cement | Very High | High | 12 Hours |
Hardwood floors and the moisture trap
Hardwood floors fail when installers ignore the equilibrium moisture content of the environment and the subfloor. A margin trowel might be for tile, but the same technical precision is required when measuring the gap between planks. Solid hardwood is a living thing. It breathes. It expands when the humidity rises in the summer. It shrinks when the heater kicks on in the winter. If you do not leave an expansion gap at the perimeter, the floor will buckle. I have seen floors lift six inches off the joists because they were pinned against the drywall. You need a minimum of half an inch. Most guys hide this with baseboards and shoe molding. If you are working in a place like New Orleans, you better be using engineered wood with a plywood core. The cross grain construction of the core layers fights the natural urge of the wood to cup. Solid oak in a swamp is a recipe for a disaster. I once walked into a house where the wide plank walnut was cupping so bad it looked like a potato chip. The installer did not check the crawlspace. The damp earth was sending moisture right through the subfloor into the bottom of the planks. The top was dry, the bottom was wet. The wood bent. It was a fifteen thousand dollar mistake that could have been avoided with a sixty dollar roll of six mil poly film.
“Wood flooring will perform best when the environment is controlled to stay within a relative humidity range of 30 to 50 percent.” – NWFA Technical Guidelines
The ghost in the expansion gap
The expansion gap is the most misunderstood element of laminate and hardwood installations because it appears as a flaw rather than a functional necessity. This gap allows the floor to move as a single unit without stressing the locking mechanisms. People hate the gap. They want the wood to touch the wall. They think it looks cleaner. But that gap is the lungs of the floor. Without it, the floor suffocates. When the wood expands, it needs somewhere to go. If there is no space, the pressure builds until the weakest point gives way. Usually, that is the tongue and groove joint. In laminate floors, this pressure will cause the click lock system to snap. Once that plastic edge breaks, the plank is loose. It will slide. It will create a gap in the middle of the room. I use spacers every twelve inches during the install. I do not trust my eyes. I trust the plastic blocks. They stay there until the last row is in. Only then do the baseboards go on. It is a disciplined process. If you rush the edges, you ruin the center.
Why laminate fails where tile succeeds
Laminate flooring fails in high moisture areas because its core is typically made of high density fiberboard which absorbs water through the seams. Unlike tile which is bonded with thin-set, laminate is a floating system that can trap moisture underneath. Homeowners love the price of laminate. I get it. But you cannot put it in a full bathroom and expect it to last. One overflowing toilet and the floor is trash. The fiberboard core acts like a sponge. It swells and the edges peel up. Tile does not have this problem because the ceramic is fired at temperatures that make it nearly impervious. When you use the margin trowel to mix a high quality modified thin-set, you are creating a bond that can handle a flood. Laminate just sits there. If water gets under it, it stays there. It cannot evaporate through the plastic wear layer. It just sits and rots the subfloor. I have pulled up laminate that looked fine on top but was covered in black mold underneath. It was a health hazard because the installer did not use a moisture barrier on the concrete slab.
Pre-grout technical checklist
- Verify that all thin-set is dry and cured for at least 24 hours to prevent moisture entrapment.
- Clean every grout joint with a utility knife or a stiff brush to remove excess adhesive.
- Check the tile edges for chips or spacers that were left behind during the set.
- Measure the water for the grout mix using a graduated cylinder for exact ratios.
- Ensure the room temperature is between 60 and 80 degrees Fahrenheit for optimal hydration.
- Test a small area to ensure the grout pigment does not stain the tile surface.
The physics of the grout float
The grout float must be used at a forty five degree angle to the joint to ensure the grout is packed tightly without being pulled back out by the edge of the tool. This technique works in tandem with the hand mixed consistency achieved by the margin trowel. Most people move the float parallel to the lines. That is a mistake. It scoops the grout out. You have to go diagonal. You want the float to bridge the gap, pushing the material down. It is about pressure. You are forcing air out and cement in. After the joints are full, you wait. You do not wash immediately. You wait for the grout to firm up. If you wash too early, you pull the pigment out. You end up with splotchy, light colored joints. I use a high density hydrophilated sponge. It holds water but does not drip. You want the sponge damp, not wet. If you see water running down the wall, you are washing away your hard work. You are weakening the surface of the grout. You want a crisp, clean line that sits just below the edge of the tile. That is the mark of a pro. It looks like a single, solid unit of stone.
Final technical summary
A professional floor is the result of a thousand small decisions made correctly. It starts with the subfloor and ends with the final wipe of a sponge. The margin trowel is the symbol of that precision. It represents the refusal to take shortcuts. Whether you are installing solid oak in a library or porcelain tile in a steam shower, the rules of physics apply. Moisture will move. Wood will expand. Cement will hydrate. If you respect these forces, your floor will outlast the house. If you ignore them, you will be calling me in two years to tear it all out. Use the right tools. Measure the moisture. Respect the gap. That is how you build a floor that stands the test of time. It is not about the aesthetic. It is about the engineering. Every joint and every plank is a testament to the preparation you put in before the first piece was ever laid. Stick to the standards and the results will follow.”