
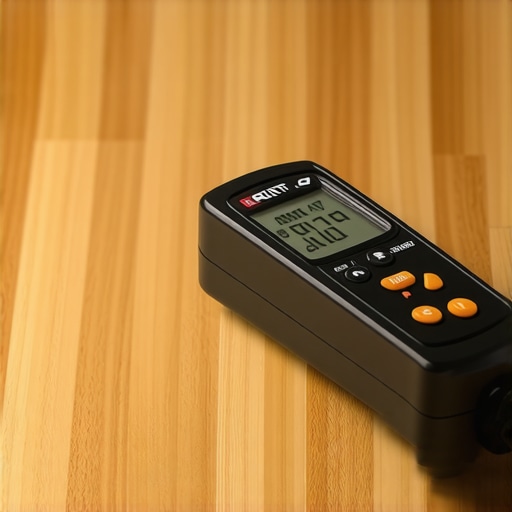
I once walked into a house where a $15,000 wide-plank walnut floor was cupping so bad it looked like a potato chip because the installer didn’t check the crawlspace humidity. The boards were literally lifting the baseboards off the wall. The homeowner was in tears and the contractor had vanished into the wind. I stood there with my moisture meter and the reading jumped to 18 percent. That is a death sentence for walnut. The wood was gasping for air while drowning in vapor. All that heartbreak and financial ruin could have been prevented by a tool that costs less than a decent lunch. My hands are stained with walnut oil and my lungs have seen too much oak dust but I will never step onto a job site without my sensors. A floor is a living organism. It breathes. It moves. It fights back when you disrespect the physics of the subfloor. I have spent 25 years on my knees learning that wood is a jealous mistress that demands perfect conditions before she agrees to stay flat.
The invisible vapor that kills solid oak
Hardwood floors fail because installers ignore the relative humidity of the subfloor and the ambient air. Wood is a hygroscopic material which means it constantly exchanges moisture with its environment to reach an equilibrium. When the subfloor is wetter than the planks, the bottom of the wood swells. This expansion causes the edges to rise, a phenomenon known as cupping. If the air is too dry, the planks shrink and leave gaps that collect dirt and hair. Solid hardwood needs a stable environment, usually between 30 and 50 percent humidity. When you ignore the moisture meter, you are gambling with a five-figure investment.
“A floor is only as good as the subfloor beneath it; deflection is the enemy of every joint.” – Master Flooring Axiom
The science of wood cells is brutal. Inside every plank, there are millions of microscopic tubes called lumens. These were once the plumbing of the tree. Even after the tree is cut, dried, and milled, those tubes want to work. They pull moisture from the concrete slab or the crawlspace through the bottom of the plank. If you have a leaky pipe near your showers or a damp basement, your hardwood will find that water. It acts like a straw. You can sand it flat a dozen times but it will keep moving until you solve the vapor pressure.
Why a cheap plastic tool beats your intuition
A moisture meter provides a numerical value for the electrical resistance within wood or masonry to detect hidden water. You cannot feel 12 percent moisture with your hand. You cannot see the water vapor rising through a concrete slab. A pin-style meter uses two metal probes to complete an electrical circuit. Since water conducts electricity, the meter measures how easily the current flows between the pins. Higher conductivity equals higher moisture content. This tool is the only thing standing between a successful installation and a rotting mess. It is the most important $15 you will ever spend in a hardware store. Many homeowners think that because a floor feels dry to the touch, it is ready for planks. This is a lie. Concrete slabs often look white and bone-dry on the surface while holding a reservoir of water three inches down. As soon as you cover that concrete with a vapor barrier and wood, the moisture migrates upward. It gets trapped. It turns into a tropical rainforest under your feet. The glue fails. The wood rots. The grout in adjacent tile starts to crumble.
The concrete slab is a sponge
Concrete flooring requires a calcium chloride test or an in-situ probe to verify that the moisture vapor emission rate is low enough for adhesives. Even old concrete is never truly dry. It is a porous network of capillaries that pulls water from the earth through capillary action. When we talk about the chemistry of adhesives, we are talking about long-chain polymers that need a clean, dry surface to bond. If the hydrostatic pressure from the slab is too high, it will literally blow the glue off the surface. I have seen entire floors of expensive laminate floating on a layer of gray sludge because the moisture turned the adhesive back into a liquid.
| Subfloor Type | Max Moisture Content | Testing Method |
|---|---|---|
| Plywood Subfloor | 12% | Pin-Style Meter |
| Concrete Slab | 4% | Impedance Meter |
| Hardwood Planks | 6% to 9% | Resistance Meter |
| Laminate Core | 7% | Electronic Sensor |
This is why the gap between the wood moisture and the subfloor moisture cannot exceed 4 percent for strip flooring. For wide-plank flooring, that margin shrinks to 2 percent. If your subfloor is at 11 percent and your walnut planks are at 6 percent, you must wait. You must run a dehumidifier. You must wait for the materials to acclimate. If you nail it down now, the planks will swell as they suck moisture from the subfloor, and the floor will buckle.
Why waterproof does not mean bulletproof
Laminate and luxury vinyl plank floors are marketed as waterproof but the locking mechanisms remain vulnerable to subfloor irregularities. People buy laminate thinking it is invincible. They see the word waterproof and think they can install it over a damp mess. While the plastic wear layer might not rot, the core material often contains wood fibers or limestone composites that do not like standing water. More importantly, the locking joints are the weak point. If your subfloor has a dip greater than 1/8 inch over a 10-foot span, the floor will flex every time you walk on it. That repetitive motion is like bending a paperclip back and forth. Eventually, the click-lock mechanism snaps. Once the joint is broken, water from your showers or a spilled drink gets under the floor. It sits there. It grows mold. It smells like a damp locker room. No amount of surface cleaning can fix a mold colony growing in the underlayment.
- Check subfloor flatness with a 10-foot straight edge.
- Measure moisture in three locations per 100 square feet.
- Acclimate wood planks in the room where they will be installed.
- Use a premium vapor barrier for all concrete installations.
- Leave a 1/2 inch expansion gap around the entire perimeter.
The ghost in the expansion gap
An expansion gap is a mandatory space left around the perimeter of a room to allow the floor to grow and shrink. Wood expands across the grain. It does not grow much in length but it grows significantly in width. If you push your hardwood or laminate tight against the drywall, the floor has nowhere to go when the humidity rises in the summer. It will find the weakest point and lift into a tent in the middle of the room. I have seen floors lift three inches off the subfloor because some amateur didn’t want to use baseboards. You need that gap. It is the lung of the floor. You cover it with baseboards or shoe molding but you never, ever fill it with caulk or grout.
“Failure to provide adequate expansion space is the leading cause of floor failure in residential construction.” – NWFA Technical Manual
Where the water actually goes
Grout is a porous cementitious material that absorbs water unless it is sealed with a high-quality penetrating sealer. When you see cracked grout near the transition to a hardwood floor, it is usually a sign of structural movement or moisture migration. Water travels horizontally. If your shower pan has a micro-leak, that water will travel under the tile and hit the edge of your hardwood. The wood will soak it up like a sponge. This is why the interface between different flooring types is a high-risk zone. You need to use 100 percent silicone caulk at those transitions, not grout. Silicone is flexible and waterproof. Grout is rigid and thirsty. If you use grout at a transition, it will crack within six months. The house moves. The floors move. The grout stays still until it breaks.
The 1/8 inch that ruins everything
Precision is not an option in flooring. It is the law. If your subfloor is not level, your floor will click. It will hollow-sound. It will fail. I spend more time grinding concrete and pouring self-leveling compound than I do actually laying planks. Most guys skip this. They think a thick, squishy underlayment will hide the dips. It is a lie. Too much cushion is actually worse for the floor. It allows too much vertical movement which puts extreme stress on the tongues and grooves. You want a firm, flat surface. You want a subfloor that is as level as a billiard table. If you find a dip, you fill it. If you find a hump, you grind it down. You wear your respirator and you deal with the dust now so you don’t have to deal with the lawsuits later. The chemistry of the leveling compound is also specific. You cannot just throw any patch down. You need a high-strength, fiber-reinforced polymer modified cement. It needs to bond to the substrate so it doesn’t crack and turn into sand under your feet. Every step you take on a floor is a mechanical stress test. If the subfloor is hollow, the floor will eventually lose the war.